fbpx
The Best Fun Outdoor Toys for Kids in 2024

The Best Fun Outdoor Toys for Kids in 2024

The Best Fun Outdoor Toys for Kids in 2024

best fun outdoor toys for kids guide

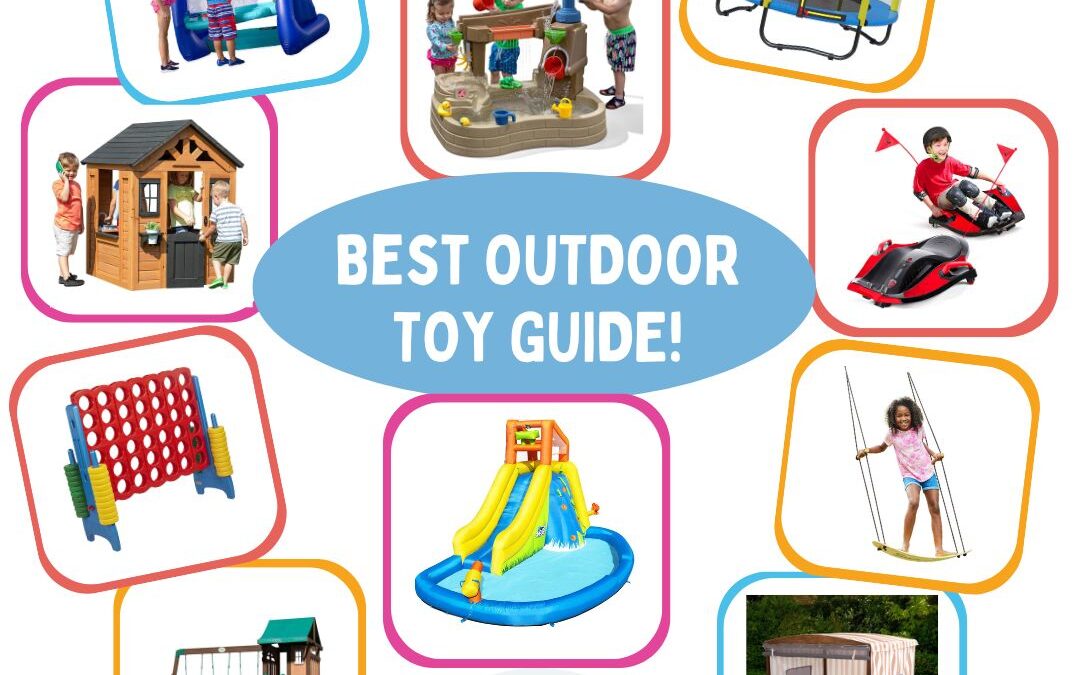
Explore fun outdoor toys for kids in 2024! From sandboxes to water toys, bikes, games, and more. Keep your kids entertained all year long!

Your Guide to Fun Outdoor Toys for Kids!

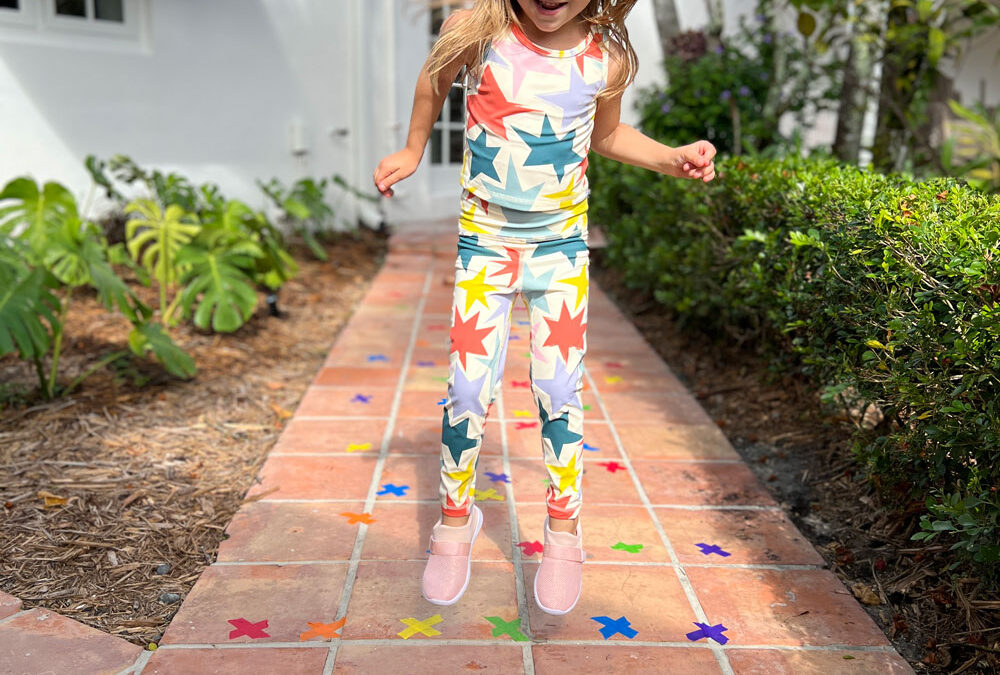
Outdoor play is not just a pastime for children; it’s an essential component of their development. The great outdoors offers a vast playground where kids can explore, learn, and grow in ways that indoor activities simply cannot replicate. From improving physical health and motor skills to fostering creativity, social skills, and resilience, the benefits of outdoor play are numerous.

Our curated list encompasses a diverse range of toys that encourage active engagement, imaginative exploration, and endless fun in the fresh air. Whether it’s splashing in water, building sandcastles, zooming around on bikes, or engaging in classic outdoor games, these toys are designed to spark joy and enrich children’s outdoor experiences.

All toys and activities should be supervised by an adult. As an Amazon Associate, I earn from qualifying purchases. This post may contain affiliate links.

For the Water and Sand Lovers!

Dive into a world of aquatic and sandy fun in this section. From building sandcastles to splashing in water, these toys promise endless summer fun for your little ones!

fun outdoor toys for kids - water toy

The Ultimate Water Play and Pump Toy!

fun outdoor toys for kids - sand box

Wooden Sandbox with Sun Coverage

fun outdoor toys for kids - sand box

Weatherproof Sandbox (for humid climates!)

sensory sand kit outdoor play

Sensory Sand Construction Kit

outdoor inflatable water slide

Inflatable Water Slide

sensory table small lightweight affordable

Lightweight Weatherproof Sensory Table

outdoor play digger

Dig / Excavator Toy Ride-On

best learning toys interactive book quiet time book

Affordable Sand, Water, and Ball Pit

Play, Move, Thrive: Top Toys for Sports and Active Outdoor Fun

Encourage an active lifestyle with our Sports and Active Play section. Whether they’re swinging a bat, shooting hoops, or zooming around on wheels, these toys will keep kids on the move and having a blast outdoors.

gross motor skills balance bike

Balance Bike

bike outdoor

Bike with Removable Training Wheels

outdoor trampoline

Trampoline

outdoor golf toy

Golf Kit

fun outdoor toys for kids - pogo stick

Pogo Stick

fun outdoor toys for kids - baseball ball and glove

Easy Catch Ball and Glove Set (Great for Beginners!)

golf kit outdoor play

Golf  Club Set and Board

gross motor skills baseball

Baseball Tee

adjustable basketball hoop and baseball

2 in 1 Basketball Hoop and Baseball Tee

outdoor soccer goal and ball kit

Soccer Goal and Ball Set

outdoor go kart

Electric Ride On with Top Speed of 6.5 MPH

outdoor play ride on

Push Buggy for Toddlers

gross motor skills scooter outdoor play

Scooter with Adjustable Seat Support

gross motor skills scooter outdoor play

Classic Scooter

outdoor play skateboard

Skateboard

outdoor play roller skating

Roller Skates

outdoor helmet

Helmet

outdoor play helmet

Helmet – This one is great for little heads!

outdoor play protective pads

Protective Pads

outdoor play protective pads

Protective Pad

Game On: Top Outdoor Games and Art for Endless Entertainment

From classic favorites to exciting new challenges, our Games section offers a variety of outdoor entertainment options for kids of all ages. Get ready for hours of laughter and friendly competition with these engaging activities and art gear.

fun outdoor toys for kids - game

Inflatable Body Bump Game!

fun outdoor toys for kids - game

Ring Toss Game

fun outdoor toys for kids - rocket launch

Dinosaur Themed Rocket Launcher

gross motor skills tunnel

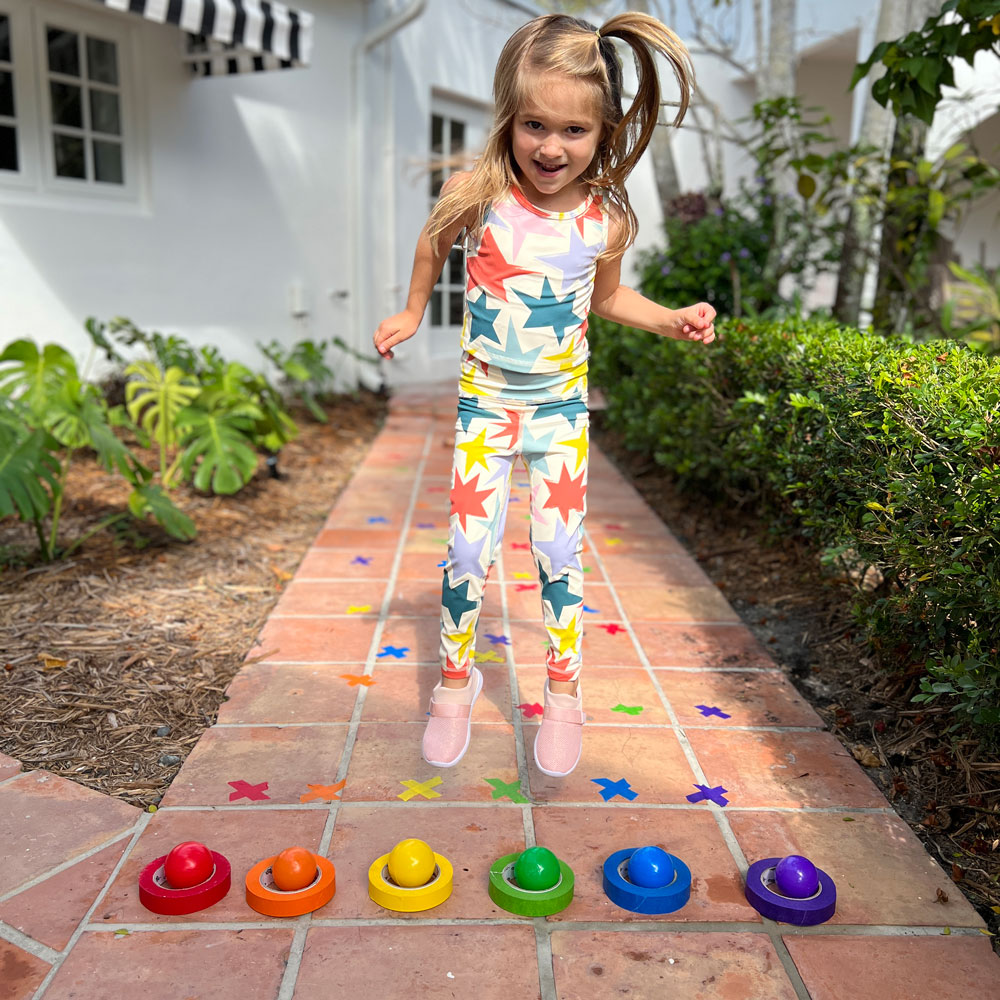
Fun Toy for Learning Numbers 1-10

art inflatable easel outdoor play

Inflatable Easel

outdoor connect 4 game

Jumbo Connect 4!

outdoor play game toss

Ladder Toss Game

plane launcher outdoor toy

Plane Launcher

bubble maker toy outdoor play

Bubble Machine!

chalk outdoor play

Create Sidewalk Chalk Art or Obstacle Courses

outdoor play game spikeball

Spikeball Game

outdoor game cornhole

Cornhole

Swing, Slide, Explore: Top Toys for Outdoor Adventure Seekers

Create a backyard oasis with our Swings and Structures section. From cozy lounging spots to imaginative play structures, these toys provide the perfect setting for outdoor adventures and imaginative play.

fun outdoor toys for kids - zip line

150 Foot Zipline

outdoor climbing toy

Geometric Dome Climber with Slide

outdoor play house

Wooden Playhouse

outdoor pretend play grill

BBQ Pretend Play 

outdoor play equipment slide swing

Wooden Swing and Slide Set

outdoor play equipment slide

6 in 1 Freestanding Toddler Slide Set

outdoor play house

Weatherproof Cottage

inflatable water slide and bounce house

Inflatable Slide and Bounce House 

outdoor climbing triangle

Triangle Rope Ladder

outdoor play lounge set for kids

Kid’s Double Chaise Lounge Chair

outdoor play rocking swing

Swinging Loveseat (Free-Standing)

outdoor play swurfer swing

Swurfer Surf and Swing

For the Nature Explorer, Garden Lover, and Camping Fan!

Dive into the wonders of the natural world with our selection of toys that inspire exploration, camping adventures, and gardening fun. Encourage curiosity, imagination, and a lifelong love for nature with these engaging outdoor toys.

fun outdoor toys for kids - camping kit

Nature Explorer Kit

gardening kit for kids outdoor play

Gardening Kit

camping kit for kids outdoor play

Camping Set

outdoor play net

Insect and Butterfly Net

nature gardening toy

Gardening Tool Kit

bird house art kit

Birdhouse Kit

stepping stone art kit

Stepping Stone Kit

scavenger hunt journal

Scavenger Hunt Journal

Empowering Outdoor Adventures: Embracing Playtime & Growth

In conclusion, the importance of outdoor play cannot be overstated in nurturing the holistic development of children. As we’ve explored the top outdoor toys for kids in 2024, it’s evident that these toys offer more than just entertainment—they provide valuable opportunities for learning, growth, and exploration. By prioritizing outdoor play and incorporating these recommended toys into their children’s routines, parents and caregivers can empower them to thrive both physically and mentally.

outdoor play quote card

Empowering Outdoor Adventures: Embracing Playtime & Growth

In conclusion, the importance of outdoor play cannot be overstated in nurturing the holistic development of children. As we’ve explored the top outdoor toys for kids in 2024, it’s evident that these toys offer more than just entertainment—they provide valuable opportunities for learning, growth, and exploration. By prioritizing outdoor play and incorporating these recommended toys into their children’s routines, parents and caregivers can empower them to thrive both physically and mentally.

What’s Next?

Gross Motor Skills for Preschoolers – Your Ultimate Guide

Gross Motor Skills for Preschoolers – Your Ultimate Guide

Gross Motor Skills for Preschoolers – Your Ultimate Guide

edible play dough

This is your ultimate guide to understanding gross motor skills for preschoolers including activity ideas, milestone timeline, and product suggestions!

Understanding Gross Motor Skills for Preschoolers: Building Blocks for Physical Development

Gross motor skills encompass the coordination of large muscle groups to perform activities like walking, running, jumping, and throwing. In the preschool years, these fundamental abilities form the cornerstone of physical development, laying the groundwork for more refined movements later in life. From navigating playground equipment to participating in group games, gross motor skills enable children to explore their surroundings, interact with peers, and build confidence in their physical abilities. In this comprehensive guide, we’ll delve into the significance of gross motor skills for preschoolers and offer a wealth of engaging activities and product recommendations to foster their growth and enjoyment.

This article may contain affiliate links. As an Amazon Associate, I earn from qualifying purchases.

Fun Activities to Develop Gross Motor Skills for Preschoolers

Engaging in playful and interactive activities is an excellent way to support your preschooler’s gross motor skill development. Here are some enjoyable activities that promote movement and coordination:

gross motor activities for preschoolers

AIM, ROLL, AND STICK!

Tape construction paper on the ground. Put another strip of tape across the papers, but sticky side up. Aim, throw/roll colorful balls at the corresponding paper. The tape will catch it, stopping the ball in its tracks! 

gross motor activities for preschoolers

HAND AND FEED COORDINATE

Get the free printable hands and feet HERE to practice coordinating hand and feet movements. Pictured above, I created a set up where you have to hop while alternating the position of your hands and feet.

gross motor activities for preschoolers

HOP AND COLOR MATCH

Just use X marks of colorful tape scattered across a small hallway. Place colorful balls at the starting point, and the tape rolls at the ending point. Task your kiddo to hop from on X mark to another while matching the ball to the corresponding colored tape roll.

gross motor activities for preschoolers

WALK IN A STRAIGHT LINE!

Use tape to make a straight line for young kids to balance themselves as they walk.  I created 6 different colored lines ending with an X mark. I tasked my kiddo to walk in a straight line and match a colorful toy to it’s corresponding X.

gross motor activities for preschoolers

OBSTACLE COURSE

Create a mini obstacle course using cushions, hula hoops, cones, and tunnels. Encourage your child to climb over, crawl under, and weave through the obstacles to enhance their balance, agility, and spatial awareness.

gross motor activities for preschoolers

HAVE A DANCE PARTY

Put on some music and have a dance party in your living room! Encourage your child to move their body freely, experimenting with different dance styles and movements. Dancing helps improve coordination, rhythm, and flexibility.

Yoga Poses - Printable for Kids

YOGA FOR KIDS

Introduce simple yoga poses tailored for children with a free printable dice game! Poses like downward dog, tree pose, and butterfly pose improve balance, strength, and flexibility while promoting mindfulness and body awareness.

    nature scavenger hunt

    NATURE SCAVENGER HUNT

    Take a nature walk with your child and create a scavenger hunt list of items to find such as leaves, rocks, flowers, or sticks. Encourage your child to walk, run, climb, and reach to collect the items, promoting balance, coordination, and spatial awareness. Combine it with a fun art project like this!

    Key Gross Motor Milestones

    Gross motor skills are essential for preschoolers as they navigate the world around them. It’s important to remember that every child develops at their own pace, and these milestones are just general guidelines:

    (1) Walking Independently: Most children begin walking between 12 and 18 months. Initially, they may be unsteady on their feet but gradually gain confidence and stability.

    (2) Running and Jumping: Around the age of 2, children start to run with more coordination and may attempt to jump off low surfaces. By age 3, they can typically jump forward and possibly even hop on one foot briefly.

    (3) Climbing: Climbing skills improve throughout the preschool yers. Kids may start by climbing stairs with support and progress to climbing playground structures and trees.

    (4) Balancing: By age 4, children can often balance on one foot for a few seconds and walk in a straight line heel-to-toe, demonstrating improved balance and coordination

    (5) Throwing and Catching: Around age 4 or 5, children develop the ability to throw a ball overhand with some accuracy and may begin to experiment with catching objects.

    (6) Skipping: By age 5 or 6, children may start to experiment with skipping and galloping, demonstrating more advanced coordination and rhythm.

    (7) Pedaling and Bike Riding: Pedaling a tricycle typically becomes achievable around age 3 or 4, signaling improved leg strength and coordination. While some children may learn to ride a bike as early as age 3 with practice, mastering this skill often occurs later in childhood, around ages 5 to 7.


    Gear Up for Gross Motor Skills for Preschoolers: Product Recommendations

    Investing in the right toys, equipment, and tools can greatly enhance your preschooler’s gross motor skill development. Here’s a selection of products tailored to various budgets and space requirements.

    gross motor skills balance bike

    Balance Bike

    gross motor skills trampoline

    Indoor Mini Trampoline

    gross motor skills modular furniture

    Modular Play Furniture

    gross motor skills scooter

    Scooter

    gross motor skills baseball

    Baseball Tee

    gross motor skills basketball

    Basketball Hoop

    ice cream maker toy ball how to use it

    Ice Cream Maker Ball

    gross motor skills water play

    Water Play

    gross motor skills stepping stone and beam

    Balance Beam and Stepping Stones

    gross motor skills soccer

    Soccer Ball and Goal

    gross motor skills tunnel

    Tunnels

    gross motor skills jump rope

    Jump Rope

    edible play dough

    Conclusion: Fostering Gross Motor Skill Development in Preschoolers

    Encouraging the development of gross motor skills in preschoolers is vital for their overall physical, cognitive, and social growth. Through a combination of engaging activities, appropriate equipment, and supportive environments, parents can provide valuable opportunities for their children to explore and strengthen these essential skills. Whether it’s jumping, climbing, balancing, or pedaling, each activity offers unique benefits, from enhancing muscle strength and coordination to promoting creativity and social interaction.

    Incorporating gross motor activities into daily routines, such as including them in chores, errands, and outings, seamlessly integrates physical development into everyday life, further reinforcing these skills. While challenges or delays in gross motor skill development may arise, it’s important for parents to stay vigilant and seek professional assessment or intervention if concerns persist. By fostering a nurturing environment that prioritizes physical activity and exploration, parents can empower their preschoolers to thrive and reach their full potential in all areas of development.

    What’s Next?

    Ice Cream Maker Toy Ball – How to Use and Recipes

    Ice Cream Maker Toy Ball – How to Use and Recipes

    Ice Cream Maker Toy Ball – How to Use and Recipes

    ice cream maker toy ball how to use it

    This ice cream maker toy ball isn’t just a delicious treat; it’s a gateway to getting kids off screens so that they are more active, moving, having fun, and learning about the science behind making ice cream!

    Where Can You Get This Ice Cream Maker Toy Ball?

    You can get the exact ball we used HERE. It comes with a recipe book as well. This ball will make one pint of ice cream. They also have THIS set available that includes both the ice cream ball and the special rock salt used for making ice cream.  

    No electricity is needed to make ice cream in this toy ball! All the energy your kiddos have can be put towards playing with this ball and they’ll soon find out how easy it is to make ice cream!

    All activities should be supervised by an adult. As an Amazon Associate I earn from qualifying purchases. This post may contain affiliate links.

    Gross Motor, Science

    Ages: 
    Prep Time:

    Watch to See How To Make Ice Cream in a Ball!

    Using this ice cream mixer toy ball is as simple as add in your ingredients, playing, and enjoying homemade ice cream!

    Start by adding your favorite ice cream ingredients into one compartment of the ball, ensuring to seal it tightly. In the other compartment, fill it with rock salt and ice, again making sure it’s securely closed.

    Now, the fun begins! Roll, shake, and toss the ball around for about 20 minutes – whether it’s in the backyard, at the park, or even indoors.

    As the ball moves, the ingredients inside churn and freeze, transforming into delicious homemade ice cream.

    Once the time’s up, open up the compartments, scoop out your creamy creation, and enjoy in the fruits of your labor. It’s such an interactive and hands-on experience resulting in something delicious!

    ice cream maker toy ball how to use it

    Tips for Using This Ice Cream Ball

    Firstly, ensure all compartments are tightly sealed before you start rolling to prevent any leaks or spills. For optimal freezing, use a combination of ice cubes and rock salt in the designated compartment. Our ice stayed frozen during the 20 minutes of play, but if it melts before your ice cream freezes replenish as needed throughout the process.

    Make sure you explain the science behind creating the ice cream! Inside the ball, there’s ice and salt, which make it super cold. Normally, ice melts and turns into water when it gets warm. But when we mix salt with ice, something cool happens – the salt lowers the temperature of the ice. When we roll the ball around, the cold makes the ice cream mix freeze. That’s because the cold stops the ice cream from melting, and it gets all thick and yummy! Rolling it around helps mix everything up just right, so we get delicious ice cream every time we play!


    Materials

    • 1 Pint Cream
    • 1/2 Cup Sugar
    • 1 1/2 Teaspoon Vanilla Extract

    Step-by-Step Instructions 

    .Step 1

    Open the side of the ball with the white handle and pour in the cream, sugar, and vanilla extract. Then seal it tightly.

    Step 2

    Open the other side (neon yellow handle) and fill it up with ice with about a cup of rock salt.


    Step 3

    Play with the ball for 20 minutes (keep reading for suggestions on games you can play!)

    Step 4

    After 20 minutes of vigorous play, your ice cream should be well formed! I suggest eating it right away!

    .Step 1

    Open the side of the ball with the white handle and pour in the cream, sugar, and vanilla extract. Then seal it tightly.

    Step 2

    Open the other side (neon yellow handle) and fill it up with ice with about a cup of rock salt.

    Step 3

    Play with the ball for 20 minutes (keep reading for suggestions on games you can play!)

    Step 4

    After 20 minutes of vigorous play, your ice cream should be well formed! I suggest eating it right away!

    Gross Motor Games to Play While Using Your Ice Cream Maker Toy Ball

    There are lots of fun ways you can play with the ball, but keep in mind that the ball will be heavy, similar to a medicine ball. Here are a few games you can try:

    Rolling Relay Races: Divide kids into teams and set up relay races where they must roll the ice cream ball to a designated spot and back. This not only gets them moving but also adds an element of friendly competition.

    Ice Cream Ball Bowling: Set up empty plastic bottles or pins and take turns rolling the ice cream ball to knock them down, similar to bowling. Adjust the distance based on the age and skill level of the participants for added challenge.

    ice cream maker toy ball how to use it

    Hot Potato Ice Cream: Have kids stand in a circle and pass the ice cream ball around while music plays. When the music stops, whoever is holding the ball performs a fun action or answers a question before passing it on.

    ice cream maker toy ball how to use it

    Gross Motor Games to Play While Using Your Ice Cream Maker Toy Ball

    There are lots of fun ways you can play with the ball, but keep in mind that the ball will be heavy, similar to a medicine ball. Here are a few games you can try:

    Rolling Relay Races: Divide kids into teams and set up relay races where they must roll the ice cream ball to a designated spot and back. This not only gets them moving but also adds an element of friendly competition.

    Ice Cream Ball Bowling: Set up empty plastic bottles or pins and take turns rolling the ice cream ball to knock them down, similar to bowling. Adjust the distance based on the age and skill level of the participants for added challenge.

    Hot Potato Ice Cream: Have kids stand in a circle and pass the ice cream ball around while music plays. When the music stops, whoever is holding the ball performs a fun action or answers a question before passing it on.


    More Frozen Treats You Can Make a Home!

    Here are my top picks for frozen treat gadgets to make more yummy things at home!

    individual portion homemade ice cream cups dash

    Homemade Ice Cream in a Mug!

    slushy maker slushie

    DIY Slushy Maker – Just Squeeze!

    yonanas frozen treat with fruit ice cream

    Turn Frozen Fruit into Ice Cream!

    homemade popsicle molds

    Make Your Own Popsicles!

    What’s Next?

    Sensory Bags for Babies – Helpful Tummy Time Distractions

    Sensory Bags for Babies – Helpful Tummy Time Distractions

    Sensory Bags for Babies – Helpful Tummy Time Distractions!

    These sensory bags for babies are so easy to make and are such a great distraction during tummy time. Here are 4 ways you can make them!

    These sensory bags for babies are so easy to make and are such a great tool to use during tummy time. Here are 4 ways you can make them! 

    Benefits of Sensory Bags for Babies

    Even babies can enjoy sensory play! Not only are these sensory bags for babies a fun distraction during that critical tummy time, but sensory play in general, is so beneficial for baby! This type of sensory play can help build neural connections in the brain as those young hands explore new textures, colors, and sounds.

    They will also strengthen hand-eye coordination, and generally, are great for baby’s rapidly developing vision.

    Tummy time will be a success as they will be so curious to see and try to feel what’s inside the bags!

    All activities should be supervised by an adult. As an Amazon Associate I earn from qualifying purchases. This post may contain affiliate links.


    Skills:
    Ages: 
    Prep Time:

    Watch How to Make Sensory Bags for Babies

    In this quick video, you’ll see how easy it is to make sensory bags for babies.

    The 4 bags I created were all based on items I had in my home, which included a bag filled up with cheap hair gel and googly eyes, one filled with water beads, another one filled with oil, water, and food coloring; and finally, one filled up with leftover wrappers that made a crinkly sound! 

    For more baby activities, visit our comprehensive list of ideas.

    These sensory bags for babies are so easy to make and are such a great distraction during tummy time. Here are 4 ways you can make them!

    Tips for Setting Up This Activity

    Use What You’ve Got! As mentioned above, these sensory bags for babies were made of items I found around the house (including granola bar wrapper trash!). They do not need to be fancy, so feel free to adapt them based on what is available! Water, oil, shaving cream, water beads, hair gel, rainbow rice, paint – anything that makes a great sensory base will work well in a sensory bag!

    Seal and Secure with Tape. For using sensory bags during tummy time, you’ll not only want to tape the plastic bags to the floor, but you’ll also want to first seal the zipper edge of the plastic bag with tape to prevent any spillage! Use an easy to remove masking tape for the floor, and something more strong like gorilla tape for sealing bags shut.

    Make the Bag Label-Free. Both acetone, aka nail polish remover, and rubbing alcohol will remove the white label found on most plastic bags!

    Materials

    Step-by-Step Instructions 

    Step 1

    Remove the label on plastic bags using nail polish remover.

    Step 2

    Fill up your sensory bags with different sensory materials including water beads or crinkly leftover granola wrappers! You can also fill one up with oil, water and food coloring. Or you could fill one up with cheap hair gel and something like googly eyes!


    Step 3

    Seal the bags shut with strong tape. This is especially important when using liquids. Plastic bag’s built in zipper are not fool proof and are prone to breaking, so this will help prevent a clean up headache!

    Step 4

    Tape the sensory bags to the ground so that baby can enjoy looking at them and touching them during tummy time without the bags sliding around!

    Step 1

    Remove the label on plastic bags using nail polish remover.

    Step 2

    Fill up your sensory bags with different sensory materials including water beads or crinkly leftover granola wrappers! You can also fill one up with oil, water and food coloring. Or you could fill one up with cheap hair gel and something like googly eyes!

    Step 3

    Seal the bags shut with strong tape. This is especially important when using liquids. Plastic bag’s built in zipper are not fool proof and are prone to breaking, so this will help prevent a clean up headache!

    Step 4

    Tape the sensory bags to the ground so that baby can enjoy looking at them and touching them during tummy time without the bags sliding around!

    Get FREE Printable Black and White Patterns for Babies

    Need more fun things to do with baby? This free printable set of black and white cards for babies includes 12 different high contrast images. Plus, tape them together to make them stand up on their own – perfect for tummy time!

    Make sure that you are allowing your baby to view them at a close distance. Remember, everything gets very blurry after 12-15 inches away from them! 

    And for even more printable activities, visit our Printable Shop. It is filled with easy to set-up activities that help strengthen early childhood education skills!

    These sensory bags for babies are so easy to make and are such a great distraction during tummy time. Here are 4 ways you can make them!
    These sensory bags for babies are so easy to make and are such a great distraction during tummy time. Here are 4 ways you can make them!

    Get FREE Printable Black and White Patterns for Babies

    Need more fun things to do with baby? This free printable set of black and white cards for babies includes 12 different high contrast images. Plus, tape them together to make them stand up on their own – perfect for tummy time!

    Make sure that you are allowing your baby to view them at a close distance. Remember, everything gets very blurry after 12-15 inches away from them! 

    And for even more printable activities, visit our Printable Shop. It is filled with easy to set-up activities that help strengthen early childhood education skills!

    Top Baby Toy Picks

    Here are a few of our top picks for toys that are great for baby development!

    black and white baby activities

    Play Gym

    This item is the ultimate play gym for babies with multi-sensory areas, 3 rattles, and lots of black and white cards!

    black and white baby activities

    Crinkle Activity Book

    This black and white activity book includes a mirror as well as black and white images that prop up easily.

    sensory play for babies

    Tummy Time Splash-Free Mat

    This mess-free aquatic themed water mat is great for tummy time and strengthening baby’s neck and shoulders! 

    baby toy ball

    Baby’s 1st Ball

    This easy to grasp ball is perfect for young babies just learning how to hold objects and later transfer them from hand to hand.

    What’s Next?

    DIY Baby Toy – How to Make Sensory Wrist Bands

    DIY Baby Toy – How to Make Sensory Wrist Bands

    DIY Baby Toy – How to Make Sensory Wrist Rattles

    diy baby toy how to make black and white wrist rattles

    This DIY baby toy is so easy to make! Babies will enjoy exploring the high contrast colors and jingly sounds of these homemade rattles that can be placed on their wrists or feet! 

    Benefits of this DIY Baby Toy

    Around 2 months, babies begin to discover their hands. This DIY baby toy is a great way for babies to continue to explore those hands and develop their strength through sound and high contrast colors! With bells enclosed inside the felt band, they can hear rattling. Plus, the high contrast colors of the white band with the black jumbo pom poms is great for vision development in babies.

    The wrist bands attach with velcro making them easy to put on and off by adults, but not easy for babies to take off! So they perfect for bringing on-the-go because they are secure and won’t be easily lost!

    All activities should be supervised by an adult. As an Amazon Associate I earn from qualifying purchases. This post may contain affiliate links.


    Skills:
    Ages: 
    Prep Time:

    Watch How to Make This DIY Baby Toy

    In this quick video, you’ll see how easy this DIY baby toy is to make!

    We attached them to the wrist, but you could make them for the feet too! I used high contrast colors because they are great for younger babies, but you could also use other more vibrant colors especially for older babies whose vision is more developed.

    For more baby activities, visit our comprehensive list of ideas

    diy baby toy how to make black and white wrist rattles

    Tips for Setting Up This Activity

    Extra Large Pom Poms. As babies develop their hand control, they usually bring them straight to their mouths. This is why using extra large pom poms, 1.75 inches and larger, is important to avoid any concerns for choking hazards.

    Parts Need to Be Secured. The bells inside the velcro straps need to be firmly secured as they are small parts and it would be very dangerous if they were to get loose. Therefore, strong glue must be used or, alternatively, the pieces can be sewed together. Either way, supervision is required at all times.

    Wake Windows. A wake window is that short time in between feeding and sleeping (or being changed!). Between 0-12 weeks wake windows can be between 60-75 minutes and up to 2 hours by 4 months. During this time, babies will benefit greatly from activities like this that not only stimulate their bodies, but their brains too. Be sure to grab these moments during the wake windows or else baby may get tired and cranky and may not want to play!

    Materials

    Step-by-Step Instructions 

    Step 1

    Firmly secure bells onto a strip of felt.

    Step 2

    Glue another strip of felt on top to enclose the bells.


    Step 3

    Glue extra large pom poms onto the felt band.

    Step 4

    Use velcro stickers on the ends so that the band can open and close around baby’s wrist.

    Step 1

    Firmly secure bells onto a strip of felt.

    Step 2

    Glue another strip of felt on top to enclose the bells.

    Step 3

    Glue extra large pom poms onto the felt band.

    Step 4

    Use velcro stickers on the ends so that the band can open and close around baby’s wrist.

    Get FREE Printable Black and White Patterns for Babies

    Need more fun things to do with baby? This free printable set of black and white cards for babies includes 12 different high contrast images. Plus, tape them together to make them stand up on their own – perfect for tummy time!

    Make sure that you are allowing your baby to view them at a close distance. Remember, everything gets very blurry after 12-15 inches away from them! 

    And for even more printable activities, visit our Printable Shop. It is filled with easy to set-up activities that help strengthen early childhood education skills!

    black and white high contrast stimulation cards for babies newborns free printable
    black and white high contrast stimulation cards for babies newborns free printable

    Get FREE Printable Black and White Patterns for Babies

    Need more fun things to do with baby? This free printable set of black and white cards for babies includes 12 different high contrast images. Plus, tape them together to make them stand up on their own – perfect for tummy time!

    Make sure that you are allowing your baby to view them at a close distance. Remember, everything gets very blurry after 12-15 inches away from them! 

    And for even more printable activities, visit our Printable Shop. It is filled with easy to set-up activities that help strengthen early childhood education skills!

    More High Contrast Activities

    Here are my top picks for more ways babies can play with black and white!

    black and white baby activities

    Play Gym

    This item is the ultimate play gym for babies with multi-sensory areas, 3 rattles, and lots of black and white cards!

    black and white baby activities

    Crinkle Activity Book

    This black and white activity book includes a mirror as well as black and white images that prop up easily.

    black and white baby activities

    Take Along Mobile

    This mobile has black and white colors, calming music, and an adjustable arm that can fit many different environments.

    black and white baby activities

    Rattles

    This set of plush rattles have an animal design, black and white patterns, crinkly paper, and other sounds that are perfect for babies.

    What’s Next?

    Baby Activity at 3 months – Fun with Balloons

    Baby Activity at 3 months – Fun with Balloons

    Baby Activity at 3 Months – Fun with Balloons

    baby activity at 3 months balloon kicking

    Tying balloons to the hands and feet is a great baby activity at 3 months. Keep on reading to find out all the benefits of this activity for babies!

    Benefits of This Balloon Activity for Babies

    During the first three months of a babies life, they sleep quite often, but there are some precious wake windows where babies can start to have fun and begin to strengthen important skills!

    This is a great baby activity at 3 months because it’s an important time for babies to improve their visual tracking skills, and stay on the back before they begin rolling over from stomach to back.

    It’s also a great way to keep baby busy, engaged, and strengthening gross motor skills with every kick and punch! As each arm and leg raise and move the balloons around, babies will also be developing an understanding of cause and effect!


    Skills:
    Ages: 
    Prep Time:

    How to Set Up This Baby Activity at 3 Months

    This activity is as easy as grabbing some balloons, using helium to blow them up, and tying 2-4 of them with string to baby’s hands and feet.

    In this video you’ll see how my 3 month old enjoyed kicking, moving her arms, and tracking the balloons as they moved up, down, and side to side.

    For more baby activities, visit our comprehensive list of ideas

    All activities should be supervised by an adult. As an Amazon Associate I earn from qualifying purchases. This post may contain affiliate links.

    baby activity at 3 months balloon kicking

    Tips for Setting Up This Activity

    Ballon Type. While you can use any color balloon, the younger the baby, the more useful black and white balloons are due to their ability to see high contrast images better. Also be sure to grab some helium to keep the balloons up high!

    Wake Windows. A wake window is that short time in between feeding and sleeping (or being changed!). Between 0-12 weeks wake windows can be between 60-75 minutes and up to 2 hours by 4 months. During this time, babies will benefit greatly from activities like this that not only stimulate their bodies, but their brains too. Be sure to grab these moments during the wake windows or else baby may get tired and cranky and may not want to play!

    Supervision. It goes without saying that supervision is key! This is not an activity for babies to be left alone doing. Once you finish playing, safely dispose of the strings and balloons in the trash.

    Get FREE Printable Black and White Patterns for Babies

    Need more fun things to do with baby? This free printable set of black and white cards for babies includes 12 different high contrast images. Plus, tape them together to make them stand up on their own – perfect for tummy time!

    Make sure that you are allowing your baby to view them at a close distance. Remember, everything gets very blurry after 12-15 inches away from them! 

    And for even more printable activities, visit our Printable Shop. It is filled with easy to set-up activities that help strengthen early childhood education skills!

    black and white high contrast stimulation cards for babies newborns free printable
    black and white high contrast stimulation cards for babies newborns free printable

    Get FREE Printable Black and White Patterns for Babies

    Need more fun things to do with baby? This free printable set of black and white cards for babies includes 12 different high contrast images. Plus, tape them together to make them stand up on their own – perfect for tummy time!

    Make sure that you are allowing your baby to view them at a close distance. Remember, everything gets very blurry after 12-15 inches away from them! 

    And for even more printable activities, visit our Printable Shop. It is filled with easy to set-up activities that help strengthen early childhood education skills!

    More High Contrast Activities

    Here are my top picks for more ways babies can play with black and white!

    black and white baby activities

    Play Gym

    This item is the ultimate play gym for babies with multi-sensory areas, 3 rattles, and lots of black and white cards!

    black and white baby activities

    Crinkle Activity Book

    This black and white activity book includes a mirror as well as black and white images that prop up easily.

    black and white baby activities

    Take Along Mobile

    This mobile has black and white colors, calming music, and an adjustable arm that can fit many different environments.

    black and white baby activities

    Rattles

    This set of plush rattles have an animal design, black and white patterns, crinkly paper, and other sounds that are perfect for babies.

    What’s Next?

    Tummy Time Positions for Newborns and Babies

    Tummy Time Positions for Newborns and Babies

    Tummy Time Positions for Newborns and Babies

    tummy time positions for newborns and babies

    There isn’t just one way to do tummy time! Keep reading to find out about different tummy time positions for newborns and babies! 

    Why is Tummy Time Important?

    As you have probably heard tummy time is so important for newborns and babies! It strengthens babies neck and shoulder muscles and is, overall, fantastic for their motor skills.

    Because babies sleep so much during the day, and the recommended position for sleep is on the back, the time they have to be on their tummies is limited. It’s important to take advantage of placing baby on their stomachs during wakeful moments so they can work on these important skills!

    However, tummy time is not limited to being on the floor. You can also explore doing the football hold, tummy to tummy, and tummy to lap positions!

    By 2 months, it’s recommended to do tummy time for 15 minutes a day, in 5 minute increments. However, I have found that I don’t need to count the minutes if I rotate all the different ways of doing tummy time throughout the day.

    Skills:
    Ages: 
    Prep Time:

    3 Alternative Tummy Time Positions for Newborns and Babies

    In this quick video you’ll see the 3 alternative tummy time positions for newborns and babies that aren’t on the floor: the football hold, tummy to tummy, and tummy to lap.

    All activities should be supervised by an adult. As an Amazon Associate I earn from qualifying purchases. This post may contain affiliate links.

    black and white high contrast stimulation cards for babies newborns free printable

    Get the FREE Printable Black and White Patterns for Babies

    This free printable set of black and white cards for babies are a great way to keep babies alert and interested during tummy time. The set includes 12 different high contrast images. Plus, tape them together to make them stand up on their own.

    Make sure that you are allowing your baby to view them at a close distance. Remember, everything gets very blurry after 12-15 inches away from them! 

    And for even more printable activities, visit our Printable Shop. It is filled with easy to set-up activities that help strengthen early childhood education skills!

    Other Benefits of Tummy Time Positions for Newborns and Babies

     In addition to strengthening neck and shoulder muscles, tummy time gets babies on track for developing other motor skills including rolling over, sitting up, crawling, and ultimately walking.

    Another benefit of placing babies on their tummy during wakeful periods is that it can help them avoid developing flat spots on the back of their head!

    For more activities for babies visit our comprehensive list!  

    black and white high contrast stimulation cards for babies newborns free printable
    black and white high contrast stimulation cards for babies newborns free printable

    Other Benefits of Tummy Time Positions for Newborns and Babies

     In addition to strengthening neck and shoulder muscles, tummy time gets babies on track for developing other motor skills including rolling over, sitting up, crawling, and ultimately walking.

    Another benefit of placing babies on their tummy during wakeful periods is that it can help them avoid developing flat spots on the back of their head!

    For more activities for babies visit our comprehensive list!  

    More Activities for Newborn and Young Babies

    Here are my top picks for more ways babies can play!

    black and white baby activities

    Play Gym

    This item is the ultimate play gym for babies with multi-sensory areas, 3 rattles, and lots of black and white cards!

    black and white baby activities

    Crinkle Activity Book

    This black and white activity book includes a mirror as well as black and white images that prop up easily.

    black and white baby activities

    Take Along Mobile

    This mobile has black and white colors, calming music, and an adjustable arm that can fit many different environments.

    black and white baby activities

    Rattles

    This set of plush rattles have an animal design, black and white patterns, crinkly paper, and other sounds that are perfect for babies.

    What’s Next?

    Black and White Patterns for Babies – Printable Cards

    Black and White Patterns for Babies – Printable Cards

    Black and White Patterns for Babies – Printable Cards

    black and white high contrast stimulation cards for babies newborns free printable

    There are a ton of benefits to providing black and white patterns for babies. Keep on reading to find out what they are and to get your printable set of 12 dozen cards here. 

    Why Black and White Patterns for Babies Are Important!

    Did you know that for the first months of a baby’s life their vision is super blurry! In fact, they can only see about 12 inches in front of them. Plus it isn’t until around 3 months when they can start to see colors. Before that, all they can see is black, white, and grays.

    But during the time between birth and 6 months, a baby’s eyesight is developing at super speed! And allowing for your baby to look at black and white, high contrast images and toys provides them a great opportunity to stimulate their vision, strengthen optic nerves, and help their brains and eyes to coordinate.

    Skills:
    Ages: 
    Prep Time:

    How to Use the Printable Black and White Patterns for Babies

    This activity can be set up in no time! Since it is a printable, all you have to do is grab the printable from the link below, print it, and tape it together to have it stand alone (if you so choose!). In the video, you will see that I also laminated the cards before taping them to make them more durable and long lasting.

    My baby at one and a half months old was mesmerized by the patterns and enjoyed looking at them during tummy time, when her diaper was changed, and in the car!

    black and white high contrast stimulation cards for babies newborns free printable

    Get the Printable Black and White Patterns for Babies

    This printable set of black and white cards for babies includes 12 different high contrast images. Plus, tape them together to make them stand up on their own.

    Make sure that you are allowing your baby to view them at a close distance. Remember, everything gets very blurry after 12-15 inches away from them! 

    And for even more printable activities, visit our Printable Shop. It is filled with easy to set-up activities that help strengthen early childhood education skills!

    All activities should be supervised by an adult. As an Amazon Associate I earn from qualifying purchases. This post may contain affiliate links.

    Where to Use the Black and White Cards

    There are so many great opportunities to use these black and white cards, here are just a few ideas! 

    Tummy Time. These cards definitely help to hold and lengthen attention span during tummy time!

    Diaper Changing. Prop some up on the side of your table to make diaper changing a little easier!

    Car Seat. Safely tape some images to the seat in front of the baby to give them some car ride entertainment!

    black and white high contrast stimulation cards for babies newborns free printable
    black and white high contrast stimulation cards for babies newborns free printable

    Where to Use the Black and White Cards

    There are so many great opportunities to use these black and white cards, here are just a few ideas! 

    Tummy Time. These cards definitely help to hold and lengthen attention span during tummy time!

    Diaper Changing. Prop some up on the side of your table to make diaper changing a little easier!

    Car Seat. Safely tape some images to the seat in front of the baby to give them some car ride entertainment!

    More High Contrast Activities

    Here are my top picks for more ways babies can play with black and white!

    black and white baby activities

    Play Gym

    This item is the ultimate play gym for babies with multi-sensory areas, 3 rattles, and lots of black and white cards!

    black and white baby activities

    Crinkle Activity Book

    This black and white activity book includes a mirror as well as black and white images that prop up easily.

    black and white baby activities

    Take Along Mobile

    This mobile has black and white colors, calming music, and an adjustable arm that can fit many different environments.

    black and white baby activities

    Rattles

    This set of plush rattles have an animal design, black and white patterns, crinkly paper, and other sounds that are perfect for babies.

    What’s Next?

    Color Mixing Activity – The Color Path

    Color Mixing Activity – The Color Path

    Color Mixing Activity – The Colorful Path

    color mixing activity sensory path

    This color mixing activity is a fun way to get kids on their feet! This is where gross motor, sensory play, and science collide to discover how primary colors mix to form secondary colors!

    Even the littlest of kids can enjoy this one! Using plastic bags to mix the paint is low prep and keeps things mess free!

    Plus, Once your kiddo stamps on the bags to create a secondary color, you can use that paint for an art project!

    Read on to see how simple this is to set up and what materials I used, including paint and tape!

    All activities should be supervised by an adult. As an Amazon Associate I earn from qualifying purchases. This post may contain affiliate links.


    Skills:
    Ages: 
    Prep Time:

    Watch the Video to See the Color Mixing Activity in Action

    Back and forth, back and forth! My kids enjoyed running on top of the colorful bags, mixing them with their feet as well as getting on the floor and mixing them with their hands!

    They made guesses of what colors were going to form, and enjoyed the mess-free sensory experience!

    color mixing activity for kids sensory path

    How to Make Your Own Gross Motor Color Mixing Activity for Kids

    Making this color mixing activity requires the simplest of materials! Everything we used, you likely already have in your home!

    If you’ve been following along on our play journey, you know we constantly save and use cardboard! So naturally, this is what we used as the foundation of our sensory path!

    In addition, I will break down everything that we used to keep this color mixing activity vibrant, yet mess-free!

    Materials

    Step-by-Step Instructions 

    Step 1

    Use an alcohol swab to remove the white label on top of the plastic bag. This is optional, but it allows you to see into the bag more clearly!

    Step 2

    Fill plastic bags up with paint, each with 2 colors that will form a secondary color. Blue and yellow to form green. Yellow and red to form orange. And blue and red to form purple.

    Step 3

    Tape the bags over the zipper portion to give extra security in case of the bag opening. 


    Step 4

    Tape the bags onto the floor, or first on to cardboard (like we did!) as an extra security in case a bag ruptures.

    Step 5

    Task children with mixing up the paint using their feet. Walking back and forth until the colors combine. Make guesses, and enjoy discovering the results!

    Step 1

    Use an alcohol swab to remove the white label on top of the plastic bag. This is optional, but it allows you to see into the bag more clearly!

    Step 2

    Fill plastic bags up with paint, each with 2 colors that will form a secondary color. Blue and yellow to form green. Yellow and red to form orange. And blue and red to form purple.

    Step 3

    Tape the bags over the zipper portion to give extra security in case of the bag opening. 

    Step 4

    Tape the bags onto the floor, or first on to cardboard (like we did!) as an extra security in case a bag ruptures.

    Step 5

    Task children with mixing up the paint using their feet. Walking back and forth until the colors combine. Make guesses, and enjoy discovering the results!


    color mixing activity printable worksheet for kids

    Color Mixing Activity Printable

    We created a super fun printable that explores color mixing. The set includes 5 hands on activities all about colors and color mixing!

    Enjoy coloring and distinguishing each of the colors in the rainbow! Then, learn all about what happens when primary colors mix to form secondary colors. Next, learn about shades (making colors darker) and tints (making colors lighter). And finally, go over all those concepts in a final round up review!

    For this printable color mixing activity set plus many other printables visit our Printable Shop

    Educational Benefits of Color Mixing

    There are so many benefits a child can gain through color mixing activities, especially gross motor ones like this!

    They will experience the concept of cause and effect. When they cause the two primary colors mix, they will see the effects visually in the new color they created!

    This activity is also a great way for even the youngest of kids to learn color recognition. Not only will they be able to distinguish primary colors from secondary colors, but will enjoy the process of creating them!

    This is also a great opportunity for language development. Asking questions, making predictions, and discussing the names of the different colors is key!


    color mixing activity for toddlers sensory path

    Last but not least there are both gross motor and fine motor skills being experienced in this color mixing activity. My having children walk over the color path, they are exercising their gross motor skills. Then, they can sit down on the ground and use their hands to mix the colors, exercising their fine motor skills too! 

    Educational Benefits of Sensory Play

    There are so many benefits a child can gain through color mixing activities, especially gross motor ones like this!

    They will experience the concept of cause and effect. When they cause the two primary colors mix, they will see the effects visually in the new color they created!

    This activity is also a great way for even the youngest of kids to learn color recognition. Not only will they be able to distinguish primary colors from secondary colors, but will enjoy the process of creating them!

    This is also a great opportunity for language development. Asking questions, making predictions, and discussing the names of the different colors is key!

    Last but not least there are both gross motor and fine motor skills being experienced in this color mixing activity. My having children walk over the color path, they are exercising their gross motor skills. Then, they can sit down on the ground and use their hands to mix the colors, exercising their fine motor skills too! 


    Store-Bought Color Mixing Activities

    Here are my top picks for toys you can buy that are all about color mixing!

    Color Mixing Glasses

    Layer colored lenses in the plastic glasses to see different shades of colors all around you!

    Splash of Color Kit

    This great kit includes a mini mixing tray, color mixing tablets, and pipettes for creating an amazing splash of colors!

    Watercolor Set

    This set includes paint, brushes, and paper. Watercolors are a classic way to watch colors mix and create new shades.

    Steve Spangler Science Color Fizzers

    This set of 100 tablets comes in primary colors. You can mix the colored water to create different colors.

    What’s Next?

    error: Content is protected !!

    Pin It on Pinterest

    Skip to content