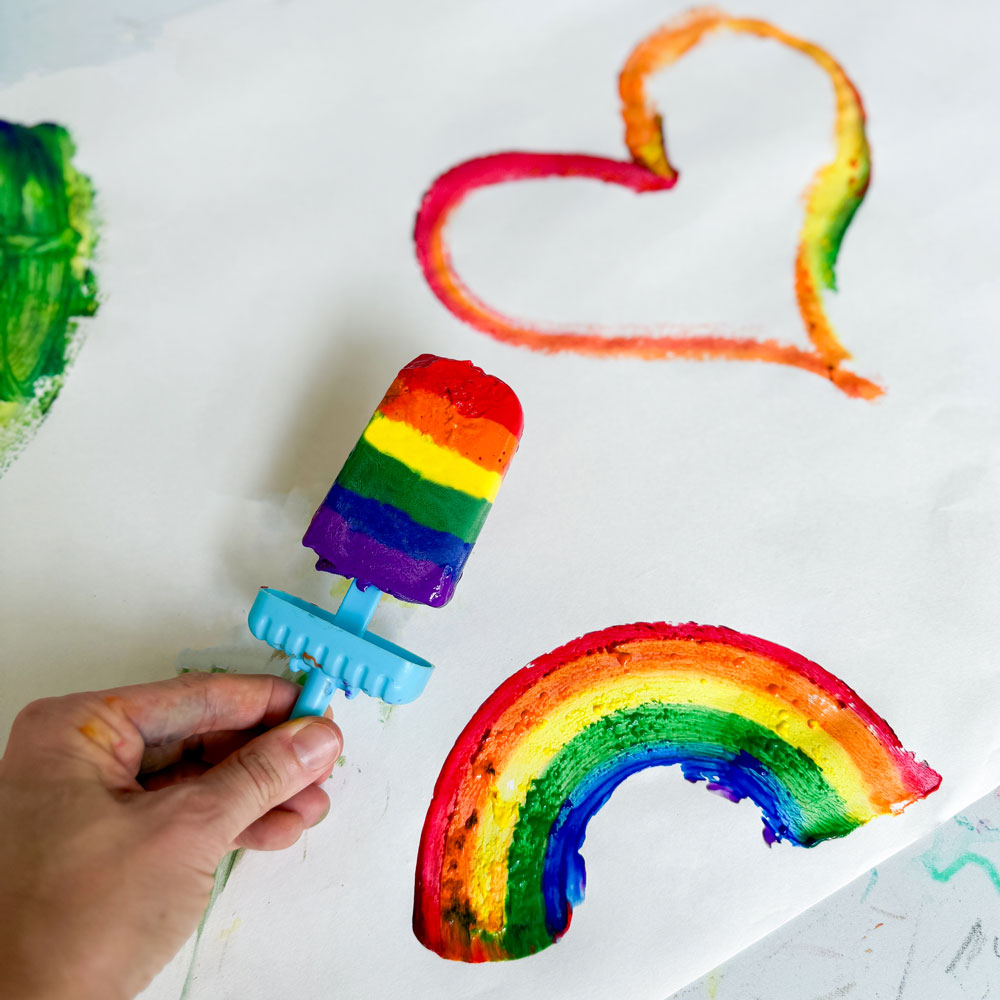
Experience the fun of popsicle paint! Chill out and create icy masterpieces. Learn how to make your own frozen art!
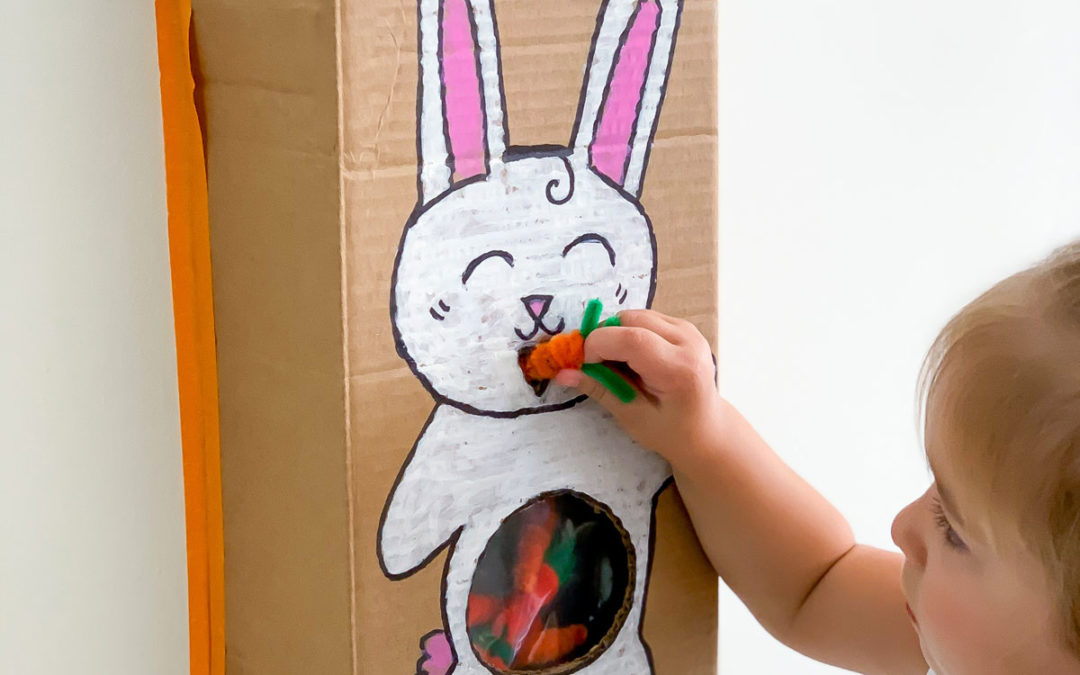
Hand-Eye Coordination Game – Hatch the Egg
Hand-Eye Coordination Game – Hatch the Egg

This hand-eye coordination game is a fun way for toddlers to strengthen this oh so important gross motor skill!
Setting it up is simple with our free printable baby chick! Read on to get it!
A Fun Hand-Eye Coordination Game for Toddlers
Hand-eye coordination is all about the hands and eyes working together. It’s the process by which hands accurately coordinate with information processed by the vision system. This is a skill that is developed during the early years and instrumental for completion of simple daily tasks like pouring a glass of water to more advanced actions in playing sports.
For another hand-eye coordination coordination game, don’t miss our DIY Fishing Game for Toddlers!
Skills:
Ages:
Prep Time:
Watch How to Set Up and Play This Hand-Eye Coordination Game!
Here’s a quick video showing how easy it is to set up this hand-eye coordination game! Using a toy hammer to crack the eggs is such a fun sensory experience! Plus, it is a fun game to play during Spring time!
All activities should be supervised by an adult. As an Amazon Associate, I earn from qualifying purchases. This post may contain affiliate links.

Get the Free Printable Baby Chick!
The prep work and set-up could not be easier! You don’t have to spend a lot of time buying lots of supplies either. And since we know grown ups are busy, grab our Hatch the Egg printable so you don’t have to draw one!
For more activities you can easily print, including our bundle of +20 Easter-Themed Activities, visit our Printable Shop.
To santize egg shells, rinse them under water, place them on a baking sheet, and bake at 250F for 20 minutes.
Read on for the step by step instructions and the educational benefits of this hand-eye coordination game for toddlers!
Materials
- Egg Shells (see note on santizing above!)
- Plastic Bag or Plastic Wrap
- Free Printable Animal
- Paper Plate
- Egg Shells (see note on santizing above!)
- Plastic Bag or Plastic Wrap
Step-by-Step Instructions
Step 1
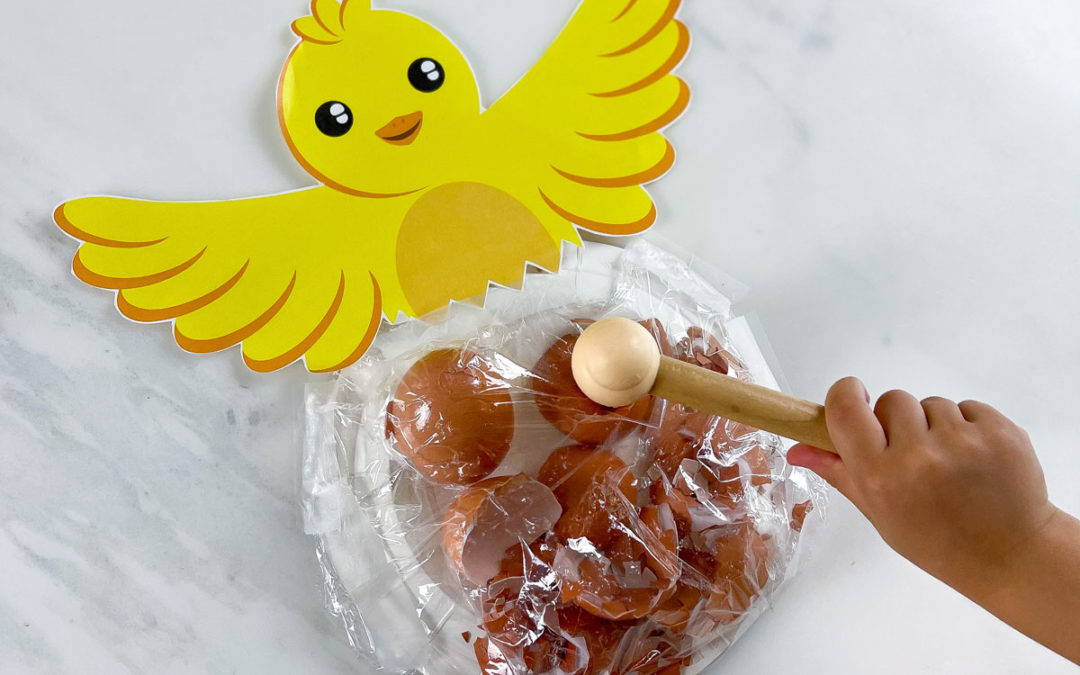
Download and cut out our free printable baby chick.
Step 2
Place a white paper plate underneath to form the “egg.”
Step 3
Place santized eggs inside a plastic bag and place on top of the white paper plate. Alternatively, use plastic wrap on top and secure it with tape.
Step 4
For extra security, tape the plate and plastic bag down.
Step 5
Provide a toy hammer and task your toddler to help the chick hatch by cracking the eggs!
Step 1
Download and cut out our free printable baby chick.
Step 2
Place a white paper plate underneath to form the “egg.”
Step 3
Place santized eggs inside a plastic bag and place on top of the white paper plate. Alternatively, use plastic wrap on top and secure it with tape.
Step 4
For extra security, tape the plate and plastic bag down.
Step 5
Provide a toy hammer and task your toddler to help the chick hatch by cracking the eggs!

More Easter and Spring-Themed Activities!
For more Easter and Spring-Themed activities you have to check out our +20 Easter and Spring-Themed Printables! It includes over 20 activities for practicing early childhood education skills, including alphabet recognition, number recognition, comparisons, tracing, writing, coloring, counting, color recognition, shapes, patterning, and so much more.
We aim to create fun hands on printables for every season and holiday, like Valentine’s Day, Christmas, Hanukkah, Kwanzaa, Halloween, and St. Patrick’s Day to name a few!
Educational Benefits of this Hand-Eye Coordination Game!
This activity is such a fun hand-eye coordination game. Hand-eye coordination is so important in our daily lives, from pouring a cup of water, to reading and writing, to catching a ball.
In this game, hand-eye coordination is being strengthened as the eyes register where the eggshells are located and where to place the hammer down to make impact. Through the course of this game, movements can become more refined and accurate.
This activity is also a fun way to talk about the life cycle of a chicken! Explain how a chicken begins as an embryo in an egg, then becomes a hatchling, followed by a chick, and finally an adult chicken!

Educational Benefits of the Hatch the Egg Activity
This activity is such a fun hand-eye coordination game. Hand-eye coordination is so important in our daily lives, from pouring a cup of water, to reading and writing, to catching a ball.
In this game, hand-eye coordination is being strengthened as the eyes register where the eggshells are located and where to place the hammer down to make impact. Through the course of this game, movements can become more refined and accurate.
This activity is also a fun way to talk about the life cycle of a chicken! Explain how a chicken begins as an embryo in an egg, then becomes a hatchling, followed by a chick, and finally an adult chicken!
More Hand-Eye Coordination Games For Toddlers
Hand-eye coordination spans from big actions to small actions, here are a few ways kiddos can continue to strengthen this skill while playing!

Basketball Hoop
This indoor and outdoor basketball hoop adjusts to six heights from 2.5 to 4 feet. Great for motor skills!

Wooden Threading
These chunky wooden shapes are great for little hands to thread. It includes 8 differently shaped beads and a stylus with a thread.

Pounding Toy
This classic pounding toy includes a wooden mallet. Great for strengthening fine motor skills and hand-eye coordination.

Velcro Balls and Mitts
This velcro set of mitts and balls is great for young kids just learning how to throw and catch balls!
What’s Next?
Popsicle Paint – How to Make This Fun, Frozen Art Tool!
read more
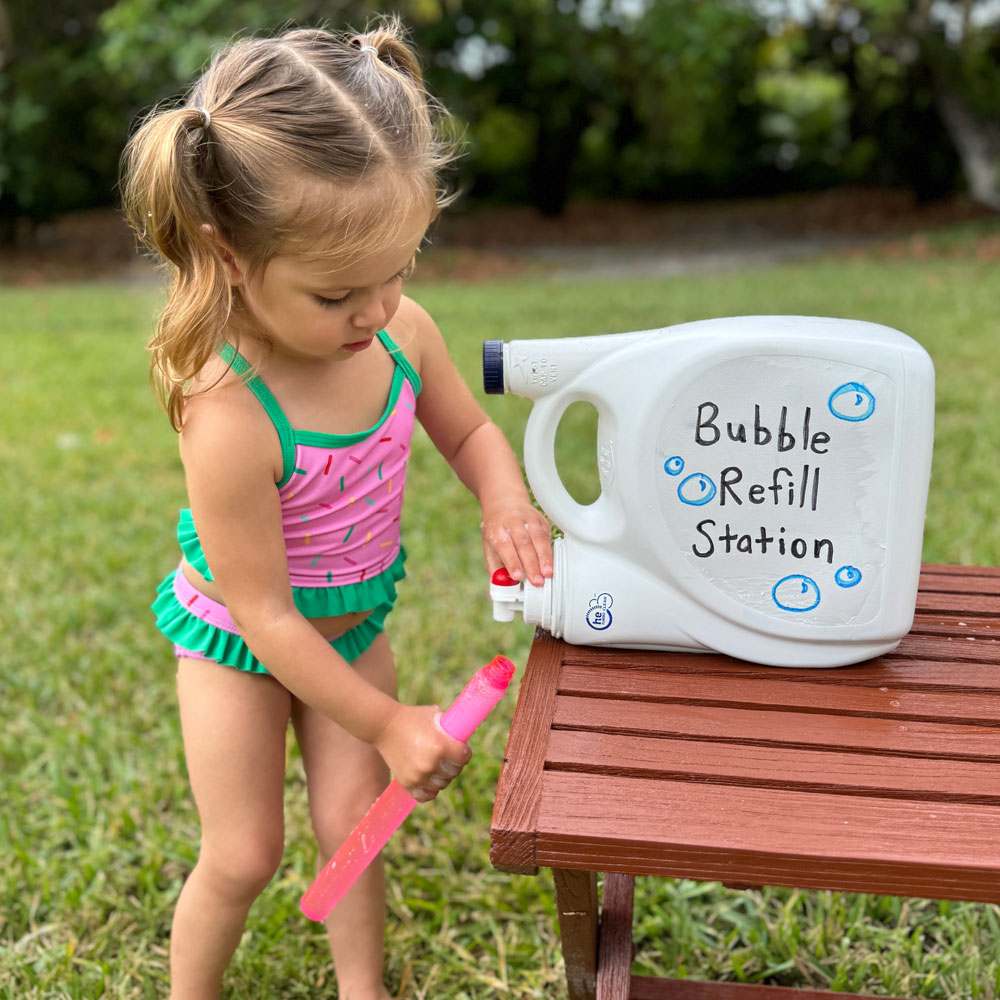
Homemade Bubble Solution – Extra Strong Bubble Recipe
Want to make your own super strong homemade bubble solution? We’ve got you! Check out this easy bubble recipe that you can whip up in minutes!
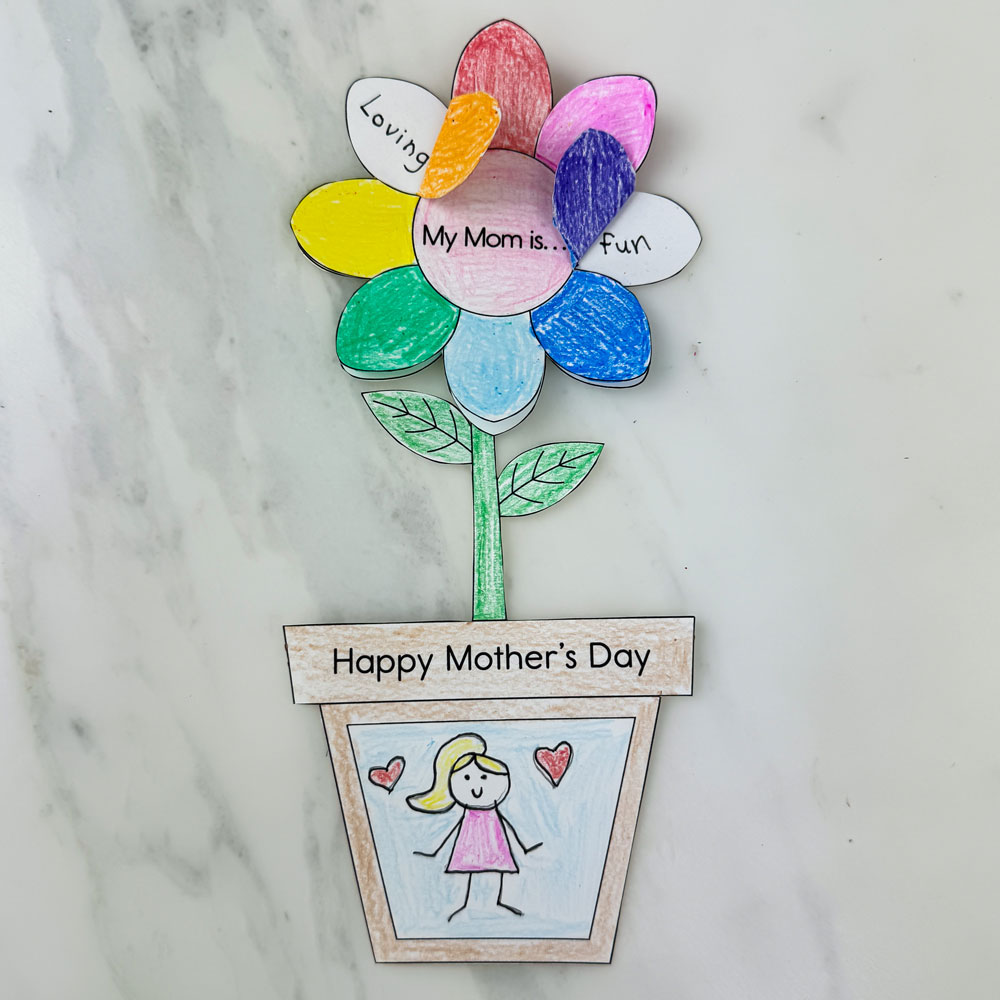
Printable Mother’s Day Cards – A Beautiful and Free Template!
Explore printable Mother’s Day cards & gifts! Don’t miss our free flower template for a heartfelt gift. Make this Mother’s Day unforgettable!


_Green-17")