DIY Easter Card – How to Make a Bunny-Shaped Handprint Card

Easter is a time for celebration and creativity, and what better way to spread joy than with a handmade DIY Easter card? In this step-by-step guide, I’ll show you how to create the sweetest handprint bunny card that’s not only adorable but will also serve as a keepsake. This DIY project is perfect for parents, teachers, or anyone looking to add a personal touch to their Easter greetings.
This is a Budget Friendly DIY Easter Card!
Crafting this DIY handprint bunny card isn’t just about creating memories; it’s also a wallet-friendly activity! Utilizing simple materials like construction paper, markers, and glue, this project proves that creativity doesn’t have to break the bank. With commonly found supplies and minimal expense, you can enjoy quality time with loved ones while saving money. Plus, the satisfaction of making something meaningful with your own hands is priceless. So, gather your supplies and let’s dive into this budget-friendly DIY Easter Card!
Skills: Arts and Crafts
Ages: 3+
Prep Time: 15 min
Watch How to Make This DIY Easter Card
As you watch the step-by-step video guide on creating this adorable handprint bunny card, you’ll witness the magic of turning simple materials into a cherished Easter keepsake.
From tracing the handprints to adding the final touches, you’ll see just how quick and easy it is to bring this delightful bunny to life.
Handprint keepsakes hold a unique and sentimental value that transcends time. Capturing the impression of a child’s hand not only preserves a moment in their growth but also symbolizes the bond between loved ones. These handprints serve as reminders of cherished memories together!
Handprint crafts, like this adorable DIY Easter bunny card, become more than just artworks; they become treasured keepsakes, encapsulating a moment in childhood. Whether it’s a gift for a grandparent, a decoration for the home, or a personal memento, handprint keepsakes hold a special place in the hearts of both the giver and the recipient.
All activities should be supervised by an adult. As an Amazon Associate, I earn from qualifying purchases. This post may contain affiliate links.

Tips for Creating the Perfect DIY Easter Card
Mind the Thumb Placement: When tracing the handprint, ensure that the thumb is aligned along the fold of the card. This will create a seamless connection and allow the card to open smoothly.
Choose Your Markers Wisely: To prevent bleeding through the paper, opt for high-quality markers or colored pencils. Alternatively, use thick paper or cardstock to provide a sturdy base for your artwork.
Message Suggestions: Need inspiration for your card’s message? Consider these heartfelt suggestions:
- “Some Bunny Loves You!”
- “Hoppy Easter to Some Bunny Special!”
- “Ears to a Wonderful Easter Filled with Joy and Happiness!”

Materials
- Construction paper or cardstock (white or pastel colors)
- Scissors
- Markers or colored pencils
- Construction paper or cardstock (white or pastel colors)
- Scissors
- Markers or colored pencils
- Glue or Strong Tape
- Pom Pom (for nose)
Step-by-Step Instructions
Step 1
Fold a piece of paper in half and trace your child’s handprint with the thumb aligned along the fold. Carefully trace around the hand, ensuring that the thumb remains connected to the fold. This will form the body of the bunny.
Step 2
With the handprint still folded, carefully cut along the traced lines. Be sure to keep the fold at the thumb intact, as this will create the bunny’s body and allow the card to open.
Step 3
Once the handprint is cut out, you’ll notice that the middle finger forms a gap. Use your scissors to carefully cut out this section, creating space for the bunny’s face. Then, on the pointer and ring fingers, draw the bunny ears. Fold the pinky finger forward to create the bunny’s arm.
Step 4
Using markers or colored pencils, draw the bunny’s eyes, mouth, and whiskers on the handprint. You can get creative with the expression, making it as cute or silly as you like! Finally, glue a small pom pom onto the bunny’s face to serve as its nose.
Step 5
Open up the handprint bunny card and write a heartfelt Easter message inside. You could use one of the suggested messages like “Some bunny loves you” or come up with your own punny greeting to make the recipient smile.
Crafting a Thoughtful DIY Easter Card
Creating this heartwarming handprint bunny card isn’t just about crafting an Easter decoration; it’s about nurturing creativity, forging lasting memories, and spreading genuine joy. Taking the time to handcraft something special not only communicates love and appreciation but also fosters meaningful connections with loved ones.
Whether it’s the sheer delight on a child’s face as they create or the heartfelt warmth felt by the recipient upon receiving such a thoughtful gift, the rewards of this DIY Easter card reach far beyond its charming appearance. So, embrace the Easter spirit and share the love with a handmade card destined to be treasured for years to come.”
More Easter Themed Activities!
Explore some more of our favorite Easter themed activities and printables!

Feed the Bunny Activity!

Hatch the Egg Printable!

Bunny Math – Learn Addition Printable!

20+ Easter Printable Activities!
What’s Next?
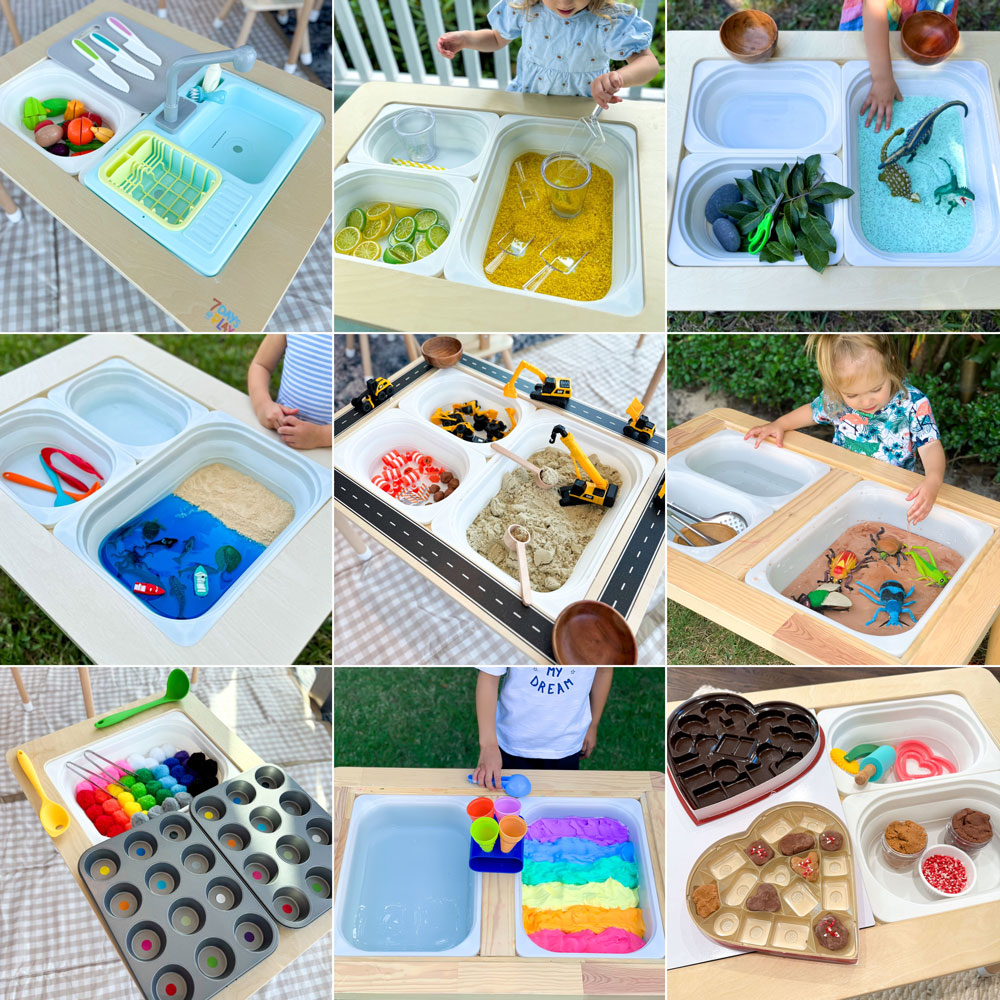
The Best Sensory Bin Ideas to Keep Kids Engaged for Hours
The best sensory bin ideas to keep kids engaged for hours! Fun, hands-on activities that spark creativity, learning, and fine motor skills.

The Best Easter Ideas for Kids
Discover the best Easter ideas for kids including basket ideas, egg fillers, crafts, activities, decorations, and printables to make Easter fun and easy.
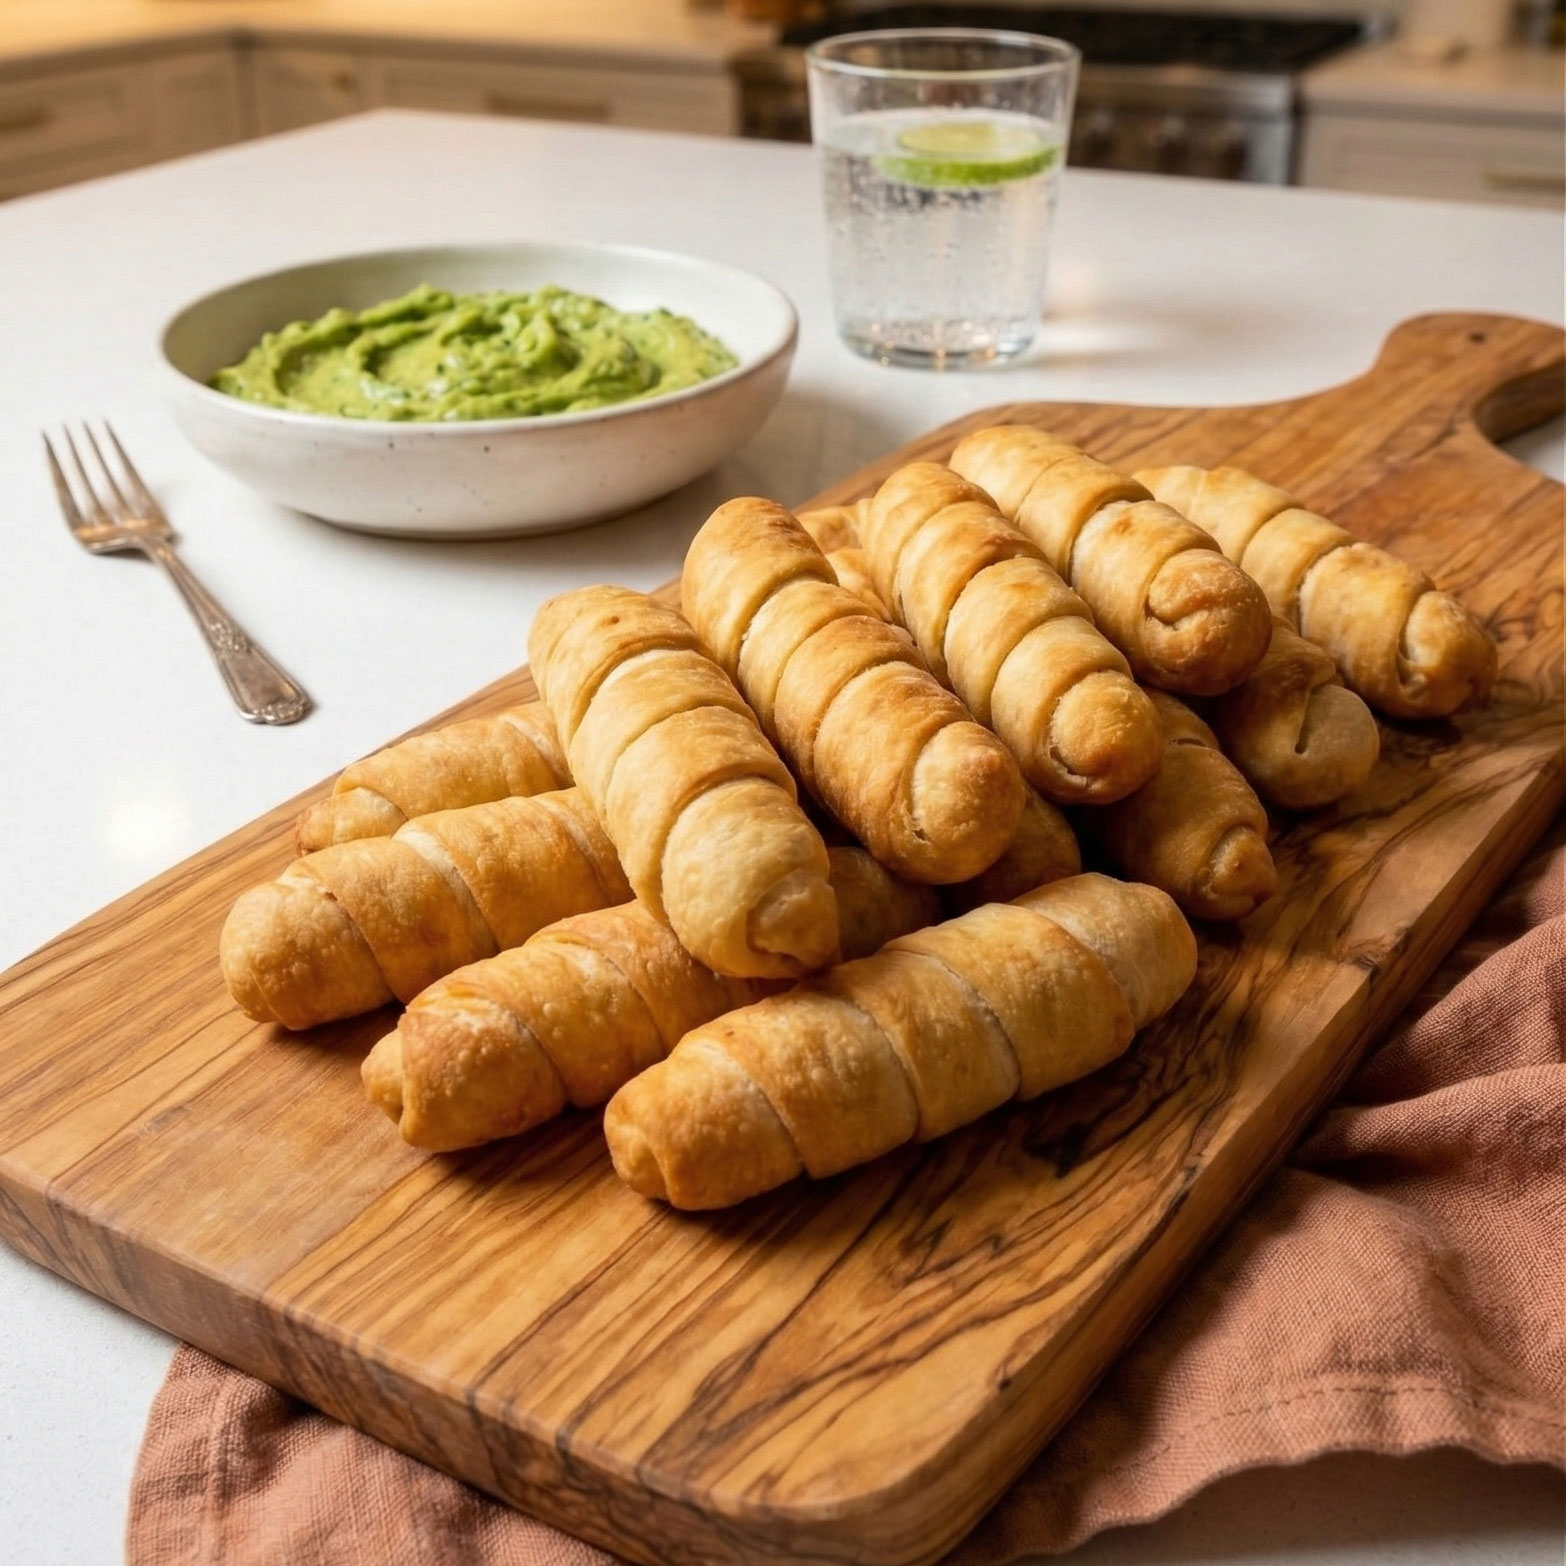
Air Fryer Tequeños, Freeze Ahead and Cook Straight From Frozen
Make Air Fryer Tequeños you can freeze and cook from frozen, crispy dough, melty cheese, plus dips and no-leak tips.