Hands-On Halloween Sensory Bag: Craft, Play, and Color-Mixing Fun

Create a fun and easy pumpkin-themed Halloween sensory bag! Mix colors, enjoy sensory play, and explore color science. Perfect for Halloween!
Halloween Sensory Bag: Simple Pumpkin Craft with Science Twist
Looking for a Halloween activity that’s fun, crafty, and a bit educational? This pumpkin-themed Halloween sensory bag is just what you need! Kids will love the magic of watching yellow and red paint combine to make orange, all while exploring sensory textures and creating their very own pumpkin masterpiece. It’s the perfect mix of science, craft, and sensory play for the spooky season. Whether you’re hosting a Halloween playdate or just looking for a fun weekend project, this sensory bag will keep little hands busy and engaged. Let’s dive into how to make your very own Halloween sensory bag that’s both fun and easy!
Hands on Learning: Educational Benefits of a Halloween Sensory Bag
This pumpkin-themed Halloween sensory bag offers more than just spooky fun—it’s an opportunity for kids to explore early science concepts like color mixing and cause-and-effect. As they squish and swirl the paint inside the bag, children see firsthand how yellow and red combine to create orange, helping to build a foundational understanding of color theory. This hands-on experience not only makes learning fun but also reinforces these basic scientific principles in an engaging, memorable way.
In addition to science, this activity supports sensory development and fine motor skills. The act of squeezing and pressing the bag strengthens hand muscles, which are essential for fine motor control, while the sensory input from the paint helps children explore different textures and sensations. This multi-sensory approach is perfect for tactile learners and offers a calming, focused activity that’s beneficial for both playtime and learning.
All activities should be supervised by an adult. As an Amazon Associate, I earn from qualifying purchases. This post may contain affiliate links.

Materials
- Cardboard
- Craft Knife
- Green Paint Stick for Stem
- Gallon-size resealable plastic bag
- Nail Polish Remover
- Cardboard
- Craft Knife
- Green Paint Stick for Stem
- Gallon-size resealable plastic bag
- Nail Polish Remover
- Yellow paint
- Red paint
- Tape to seal the bag
- Black permanent marker
Step-by-Step Instructions
Step 1
Take a piece of cardboard and cut out a pumpkin-shaped hole in the center. Make sure the hole is large enough for the plastic bag to fit through and leave space for a pumpkin stem at the top. Draw the stem on the cardboard above the cutout.
Step 2
Remove the white label on the plastic bag using nail polish remover. Inside the bag, add a generous amount of yellow paint on one side and red paint on the other. Keep the colors separate for now. Seal the bag tightly, and for extra security, you can reinforce the seal with clear tape.
Step 3
Using a black permanent marker, draw a jack-o’-lantern face on the outside of the bag. This will make the sensory bag look like a pumpkin once it’s placed inside the cardboard cutout.
Step 4
Place the cardboard frame on top of the plastic bag and use painter’s tape to secure it to a table or flat surface. This keeps the frame from moving around while your child plays and mixes the paint.
Step 5
Encourage your child to press and squish the bag, watching as the yellow and red paint mix together to form orange. They’ll see their “pumpkin” come to life as they mix the colors inside the jack-o’-lantern face. While your child plays, engage them in conversation about what’s happening. Ask questions like, “What do you think will happen when we mix the colors?” or “What other colors might we make if we added more?” Once your child is done playing, you can leave the cardboard frame taped to the table as a Halloween decoration or store the sensory bag for more squishy fun later.
Halloween Themed Printable Activity Worksheets!
And guess what? We’ve got more Halloween printables up our sleeve to make your spooky season even more special. Explore our exclusive Halloween Printables Bundle with activities that include shape recognition, matching, phonics, letter recognition, counting, number recognition, coloring, writing practice, scissor skills, emotions, measurements, and patterns to name a few! With our versatile printables, you’ll have a blast decorating and crafting your way to an enchanting Halloween. So, check out all our offerings and let’s make this Halloween unforgettable for the whole family!
More Fun Halloween Crafts and Activities to Explore
Looking for more ways to keep the Halloween fun going? Check out these creative activities like pumpkin crafts, a count-the-monster-eyes printable, Q-tip skeleton play dough fun, and a spooky hot glue craft idea!

Hot Glue Halloween Crafts

40 Pumpkin Craft Ideas

Count the Monster Eyes Printable Activity

Q-Tip Skeleton Play Dough
What’s Next?
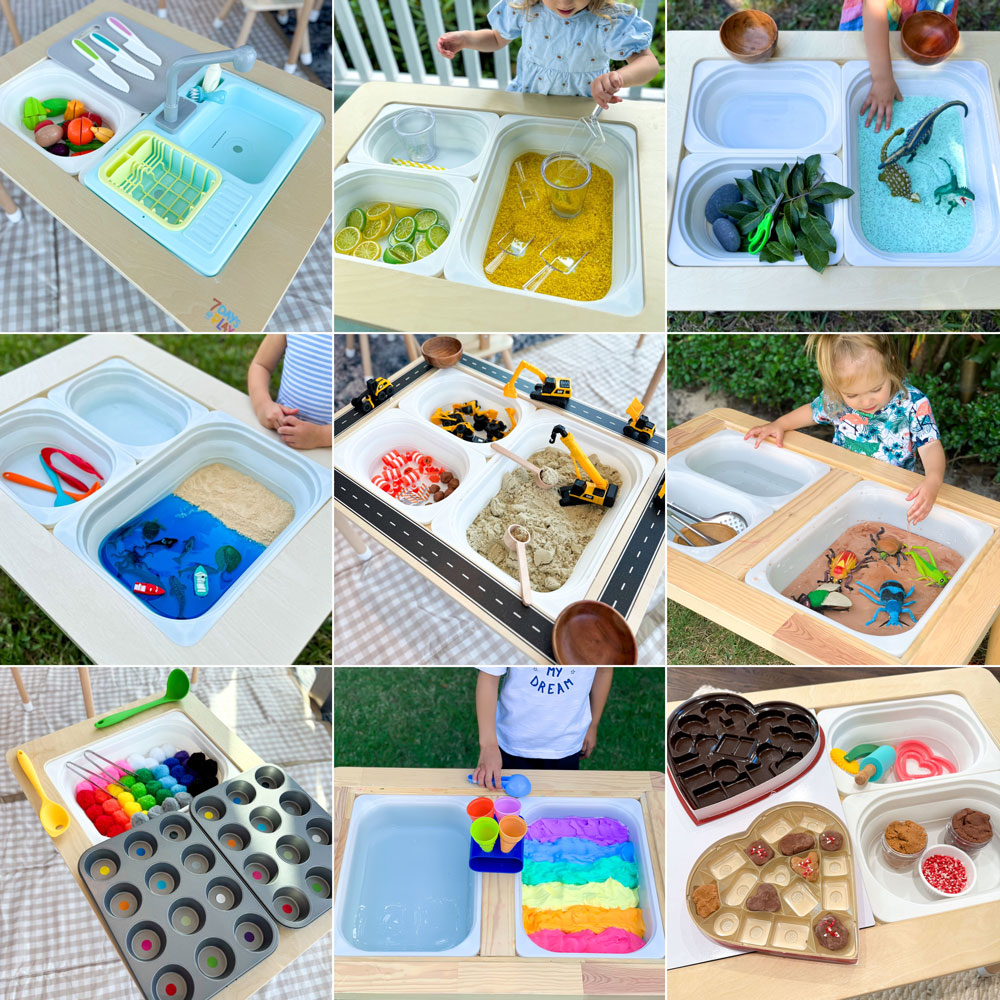
The Best Sensory Bin Ideas to Keep Kids Engaged for Hours
The best sensory bin ideas to keep kids engaged for hours! Fun, hands-on activities that spark creativity, learning, and fine motor skills.

The Best Easter Ideas for Kids
Discover the best Easter ideas for kids including basket ideas, egg fillers, crafts, activities, decorations, and printables to make Easter fun and easy.
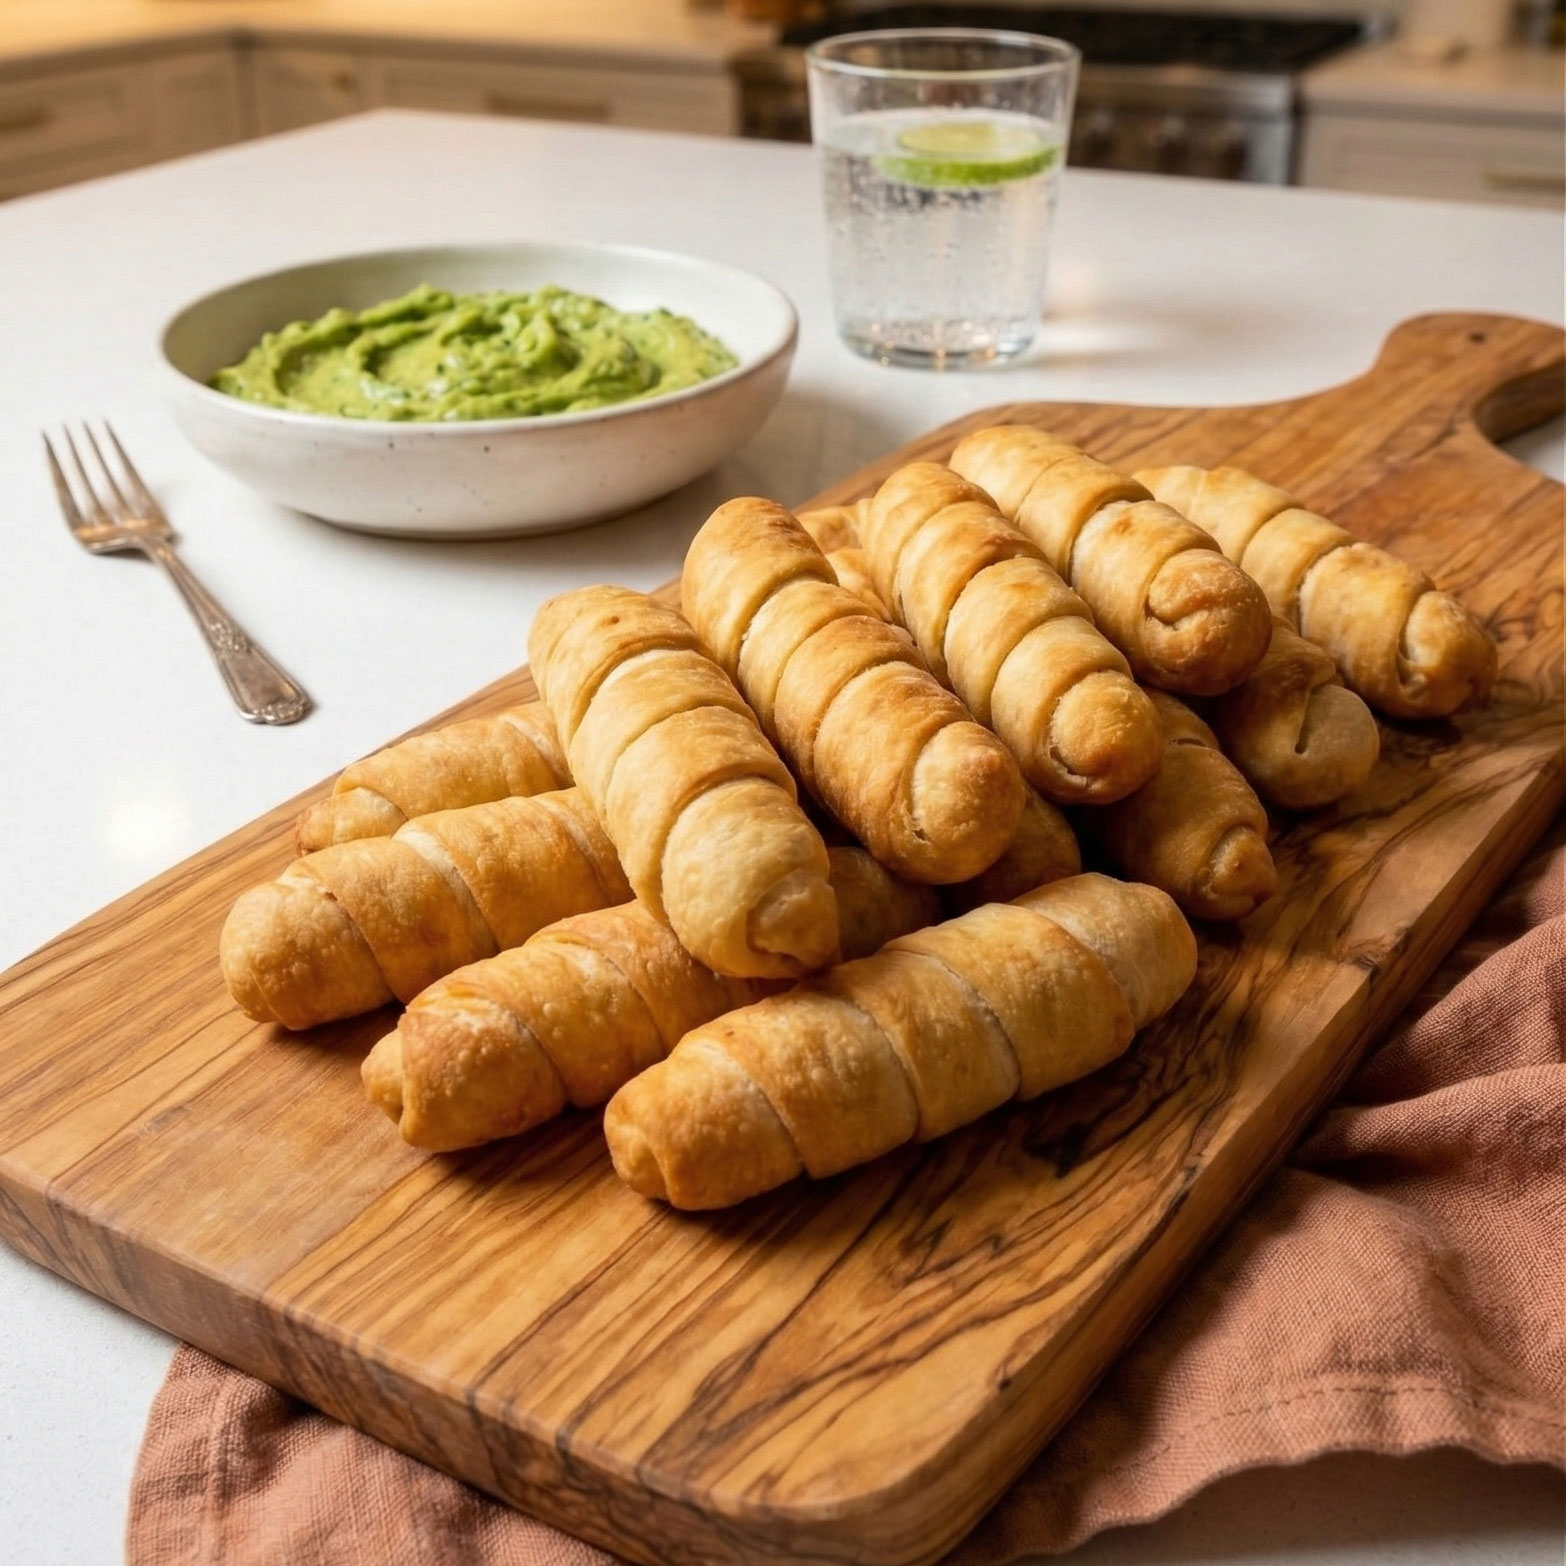
Air Fryer Tequeños, Freeze Ahead and Cook Straight From Frozen
Make Air Fryer Tequeños you can freeze and cook from frozen, crispy dough, melty cheese, plus dips and no-leak tips.