How to Make a Shrinky Dink Handprint Flower Keychain

Make a keepsake handprint flower keychain using shrink art plastic—a thoughtful gift for Mother’s Day or any special occasion.
Magic Shrinking Plastic Handprint Flower Keychain Gift Idea
Looking for a sweet keepsake gift that’s easy to make and full of meaning? This handprint flower keychain uses “shrinking plastic sheets” (sometimes called Shrinky Dinks) to turn your child’s handprint into a lasting little memento. It’s perfect for Mother’s Day—or for anyone who deserves a smile! I’ll show you exactly how to do it, step by step, and share my favorite supplies for the brightest, best results.
All activities should be supervised by an adult. As an Amazon Associate, I earn from qualifying purchases. This post may contain affiliate links.
Watch the Video: Handprint Flower Keychain Tutorial + Tips for Perfect Results
Ready to see this craft in action? Check out my quick video below for a step-by-step walk-through on how to make your own handprint flower keychain with shrinking plastic. Whether you’re new to shrink art or just want some clever tricks for a flawless finish, these tips will help your keepsake turn out adorable every time!
A few tips and best practices before you start:
-
Use the rough side: Most shrink art plastic sheets have a frosted/rough side and a smooth side. Always paint and draw on the rough side—it holds paint and marker much better!
-
Keep it simple: Big, bold designs work best! Tiny details can get lost as the plastic shrinks, so encourage kids to make a clear handprint and use bright, simple accents.
-
Punch holes before baking: Don’t forget to punch your keychain hole before you put it in the oven. It’s nearly impossible to add a hole after the plastic has shrunk!
-
Watch closely while baking: The shrinking process happens fast—just a few minutes! The plastic will curl up and then flatten out. If it’s not laying flat when you take it out, gently press it down with a spatula while it’s still hot (just be careful not to burn yourself).
-
Use parchment or foil: Bake your design on parchment paper or aluminum foil to keep it from sticking to the pan.
-
Seal for durability: For extra shine and to protect your design, add a thin coat of Mod Podge or clear sealer once your piece has cooled.

Supplies Spotlight: The Best Shrink Art Plastic and Pens for This Project
If you’re new to shrink art, choosing the right supplies makes all the difference! I’ve tested a bunch of options, and here are my absolute favorites for colorful, reliable results every time.
Best Shrinking Plastic Sheets
-
Shrinking Plastic Sheets: Click HERE for my top pick! They’re sturdy, shrink evenly, and colors always come out bright and clear. You can find both clear and frosted versions; I love the frosted kind because it really holds onto marker and paint.
Best Pens and Markers
-
Permanent Markers: Click HERE for my top pick! Permanent markers are my go-to for tracing hands, adding details, names, outlines, and coloring. They dry quickly and don’t smear, even on slick plastic.
-
Paint: Click HERE for my top paint pick! These give you great coverage, and they work beautifully on both clear and frosted shrink art sheets.
Materials
- Permanent markers (THIS is great for fine lines), or Acrylic Paint
-
Oven
-
Parchment paper or aluminum foil
- Permanent markers (THIS is great for fine lines), or Acrylic Paint
-
Oven
-
Parchment paper or aluminum foil
Step-by-Step Instructions
Step 1
Cut your shrink art plastic sheet to your desired size. (It will shrink to about 1/3 of its original size.)
Step 2
If you are using a Permanent Marker: Place your child’s hand on the rough side of the shrink art plastic sheet. Use a permanent marker to carefully trace around their hand. You can fill in the palm and fingers to look like flower petals. Remove the hand, then color and decorate as you wish.
If you are using Paint: Paint your child’s palm and fingers with acrylic paint in your chosen color. (Tip: Use a foam brush or your fingers to get an even coat.) Carefully press their painted hand onto the rough side of the shrink plastic to transfer the print. Lift their hand straight up, then let the paint dry completely before decorating or cutting.
Step 3
Cut out the handprint shape, leaving a small border and rounding the edges.
Step 4
Punch a hole near the top where you’ll attach the keychain ring—do this before baking!
Step 5
Bake in the oven according to your shrink art plastic’s directions (usually 325°F for 1–3 minutes). Place it on parchment or foil and watch the magic happen as it curls, then flattens. If it does not uncurl on its own, carefully use the bottom of a glass to manually flatten it down. Use caution as it will be hot and you must do it quickly before the plastic cools.
Step 6
Let cool for a minute or two, then (optional) seal with a clear sealer for extra shine and durability.
Step 7
Attach your keychain ring and your keepsake is ready to gift!
More Printable Mother’s Day Cards!
Need more printable Mother’s Day cards? We have lots more to download and print to make a Mom’s day extra special! From adorable handprint flower cards to a superhero mom candy bar template, a “My Mom and Me” printable booklet, and a personalized 3D Mother’s Day card, there’s something here to warm every mother’s heart. Let’s dive in and explore these heartfelt creations!

Handprint Card

Superhero Mom Candy Template

My Mom and Me Printable Booklet

Personalized 3D Mother’s Day Card

Mother’s Day Hug Card

Mother’s Day Flower Gift

Tear-and-Reveal Personalized Card

Thread-a-Shape Card!
Make It, Gift It, Love It!
Your handprint flower keychain is now ready to brighten someone’s day! Whether you make this craft for Mother’s Day, a birthday, or just because, it’s sure to become a treasured keepsake. Be sure to check out my favorite shrink art plastic and pens linked above for the best results—and let me know in the comments if you have any questions or want to share your own creative spin!
What’s Next?
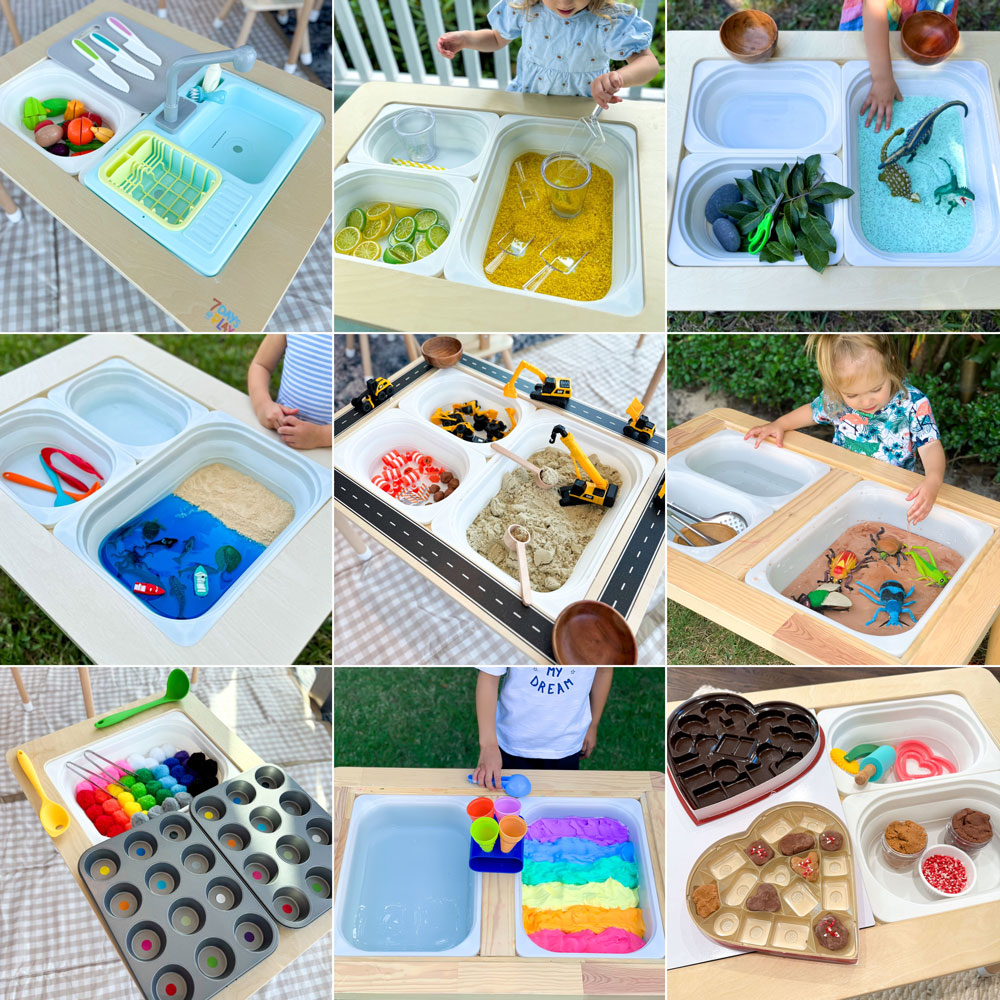
The Best Sensory Bin Ideas to Keep Kids Engaged for Hours
The best sensory bin ideas to keep kids engaged for hours! Fun, hands-on activities that spark creativity, learning, and fine motor skills.

The Best Easter Ideas for Kids
Discover the best Easter ideas for kids including basket ideas, egg fillers, crafts, activities, decorations, and printables to make Easter fun and easy.
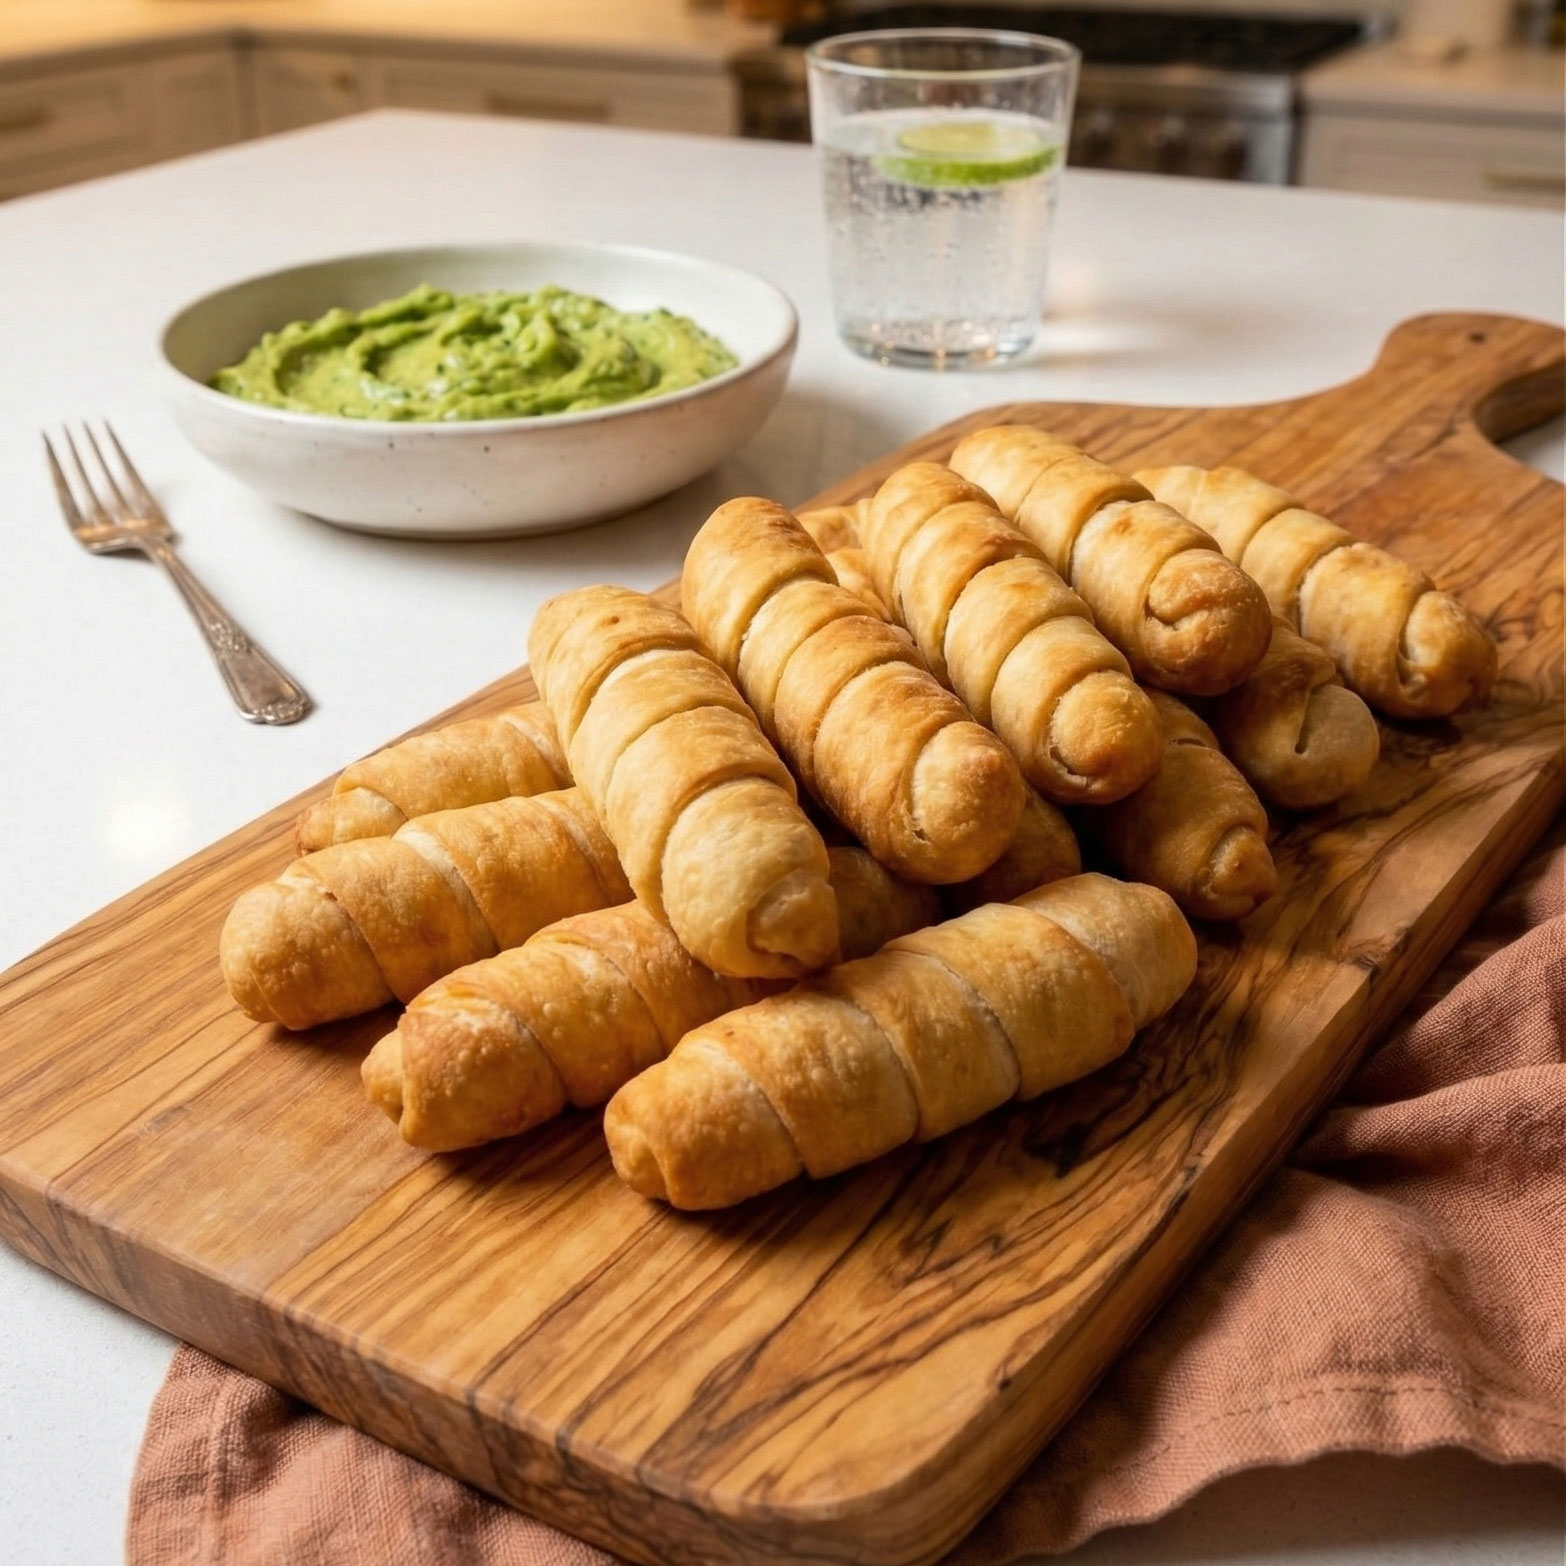
Air Fryer Tequeños, Freeze Ahead and Cook Straight From Frozen
Make Air Fryer Tequeños you can freeze and cook from frozen, crispy dough, melty cheese, plus dips and no-leak tips.