Explore a fun and easy way to make bath time fun for kids with our vibrant and homemade kids bath paint recipe!
How to Make Edible Play Dough with 12 Easy Recipes!
How to Make Edible Play Dough with 12 Easy Recipes!

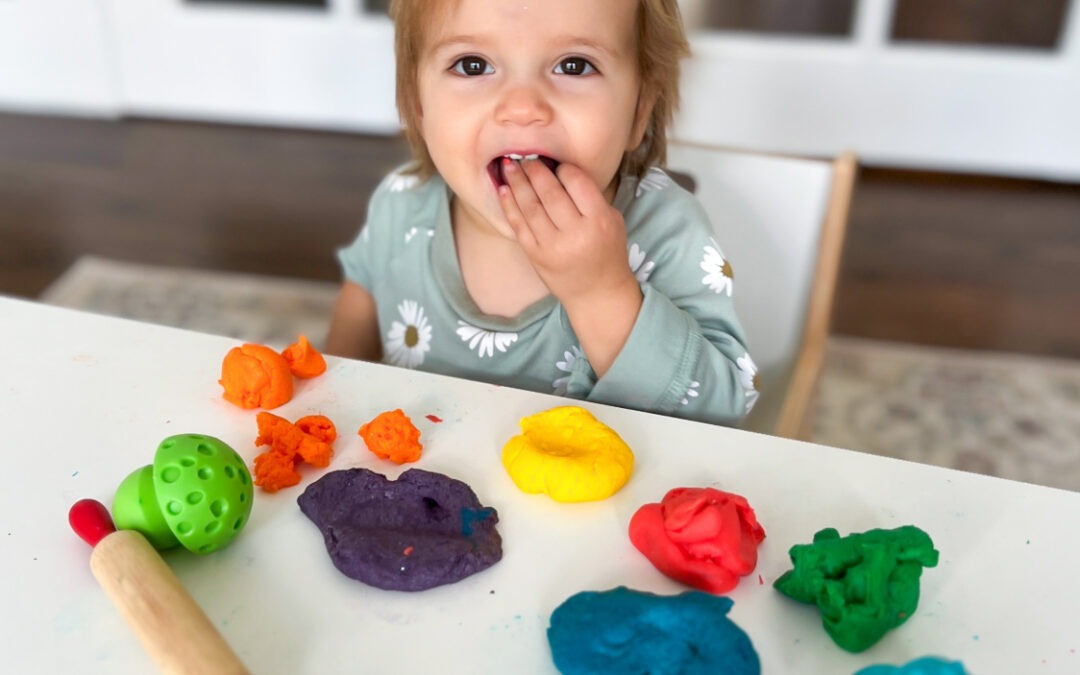
Discover 12 edible play dough recipes! Perfect for little ones who love putting everything in their mouths!
Edible Play Dough Fun for Babies and Toddlers
Are you constantly on the lookout for safe and engaging activities to entertain your little ones, who seem to have an insatiable curiosity for putting everything in their mouths? Look no further! We understand the daily struggle of keeping curious hands and mouths occupied without compromising on safety. That’s why we’ve compiled a collection of edible play dough recipes specifically designed for our youngest sensory lovers. These creations not only offer endless sensory stimulation but also provide a worry-free playtime experience for babies and toddlers alike.
As an Amazon Associate, I earn from qualifying purchases. This post may contain affiliate links.
12 Edible Play Dough Recipes
Explore an array of sensory-safe play dough options with our collection of 12 creative edible play dough recipes, perfect for hands-on exploration and imaginative play.

PUDDING PLAY DOUGH RECIPE
Mix together until smooth:
- 1 cup cornstarch
- 1 (3.4 oz) package instant pudding mix
- 1/2 cup powdered sugar
- 3/4 cup water
- 2 tablespoons vegetable oil

PEANUT BUTTER PLAY DOUGH RECIPE
Mix together until smooth:
- 1 cup creamy nut or seed butter
- 1 cup powdered sugar
- 1 cup honey
- 1 cup powdered milk (optional, for a smoother texture)
If the dough is too sticky, add more powdered sugar.

CHOCOLATE PLAY DOUGH RECIPE
Mix together until smooth:
- 1 cup Nutella or chocolate hazelnut spread (heated for 30 seconds)
- 2 cups powdered sugar
- 1/4 cup cocoa powder
- 1 tablespoon vegetable oil

MARSHMALLOW PLAY DOUGH RECIPE
- In a microwave-safe bowl, heat 3 cups marshmallows and 2-3 tablespoons coconut oil (or butter) in 30-second intervals, stirring in between, until melted and smooth.
- Mix in 3 cups powdered sugar and food coloring (optional)

COCONUT OIL PLAY DOUGH RECIPE
- In a microwave safe bowl, melt 1 cup coconut oil until it becomes liquid.
- Gradually add 2 cups cornstarch.
- Add food coloring if you’d like!

CAKE MIX PLAY DOUGH RECIPE
- In a mixing bowl, combine the 1 box (15.25 oz) cake mix and 1 cup powdered sugar.
- Gradually add 1/4 cup vegetable oil.
- Slowly add water as need until the dough forms and is no longer sticky.

FROSTING PLAY DOUGH RECIPE
Mix together until smooth:
- 2 cups powdered sugar
- 1/2 cup creamy frosting (any flavor)
- 2 tablespoons cornstarch
- Food coloring (optional)

CREAM CHEESE PLAY DOUGH RECIPE
Mix together until smooth:
- 1 (8 oz) package cream cheese, softened
- 1 cup powdered sugar
- 2 cups powdered milk

CONDENSED MILK PLAY DOUGH RECIPE
Mix together until smooth:
- 1 cup sweetened condensed milk
- 2 cups powdered sugar
- 1/2 cup cornstarch
- Food coloring (optional)

YOGURT PLAY DOUGH RECIPE
Mix together until smooth:
- 1 cup Greek yogurt (any flavor)
- 2 cups cornstarch
- Food coloring (optional)

APPLE SAUCE PLAY DOUGH RECIPE
Mix together until smooth:
- 1 cup applesauce
- 2 cups cornstarch
- Cinnamon or pumpkin pie spice (optional, for scent)

OATMEAL PLAY DOUGH RECIPE
In a food processor or blender, pulse 1 cups rolled oats until finely ground to a flour-like consistency. And mix it together with:
- 1/2 cup flour
- 1/4 cup boiling water
- 2 tablespoons honey
- Food coloring (optional)
8 Ways to Pair with Your Play Dough!
Discover essential accessories and tools to elevate your edible play dough adventures with our selection of eight versatile products, including tools, mats, and storage solutions.

Play Dough Tool Set

Play Dough Extruders

Play Dough Texture Rollers

Play Dough Kits

Play Dough Mats (Alphabet, Numbers, and Shapes)

Play Dough People Builders

Play Dough Stamps

Play Dough Storage Hack
Understanding the Difference: Taste-Safe vs. Edible Play Dough Recipes
When it comes to sensory play, understanding the distinction between taste-safe and edible play dough recipes is essential for providing a safe and engaging experience for children.
Taste-safe play dough refers to recipes that are formulated with non-toxic ingredients and are safe for children to explore with their hands and even taste in small quantities, but they are not intended for consumption in large amounts. On the other hand, edible play dough recipes are made from food-grade ingredients and are entirely safe for ingestion.
However, it’s crucial to note that even with edible play dough, it’s not advisable to encourage children to eat it. Sensory play, including play dough exploration, serves as an opportunity to teach children about safe sensory experiences and boundaries.
By introducing edible materials first, children learn what sensory materials are and not to put them in their mouths. This approach helps foster a healthy understanding of sensory boundaries and prepares children for more complex sensory experiences as they grow.
What’s Next?
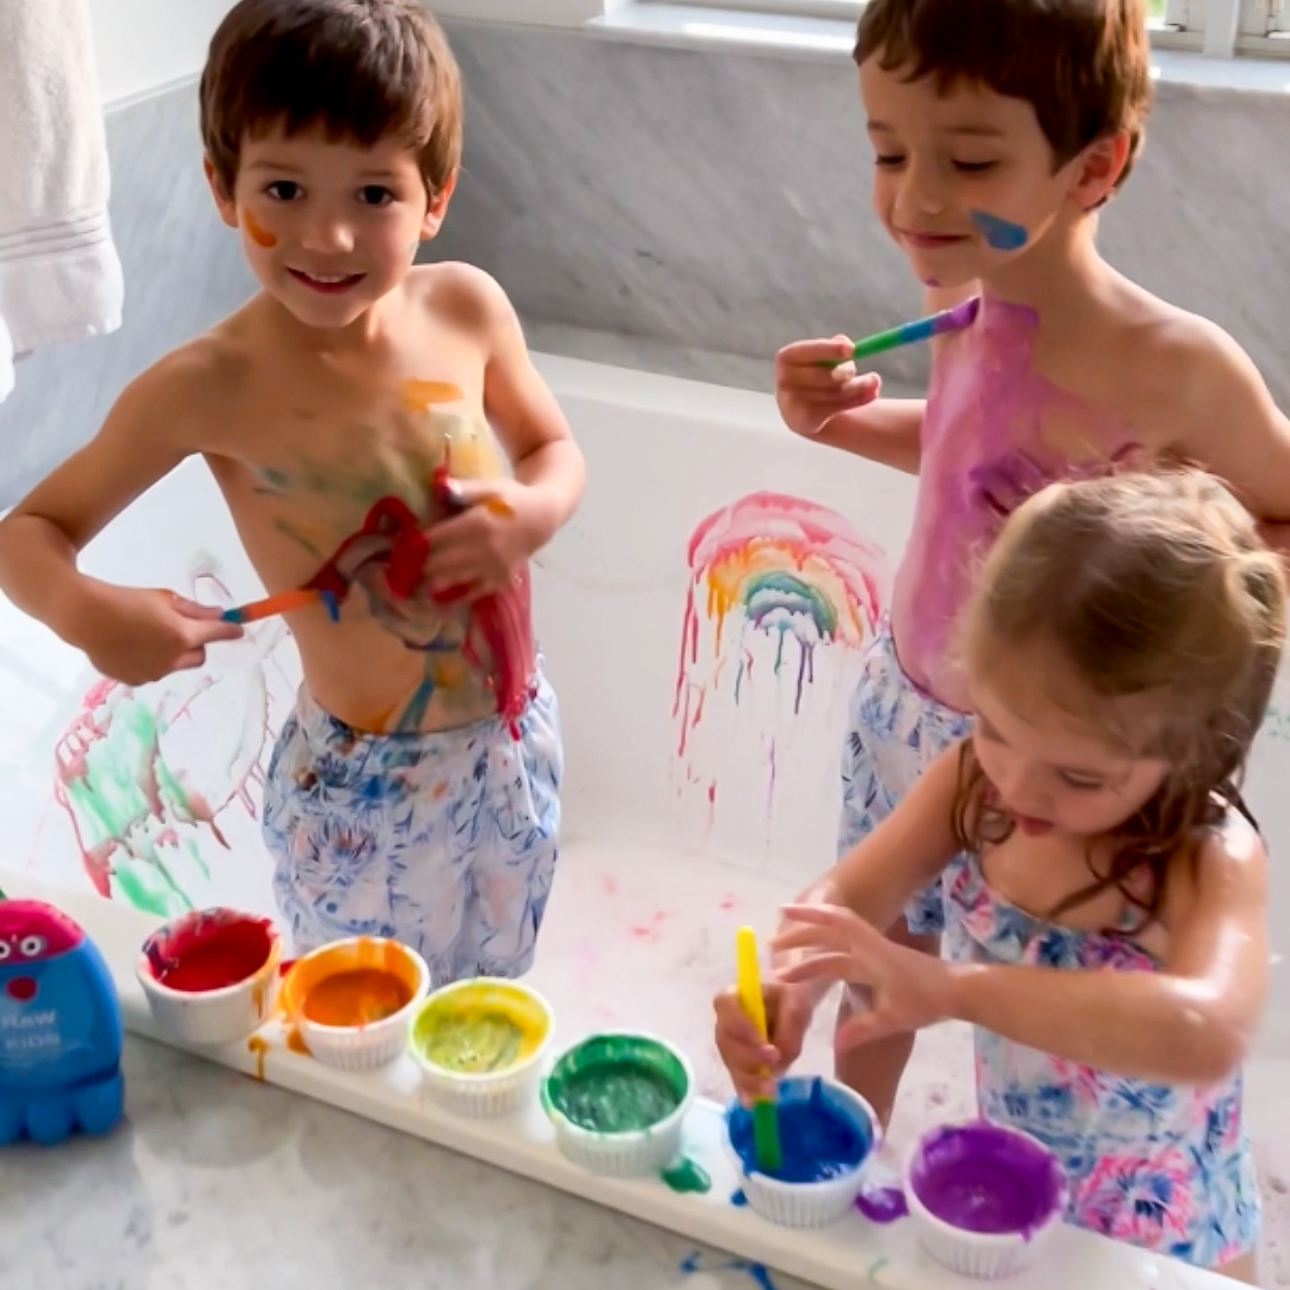
How to Make Kids Bath Paint – Colorful Clean Fun
read more
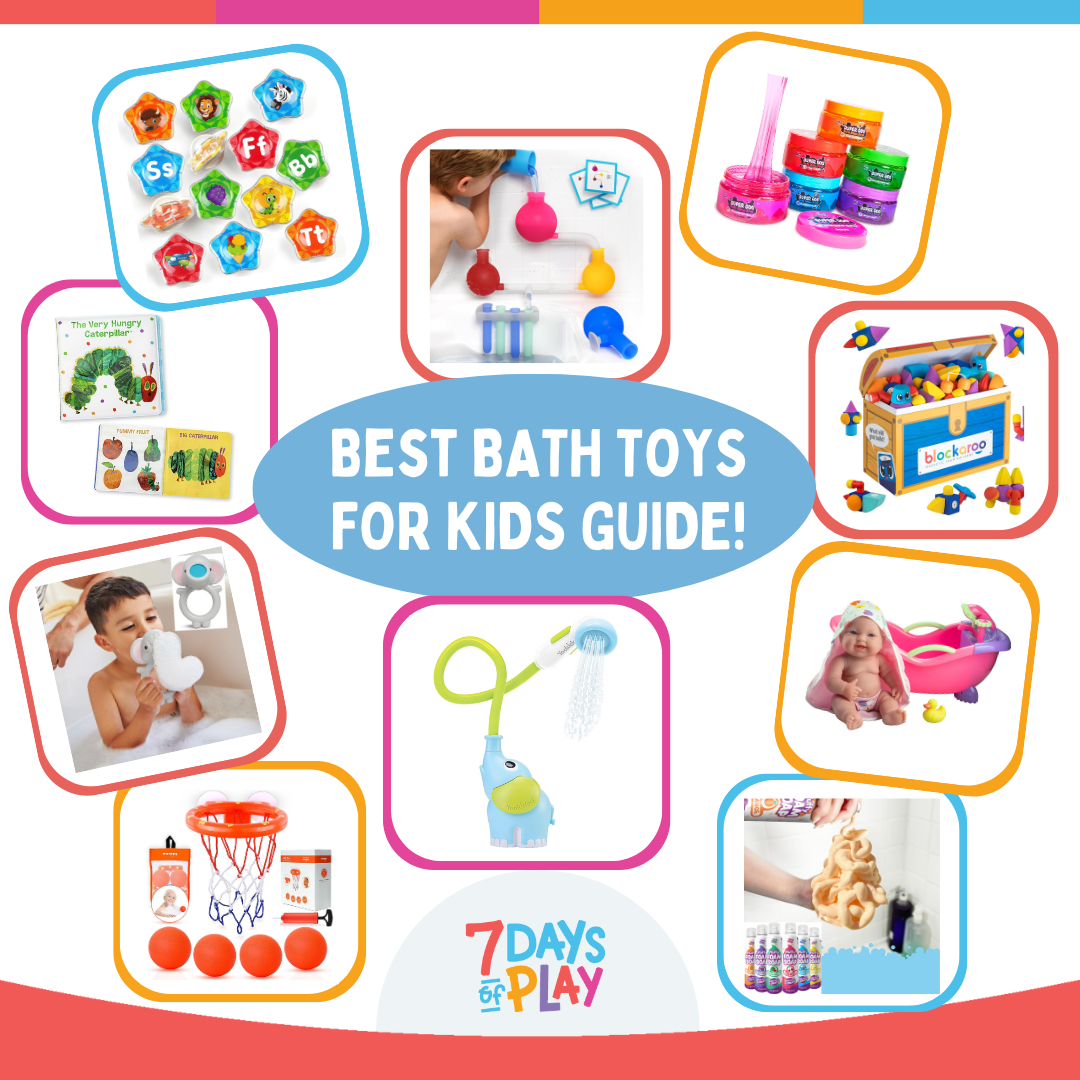
The Best Bath Toys for Kids in 2024
Explore the best bath toys for kids! Discover the ultimate guide to bath time fun with these top picks that will make every splash memorable.
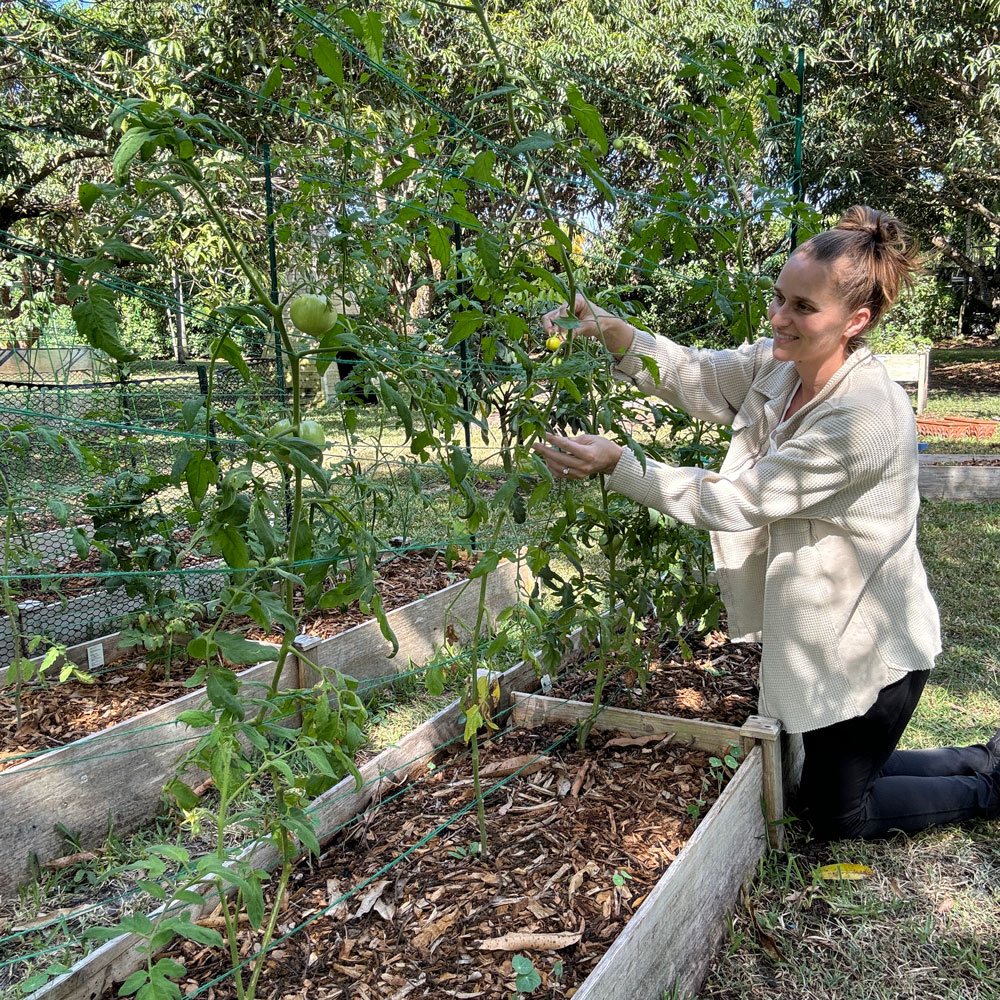
How to Layer a Raised Garden Bed and Make a Trellis
Learn how to layer a raised bed and create affordable trellises for thriving gardens. Explore our guide for expert tips & easy instructions!