Iron On Cricut Shirt – How to Make It!

Making shirts and other custom clothing is so easy with the Cricut Joy! Iron on Cricut material makes things so simple and beginner friendly!
My children’s school is big into celebrations! Almost every month I am finding myself creating another iron on Cricut shirt for them to wear to school! This “Hola!” shirt design was made for Hispanic Heritage Month, but it came out so cute, they’ll be wearing it all year long!
The Simplicity of Iron On Cricut Material!
The Cricut Joy is so user friendly, below I explain the easy steps that will have you making shirts in minutes! Iron on Cricut material is just one of the many useful supplies that Cricut provides for DIY projects. All you need for this project is the iron on Cricut material and a few simple supplies to get started, and you’ll be shocked at how easy custom shirts are to create! Plus, you can easily make them in a wide variety of sizes so that everyone in the family can have their own.
How to Create a Shirt Using Iron on Cricut Material
Watch the video to see how we used iron on Cricut material to make the cutest, most colorful shirt to honor Hispanic Heritage Month! Featuring the countries with spanish-speaking was a fun way to integrate text with images. Some of the hispanic countries were quite small, but were able to iron perfectly!
We wanted to include many colors, so you’ll have lots of opportunities to see how each layer irons on the shirt with ease!
How to Create a Shirt Using Iron on Cricut Material
Watch the video to see how we used iron on Cricut material to make the cutest, most colorful shirt to honor Hispanic Heritage Month! Featuring a map with Spanish speaking countries was a fun way to integrate text with images. Some of the hispanic countries were quite small, but were able to iron perfectly!
We wanted to include many colors, so you’ll have lots of opportunities to see how each layer irons on the shirt with ease!

Tips for Using Iron On Cricut Material
What Iron Should I Use? Traditional irons aren’t the perfect heating option for shirts using iron on Cricut material. This is because irons have holes with inconsistent temperatures that will make the process more difficult and less precise. The best option is to get one of the many varieties of Cricut’s Heat Presse Machines. We have the Mini!
What’s the best way to remove iron negative pieces of Cricut material? The negative pieces are extra pieces of material that you will need to remove as they aren’t meant to be ironed on. The best tool for this is Cricut’s weeder tool!
When Can Kids Start Making Their Own Projects on the Cricut? Kids can start to explore making amazing projects on the Cricut Joy as early as 9 years old with adult supervision. And by 13 years old, they can independently use it! They will have so much fun making as many Cricut shirt designs, cards, labels, and more!
Materials
Step-by-Step Instructions
Step 1
Head to the Cricut Design Space App and choose a project, upload a SVG file, or create your own design in the app using the fonts and shapes available.
Step 2
Based on the size of your shirt, be sure to adjust the size of your design so it fits perfectly.
Step 3
Click the make it button.
Step 4
If using a text design, be sure to select the mirror button.
Step 5
Follow the prompts selecting the correct insert material and then inserting it (shiny side down) into the Cricut Joy to be cut.
Step 6
Once cut, use your weeding tool to remove the excess material.
Step 7
Finally, heat the Easy Press and iron on your design to the shirt! Note: standard irons are not recommended because they do not distribute the heat in the same even way as the Easy Press.
More DIY Shirt Inspiration Using the Cricut Joy!
If you love our Hola! shirt, you have to check out this easy-to-make “be kind” shirt too!
The message is so sweet, and using a yellow colored shirt truly allows the words to radiate and shine!
All activities should be supervised by an adult. As an Amazon Associate I earn from qualifying purchases. This post may contain affiliate links.
More Ways Kids Can Create!
Here are my top picks for kits for kids who love DIY projects!

Monthly Creative Kits
Every month this subscription delivers not 1, but 2 kits. Each has everything you need to craft with minimal adult supervision including painting, beading, stitching, paper crafting, and much more.

Monthly Woodworking Projects
These kits introduce a wide variety of woodworking skills including learning to use small screws and nails, handling a hammer, learning how to measure, and so much more!

Pottery Wheel for Kids
A fun way to create your own decorative air dry pottery. It is great for beginners. It comes with 2 lbs of air dry clay, paints, apron, a 2 speed wheel with attachments, and more.

DIY Soap and Bath Bombs
This kit comes with supplies to make 10 soaps and 10 bath bombs. You can also create salt scrubs and fizzy bath salts. A fun way to create and learn science at the same time!
What’s Next?
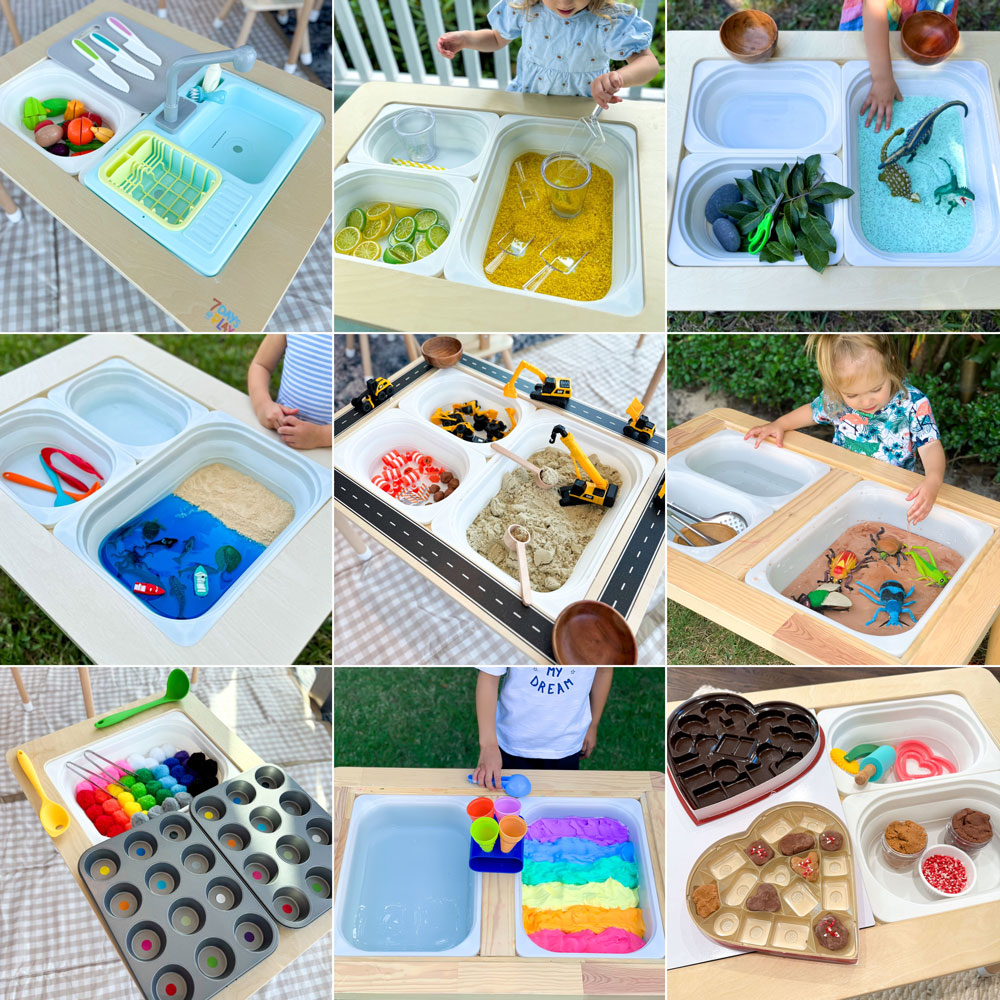
The Best Sensory Bin Ideas to Keep Kids Engaged for Hours
The best sensory bin ideas to keep kids engaged for hours! Fun, hands-on activities that spark creativity, learning, and fine motor skills.

The Best Easter Ideas for Kids
Discover the best Easter ideas for kids including basket ideas, egg fillers, crafts, activities, decorations, and printables to make Easter fun and easy.
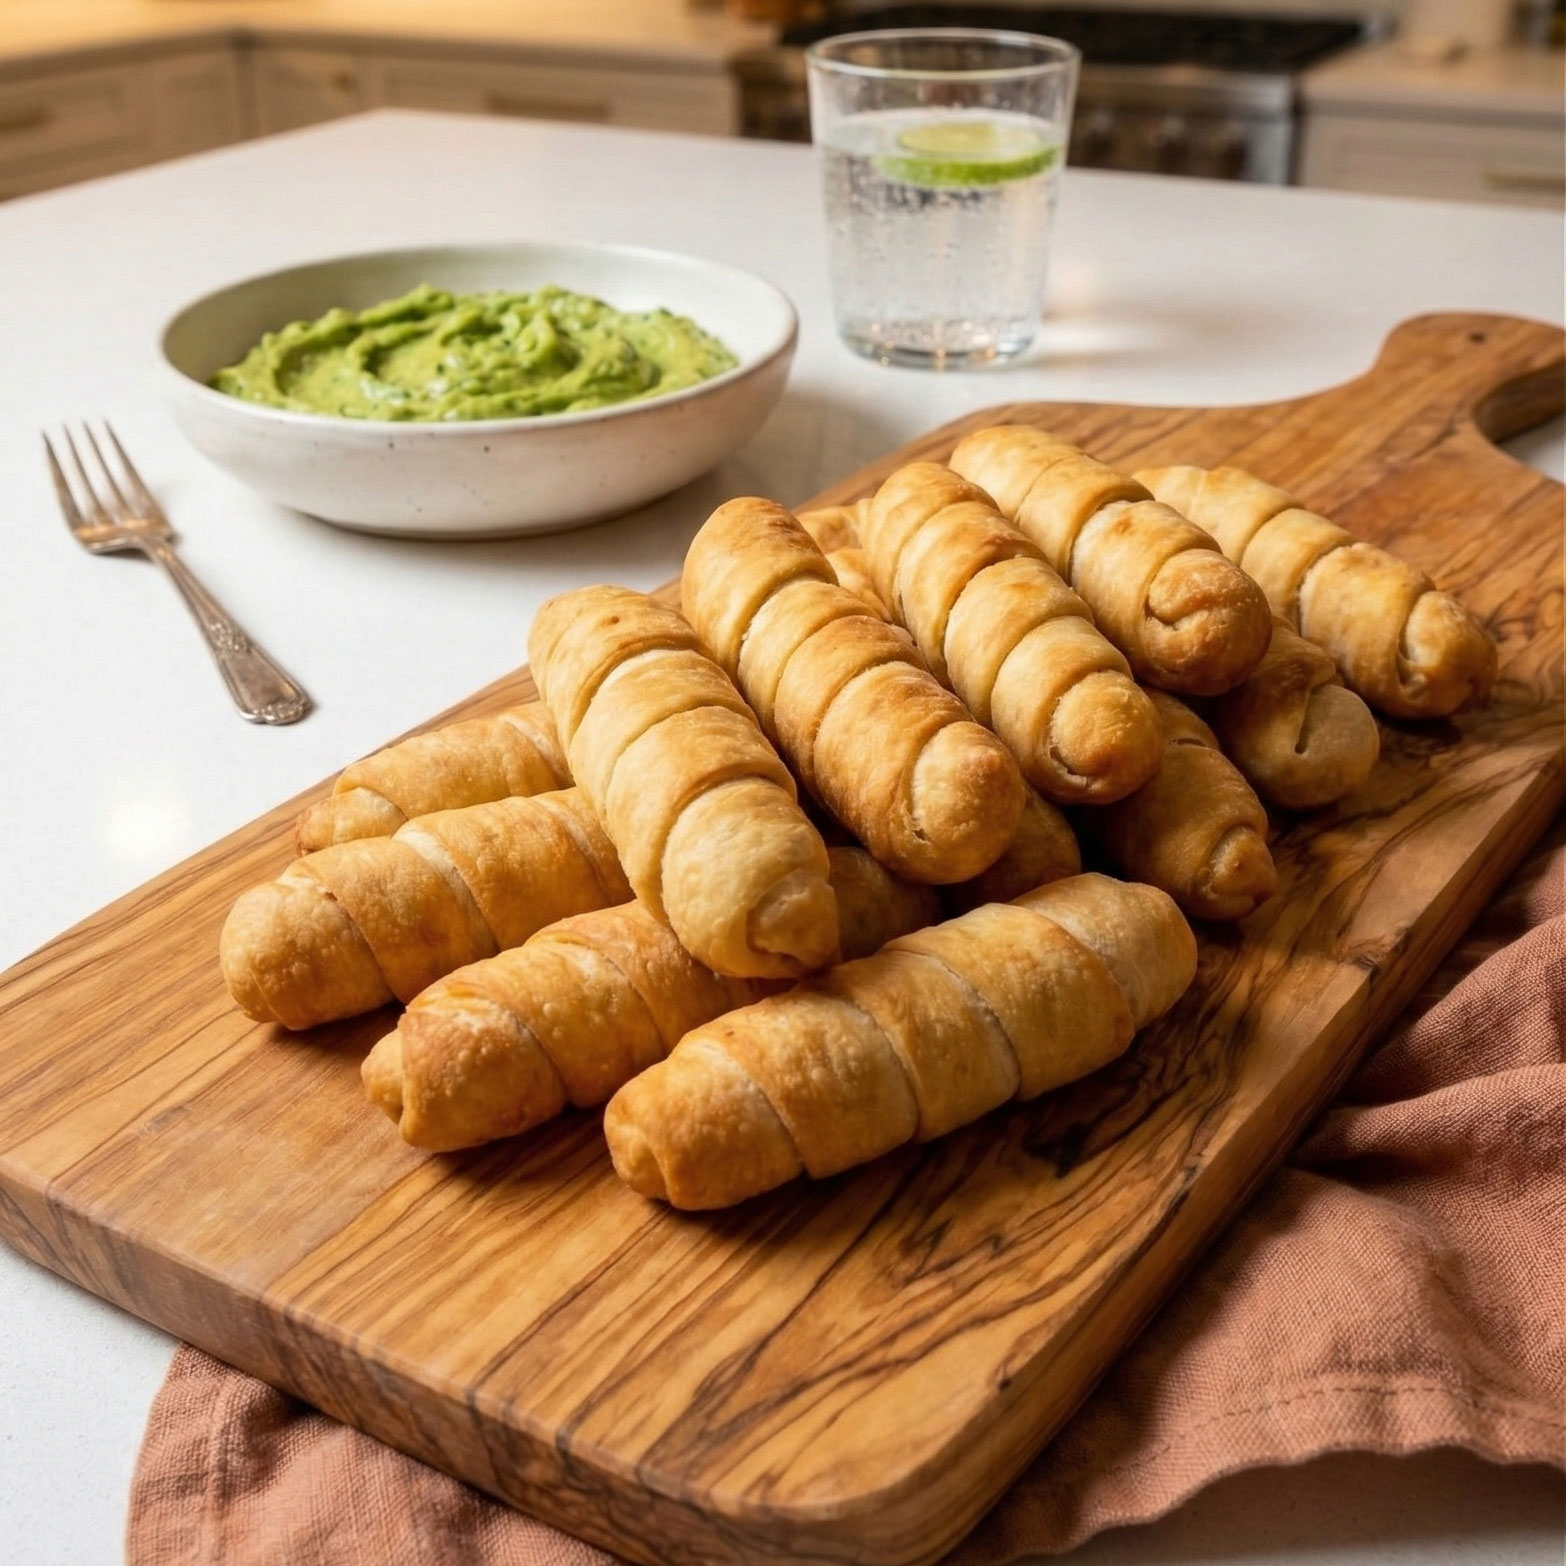
Air Fryer Tequeños, Freeze Ahead and Cook Straight From Frozen
Make Air Fryer Tequeños you can freeze and cook from frozen, crispy dough, melty cheese, plus dips and no-leak tips.