Swap the carving knife for a cordless drill and a seven year old can decorate the whole pumpkin without you taking over. The holes glow like pinpricks of light at night, the pattern is almost impossible to get wrong, and it takes about fifteen minutes.
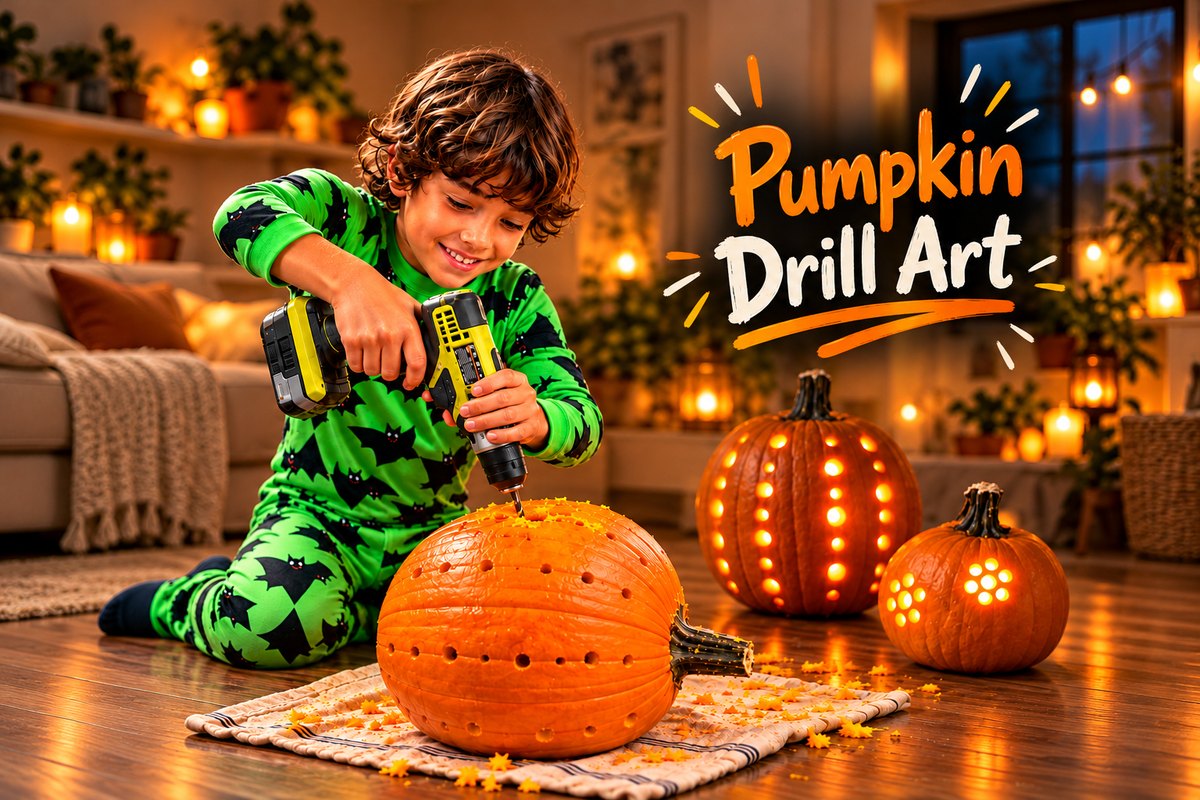
I am not precious about keeping my kids away from real tools. I am precious about setting them up so the risk is small and the win is theirs. A drill is perfect for that. It is heavy and slow, it only does one thing, and once the pumpkin is steady there is no sharp edge anywhere near a hand.
And the result does not look like a kid made it. That matters more to them than we think.
What you need
Supplies
You almost certainly own all of this already.
- A pumpkin – a smooth one with firm walls works best
- A cordless drill – this Ryobi kit comes with a battery, charger and a starter bit set
- Drill bits in three or four sizes – a cheap titanium set from 1/16 to 1/4 inch covers everything here
- A marker for dotting the pattern
- A spoon or ice cream scoop for the insides
- A paring knife or carving saw, for the adult step
- A battery tea light – never a real flame in a pumpkin full of holes
- An old towel to work on
Before the drill comes out
There are two jobs here that belong to you, not them. The first is opening the pumpkin – cut a hole in the bottom with a paring knife, angling the blade inward so it sits back down flat, and scoop it clean. Doing the bottom rather than the top means the finished pumpkin drops straight over a light, and the stem stays on. The second is holding it steady once the drill starts.

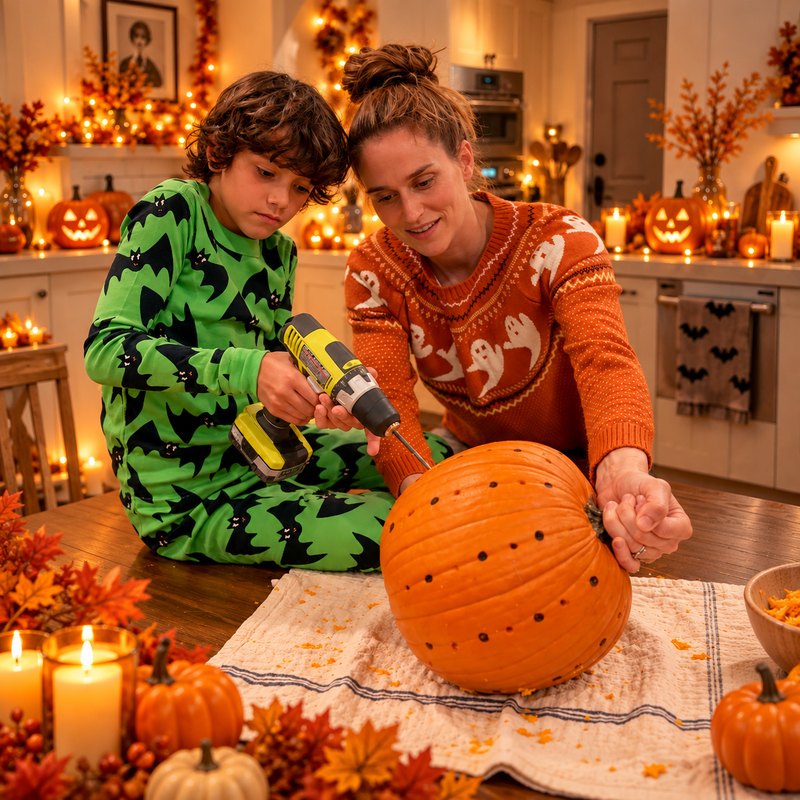
Supervision here is not standing nearby. It is holding the pumpkin yourself so their hands never need to be near the bit, keeping the drill on a low speed setting, and starting hand over hand for the first two or three holes until they feel the bit bite. Tie back long hair, and put the drill down between holes rather than resting it on a leg. My seven year old ran the whole thing after that. A four year old can squeeze the trigger while an adult holds the drill.
How to drill a pumpkin
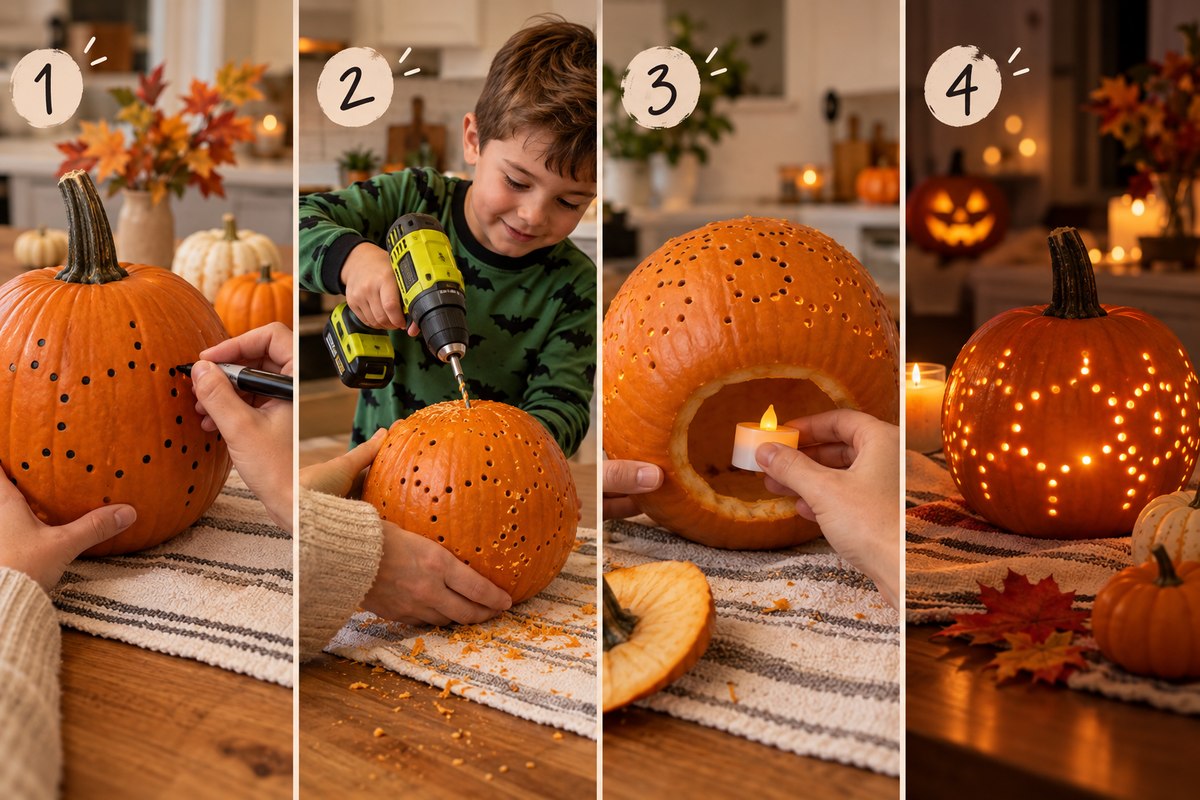
- Cut a hole in the bottom of the pumpkin with a paring knife, angling the blade inward so the pumpkin sits back down flat. Doing the bottom instead of the top means you can set the lit pumpkin straight over the light. This is the adult step.
- Scoop out the seeds and strings. The walls need to be clear so the drill comes through cleanly, and a thinner wall gives a brighter glow.
- Draw your pattern on with a marker – just dots where you want each hole. Rows that follow the pumpkin’s natural ridges look best, and dotting first is what keeps the lines from wandering.
- Set the pumpkin on a folded towel so it cannot roll, and hold it steady yourself.
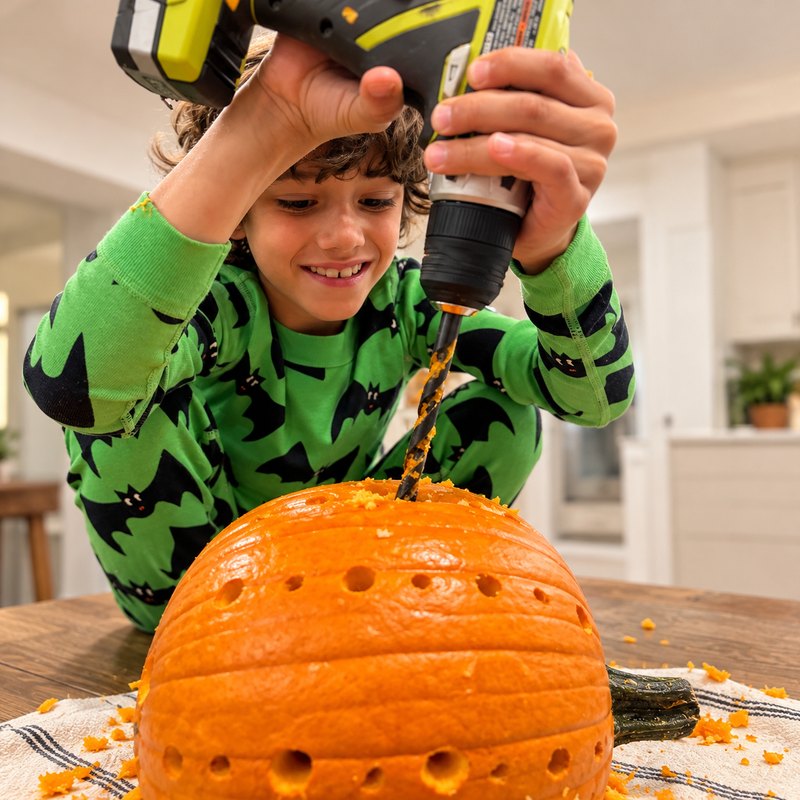
- Drill each dot, straight in and straight back out. Let the bit do the work rather than pushing – pumpkin is soft and it goes through in a second.
- Brush the bits of pumpkin out of the holes, drop a battery light inside, and turn the lights off.
Picking your drill bits
This is the part nobody explains, and it is the whole look. A pumpkin drilled with one bit size reads as a grid of dots. A pumpkin drilled with three sizes reads as a design.
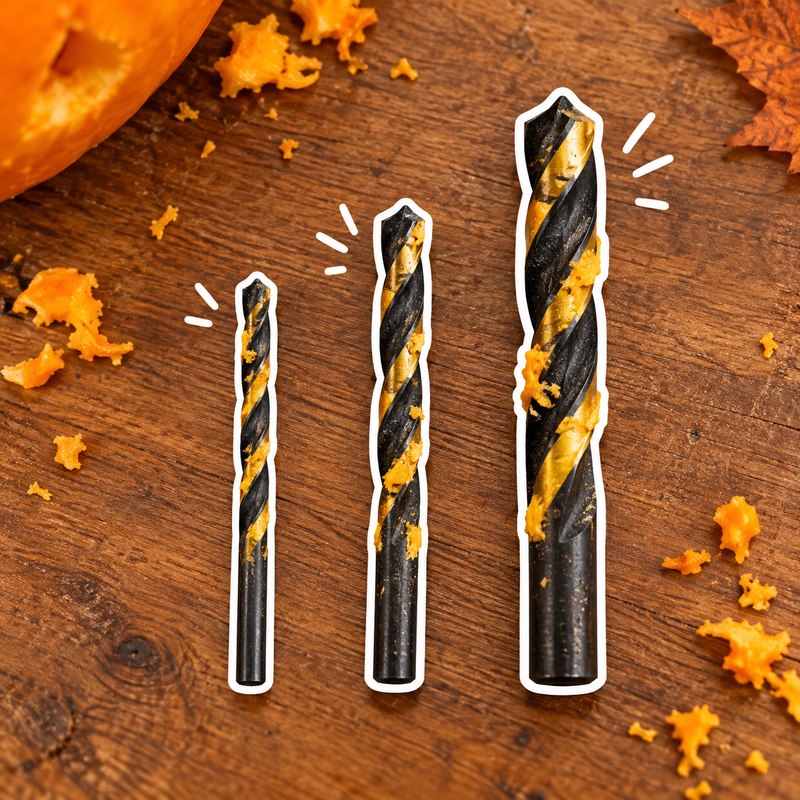
Fine pinpricks. Use these to fill in between the bigger holes and to outline a shape.
Your workhorse. Most of the pattern should be this size.
These are the ones that actually throw light. Use them sparingly, as the focal points of each row.
Run a vertical line of large holes down each ridge, then fill the valleys between them with small ones. That is the pumpkin in the photo above.

Make it easier or harder
You hold the drill, they press the trigger. Pick one bit size and let them cover the pumpkin in random dots.
Hand over hand for the first few, then let go. Draw the dots on for them.
Their project start to finish, apart from cutting the hole. Let them design the pattern on paper first.
A screwdriver pushed and twisted through a small pumpkin makes the same effect with more effort, and an apple corer makes big holes.
Questions we get asked
Is a drill actually safe for a child to use?
With the pumpkin held by an adult, yes – safer than a carving knife, in our experience. The bit only cuts what it is pressed into, the drill is slow at low speed, and there is no blade to slip. The judgment call is your own child, not their age. Start hand over hand and you will know within two holes whether to let go.
What size drill bits should I use?
Three sizes is the sweet spot – one small, one medium, one large. The contrast between hole sizes is what makes the pattern read as a design instead of a grid. Standard twist bits from any household set work fine; you do not need anything special for wood.
Do I need to cut the bottom instead of the top?
Not strictly, but it is easier. Cutting the bottom lets you set the pumpkin down over the light instead of reaching in through a lid, and it keeps the stem intact.
How long do drilled pumpkins last?
About the same as a carved one, roughly five days to a week indoors. More holes means more surface exposed to air, so a heavily drilled pumpkin will soften a little faster.
Can you do this on a mini pumpkin?
Yes, and it is a good first one. Mini pumpkins have thinner walls so the bit goes through fast. Use smaller bits so you do not blow out the side.
Our Halloween favorites