Find Thanksgiving activity sheets for kids, including free printables, coloring pages, scavenger hunts, and games to keep kids entertained!
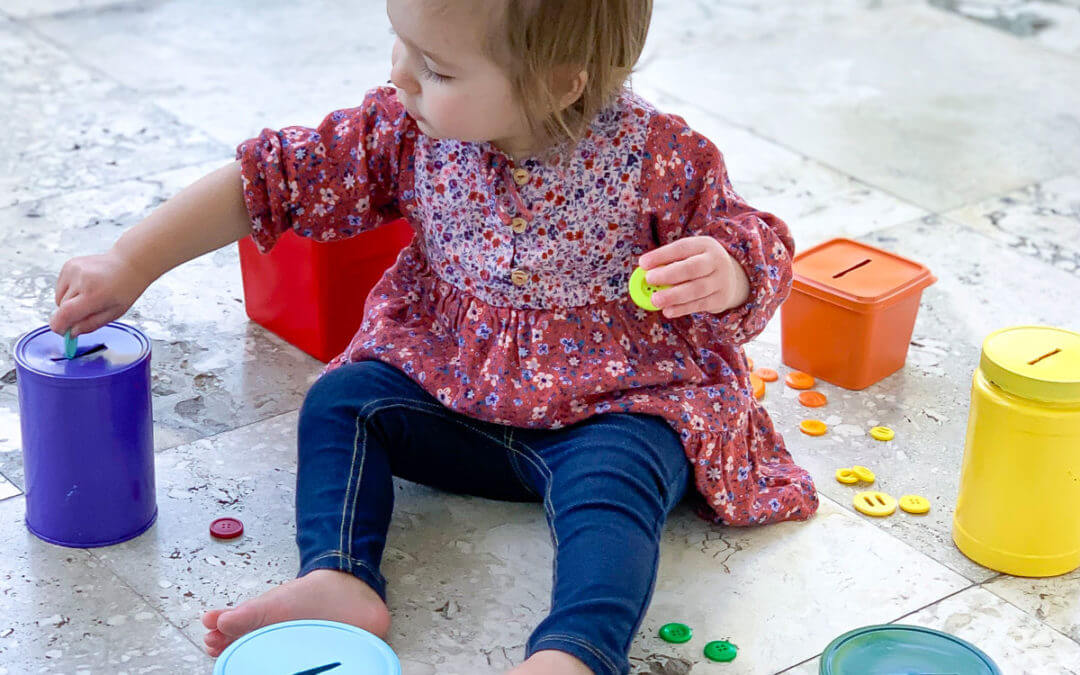
Fun for Toddlers – Color Sort Game with Big Buttons
Fun for Toddlers – Color Sort Game with Big Buttons

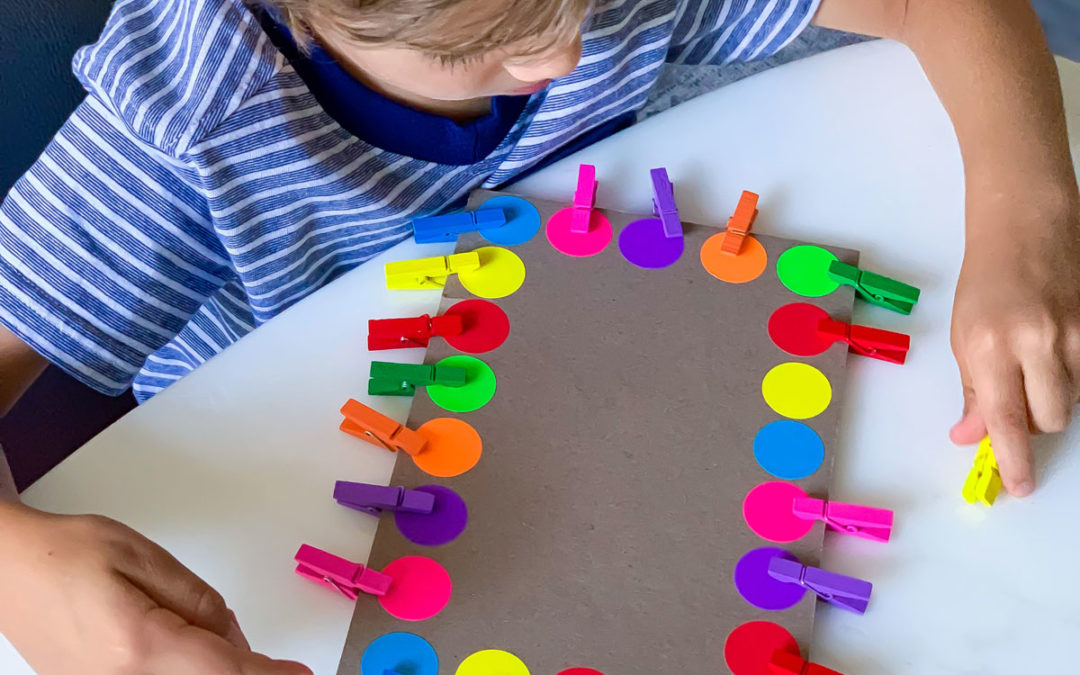
This easy-to-set-up button color sorting activity is fun for toddlers! A great way to learn colors while strengthening fine motor skills and hand eye coordination!
Fun for Toddlers in Everyday Objects!
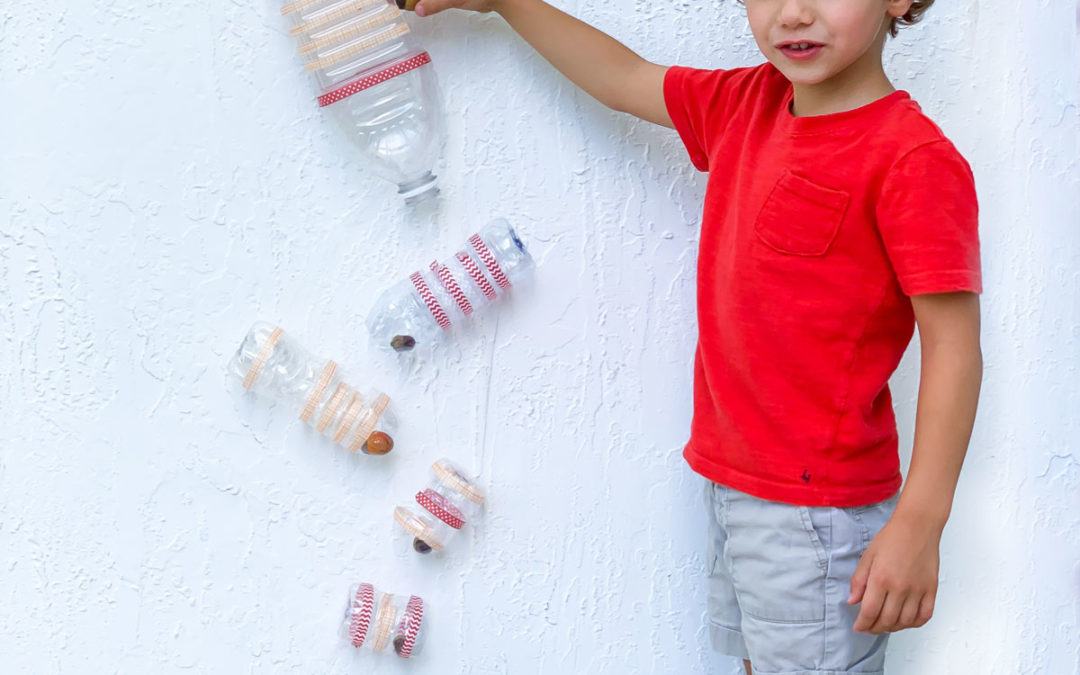
I’m always amazed at how fun and easy activities can be using recycled materials or everyday items. You don’t need a ton of fancy supplies or ideas to make learning fun for toddlers!
It’s also a great way to show kids that they don’t need expensive toys to play with, either. When you can recycle supplies that you can spruce up, it teaches them that it’s completely possible to use your imagination to transform a random object!
This activity must be supervised. As an Amazon Associate, I earn from qualifying purchases. This post may contain affiliate links.
Skills:
Ages:
Prep Time:
Watch This Button Color Sorting Activity in Action!
Even the littlest can enjoy this activity so long as you have big buttons! (Little buttons are a choking hazard and should be avoided with kids under 3 years old!).
In this video, you’ll see my daughter at 18 months. She doesn’t always color sort correctly, but it’s a great opportunity for grown ups to use language and vocabulary to support that learning. Also see how much she loves shaking the containers like a maraca!

Tips for Creating This Fun For Toddlers, Button Sorting Activity
Biggest tip is to start saving your containers! I saved any size, any height, as long as they had a lid that I could cut a slot on top! It was really as simple as that. At that point, you have options. I like to spray paint the entire container since it is such a quick process to cover the entire surface, but you can also just paint the lid with non toxic paint, or use a colorful tape around a section of the container for an even quicker set up!
Also make sure to get the right size buttons based on your kiddo’s age. As mentioned above, small buttons are choking hazards. For kids 3 and under, large buttons are the way to go. Plus, you’ll want to get a set that includes each color as it will be fun for toddlers to match as many as they can!
Materials
- Reusable containers
- Spray Paint or Tape
- Reusable containers
- Spray Paint or Tape
- Buttons
- Sharp Knife
Step-by-Step Instructions
Step 1
Use a sharp knife to cut a slot on the top of each container.
Step 2
Use paint or tape to color each container.
Step 3
Provide big, colorful buttons to sort and color match. This activity is so fun for toddlers!
Step 1
Use a sharp knife to cut a slot on the top of each container.
Step 2
Use paint or tape to color each container.
Step 3
Provide big, colorful buttons to sort and color match! This activity is so fun for toddlers!
More Fun for Toddlers!
There are so many fun and easy ways for toddlers to learn colors! It can be as simple as going on a walk and talk about the colors of the cars you pass!
Color recognition activities are so fun for toddlers that we have done many – be sure to check out our comprehensive list!
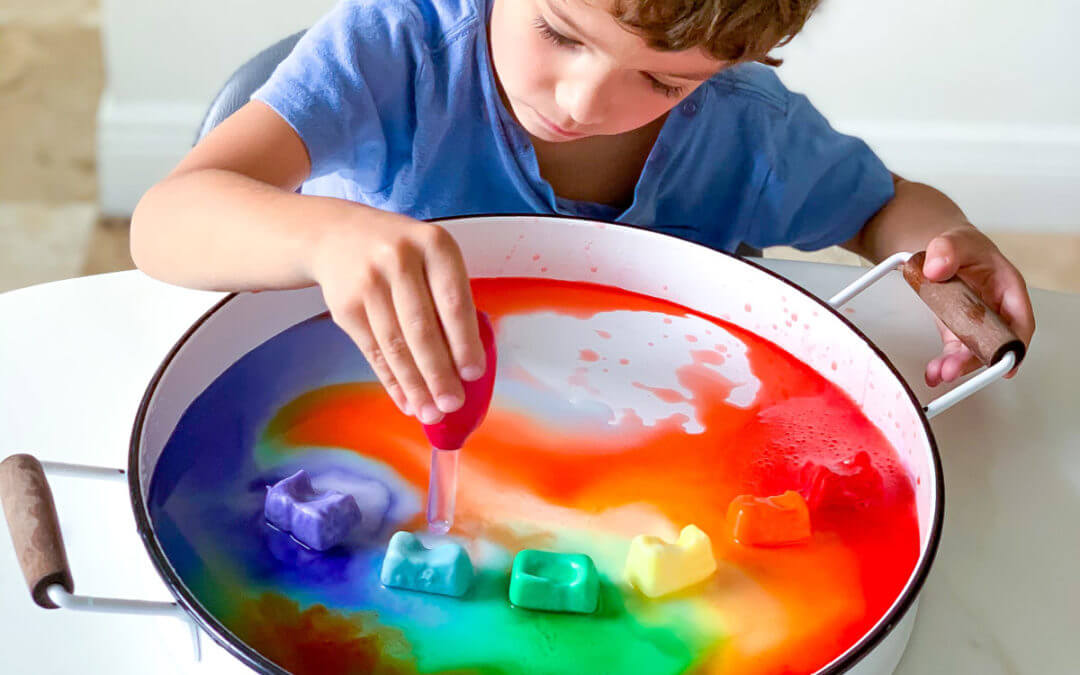
One of our favorites includes a free printable that’s a hands on way to color match using cotton rounds and colored water.
For more printable activities, check out our full collection!

More Fun for Toddlers!
There are so many fun and easy ways for toddlers to learn colors! It can be as simple as going on a walk and talk about the colors of the cars you pass!
Color recognition activities are so fun for toddlers that we have done many – be sure to check out our comprehensive list!
One of our favorites includes a free printable that’s a hands on way to color match using cotton rounds and colored water.
For more printable activities, check out our full collection!
Color Recognition Toys!
Here are my top picks for color recognition toys and gifts that are fun for toddlers!

Transfer pom poms or balls to color sort this rainbow! If you use tongs it is great for fine motor skills too! (Caution: small parts!)

This wooden rainbow stacker is not only great for color sorting, it is also a fantastic open-ended play toy!

This wooden board has a magnetic wand and beads that can be sorted based on color! Great for fine motor skills too!

This game is a great way to learn color recognition while strengthening language development.
What’s Next?

Thanksgiving Activity Sheets for Kids: Free & Printable Holiday Fun
read more

How to Make a Fairy House Pumpkin | Easy No-Carve Idea
Create a fairy house pumpkin using flowers, leaves, and twigs. A magical, no-carve pumpkin decorating idea kids will love this fall!

20 Fall Handprint Crafts to Celebrate the Autumn Season
Discover 20 fall handprint crafts for kids—fun, easy, and perfect for creating adorable autumn keepsakes with little hands.


-17")


-05")