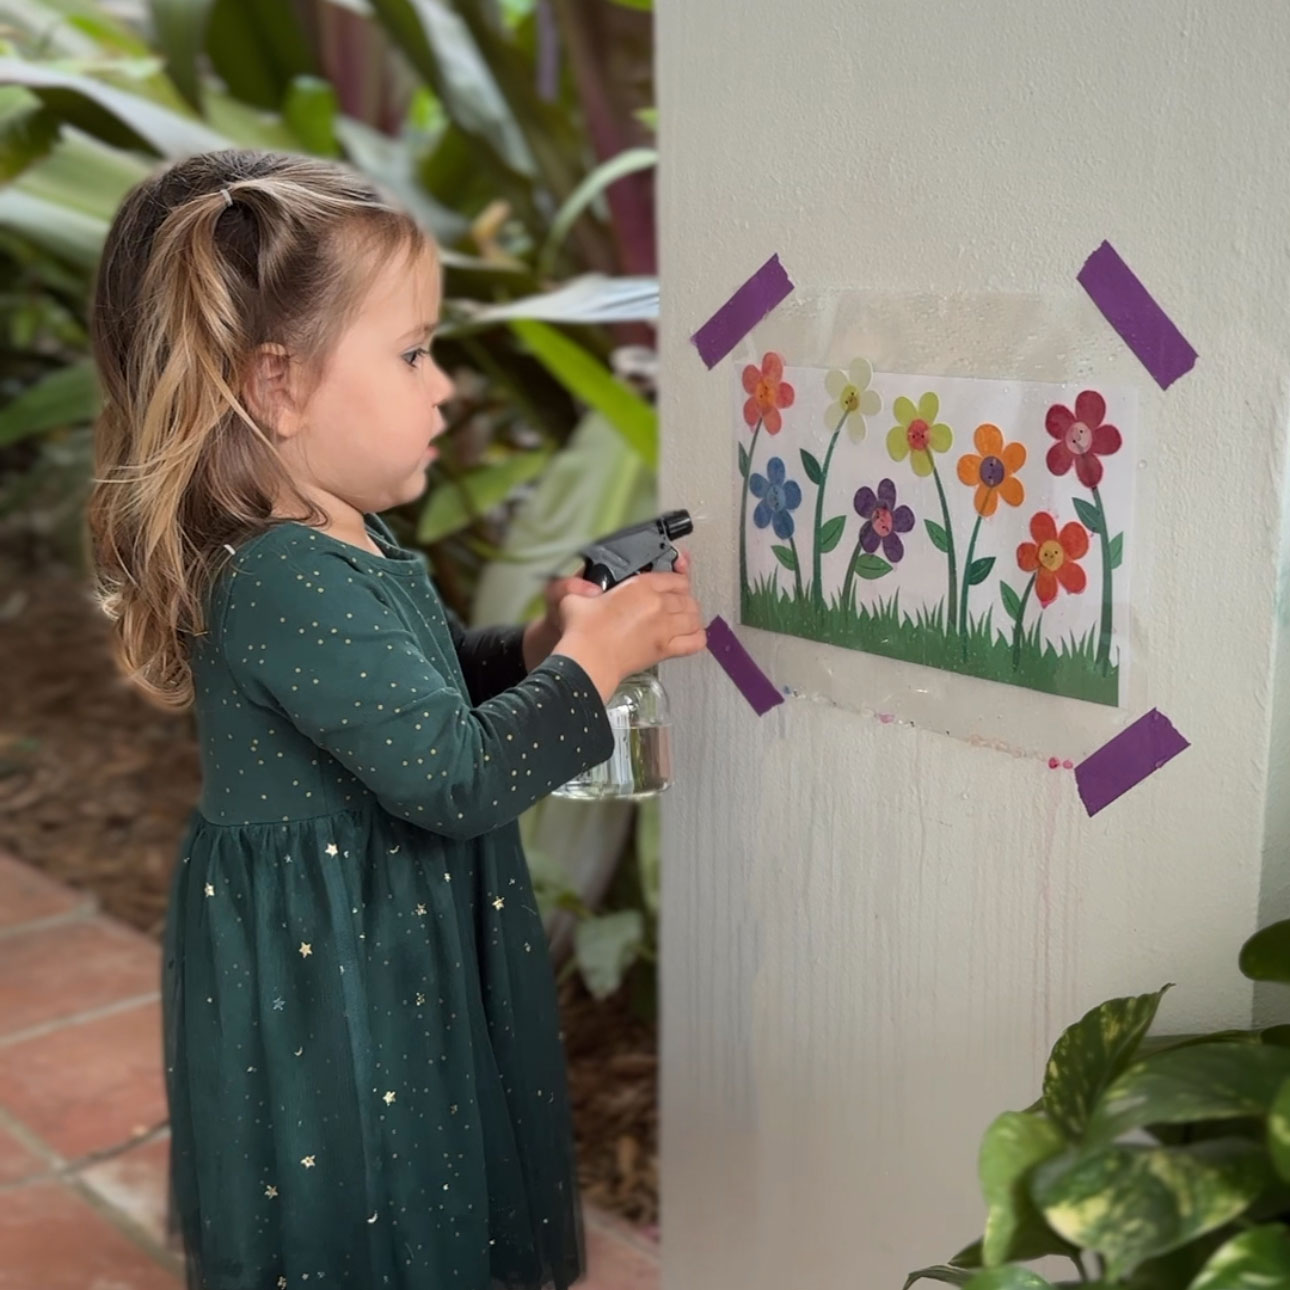
This flower activity is a fun way to learn about how flowers bloom while also strengthening fine motor skills while using a spray bottle!
Easter Bunny Coloring Craft – How to Make a Personalized Card
Easter Bunny Coloring Craft – How to Make a Personalized Card

Discover how to create a personalized Easter bunny coloring craft with our step-by-step guide, perfect for making cards and table settings!
Create a Personalized Keepsake with this Easter Bunny Coloring Craft
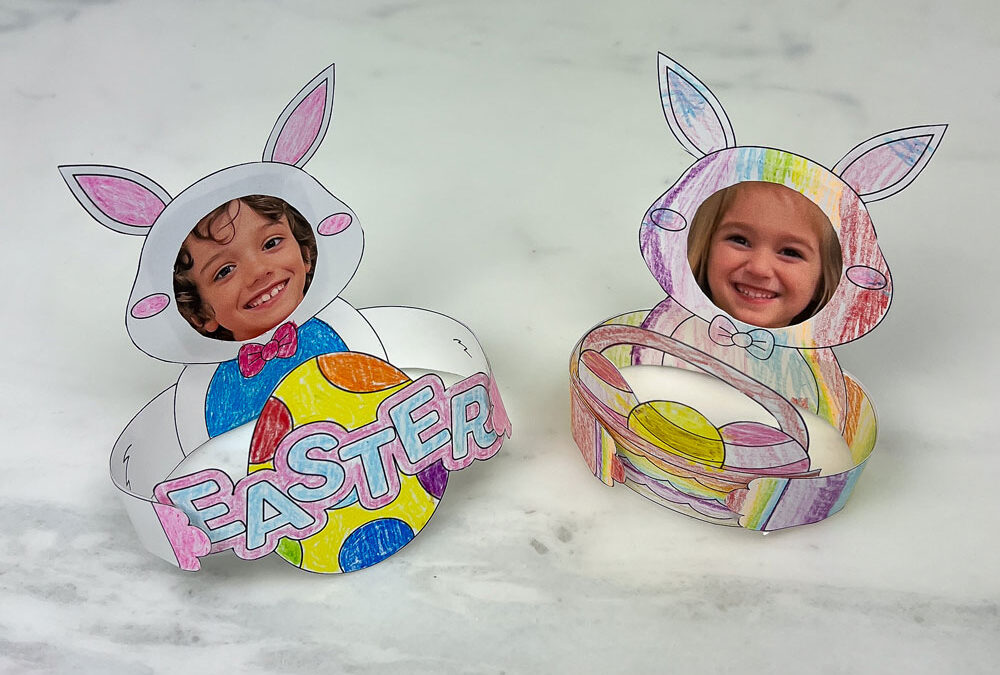
Easter is just around the corner, and what better way to celebrate than with a fun and creative craft? Keep reading to explore this super fun printable coloring craft featuring an adorable Easter bunny. But what sets this craft apart is its interactive 3D design, allowing you to personalize it with your own face and use it as both a card and a table setting decoration. Get the printable HERE!
All activities should be supervised by an adult. As an Amazon Associate, I earn from qualifying purchases. This post may contain affiliate links.
Skills: Arts and Crafts
Ages: 3+
Prep Time: 15 min
Watch How to Assemble This 3D Easter Bunny Coloring Craft!
Watch the video to see how to assemble this adorable Easter bunny coloring craft!
This craft takes Easter coloring to a whole new level. When you add your own picture and color the bunny, it really makes this printable special!
But the real kicker? Those arms! They stretch forward, ready to hold a basket of eggs or a cute Easter egg. It’s such a fun detail that really brings the card to life. Kids will have a blast with it, and hey, adults might too!
I love how versatile this printable is! First and foremost, it’s perfect for a relaxing coloring session, allowing both children and adults to unleash their creativity and personalize their own Easter bunny masterpiece.
Once colored, the printable can serve as a standalone greeting card, ideal for sending heartfelt Easter wishes to friends and family. Pair it with an Easter gift to add an extra special touch, turning it into a charming card that doubles as a delightful keepsake. For those hosting an Easter gathering, consider using the bunny as a unique place holder for table settings, adding an adorable touch to your festive decor!

Tips for Creating This Easter Bunny Coloring Craft
Choose Quality Materials: Opt for sturdy cardstock paper when printing your Easter Bunny template. This ensures durability and stability for your 3D card once assembled.
Personalize Thoughtfully: When adding a photo to customize the bunny’s face, select one that fits well within the designated area and complements the overall aesthetic of your craft.
Experiment with Decorations: Have fun embellishing your Easter Bunny with additional decorations such as glitter, stickers, or even small embellishments like ribbon or sequins.
Materials
Step-by-Step Instructions
Step 1
Download the printable Easter bunny template and print it on sturdy cardstock for durability.
Step 2
Color your bunny!
Step 3
Cut out a photo of your face to fit within the designated area on the bunny’s head.
Step 4
Carefully cut along the solid lines of the bunny and Easter egg images, including the arms that wrap around for a 3D effect. Take your time to ensure neat edges.
Step 5
Fold along the line intended for folding to create the bunny’s body and arms. Use glue or tape to secure the hands, forming the 3D structure. Make sure the arms are positioned to hold either a basket of eggs or the single Easter egg.
Easter Activity and Gift Guide!
And if you are looking for more ways to have fun this Easter season, check out our Easter Activity and Gift Guide—a jam-packed resource! Inside, you’ll find tons of activities to keep them entertained, like egg decorating, Easter egg hunts, bunny-themed crafts, and more DIY cards. Need ideas for Easter basket gifts? We’ve got you covered with suggestions. Plus, our guide doesn’t stop at Easter-specific activities. We’ve thrown in plenty of spring-inspired ideas too!
Check our our Easter Guide HERE!
More Easter Themed Activities!
Explore some more of our favorite Easter themed activities and printables!

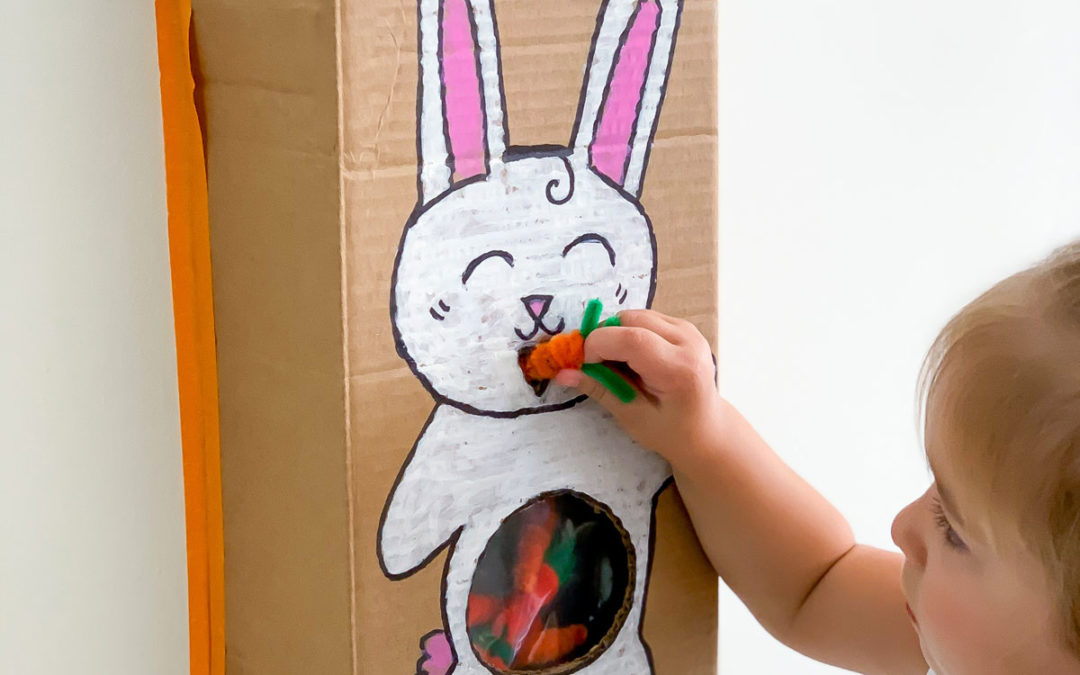
Feed the Bunny Activity!

Hatch the Egg Printable!

Bunny Math – Learn Addition Printable!

20+ Easter Printable Activities!
What’s Next?
Flower Activity for Preschoolers with Free Printable!
read more
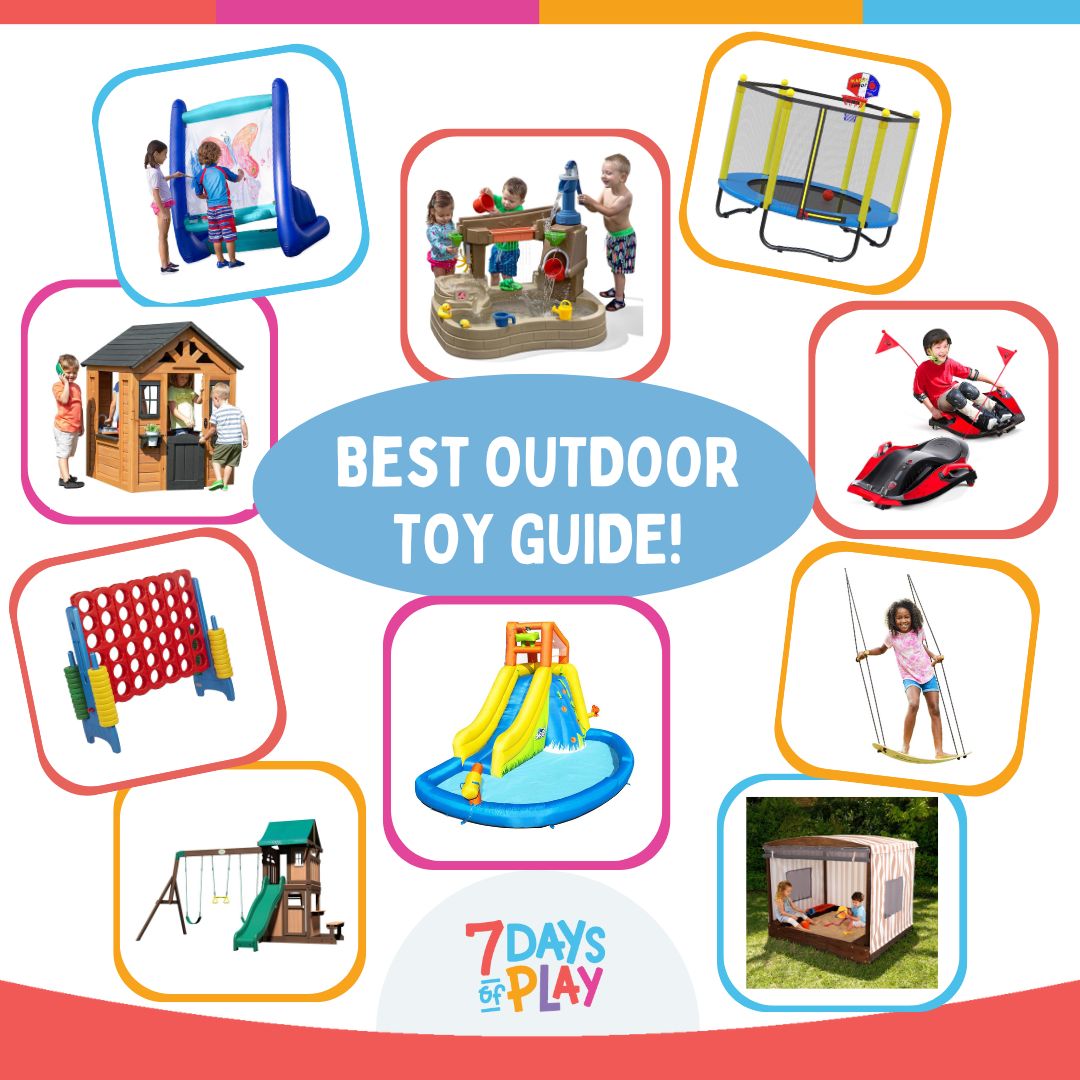
The Best Fun Outdoor Toys for Kids in 2024
Explore fun outdoor toys for kids in 2024! From sandboxes to water toys, bikes, games, and more. Keep your kids entertained all year long!
Gross Motor Skills for Preschoolers – Your Ultimate Guide
This is your ultimate guide to understanding gross motor skills for preschoolers including activity ideas and product suggestions!