The best sensory bin ideas to keep kids engaged for hours! Fun, hands-on activities that spark creativity, learning, and fine motor skills.
The Best Sensory Bin Ideas to Keep Kids Engaged for Hours
The Best Sensory Bin Ideas to Keep Kids Engaged for Hours

Discover the best sensory bin ideas to keep kids engaged for hours! These fun, hands-on activities spark creativity, learning, and fine motor skills.
Must-Try Sensory Bin Ideas
Sensory bins are a game-changer for hands-on play! They’re not just fun—they also help kids develop fine motor skills, creativity, and problem-solving abilities. Whether it’s scooping, pouring, sorting, or engaging in imaginative play, sensory bins provide endless opportunities for learning through play. Sensory play also offers a calming and engaging experience, making it perfect for independent play, quiet time, or group activities. Plus, these activities can be easily customized to match your child’s interests, making them even more engaging.
All activities should be supervised by an adult. As an Amazon Associate, I earn from qualifying purchases. This post may contain affiliate links.

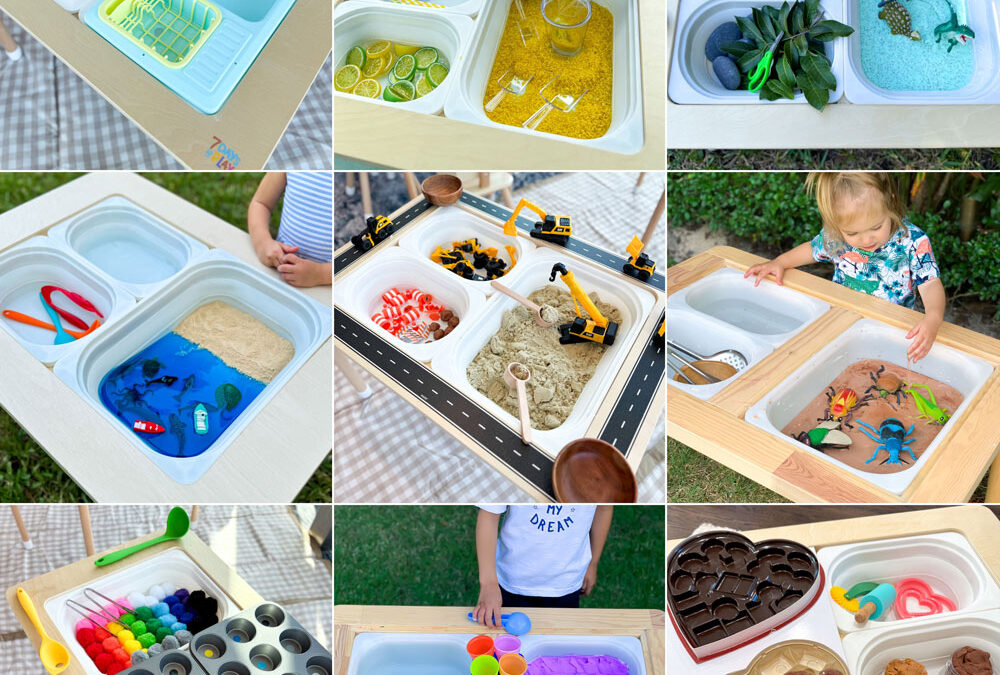
Why I Love Using the 7 Days of Play Sensory Table
At 7 Days of Play, I’ve set up countless sensory bins using my foldable sensory table, and it makes all the difference!
This table is designed with parents in mind—it folds up easily for storage, so you don’t need to dedicate permanent space to sensory play. It’s also the perfect size for different bin activities, making setup quick and simple.
The durable design ensures kids can explore different textures and materials without making a huge mess, and it’s easy to wipe down and store away after playtime.

Wash and Cut Kitchen Sensory Bin
Turn your sensory table into a mini kitchen with this wash and cut sensory bin! Kids can rinse toy fruits in the recirculating sink, sort them in the dish rack, and practice cutting them on a kid-safe cutting board. It’s the perfect setup for imaginative play that also builds fine motor skills and hand-eye coordination.
Supplies:
-
Recirculating toy sink (fits in the 7 Days of Play Sensory Table bin)
-
Cutting board
Construction Sensory Bin
Dig, build, and haul with this construction-themed sensory bin! The combo of sensory sand, mini construction vehicles, and real rocks creates an immersive play experience that kids will love. Bonus: add road tape to the table’s frame for extra creativity!
Supplies:
- Store-bought sensory sand or click HERE for a DIY taste-safe recipe
- Road Tape
- Mini construction vehicles


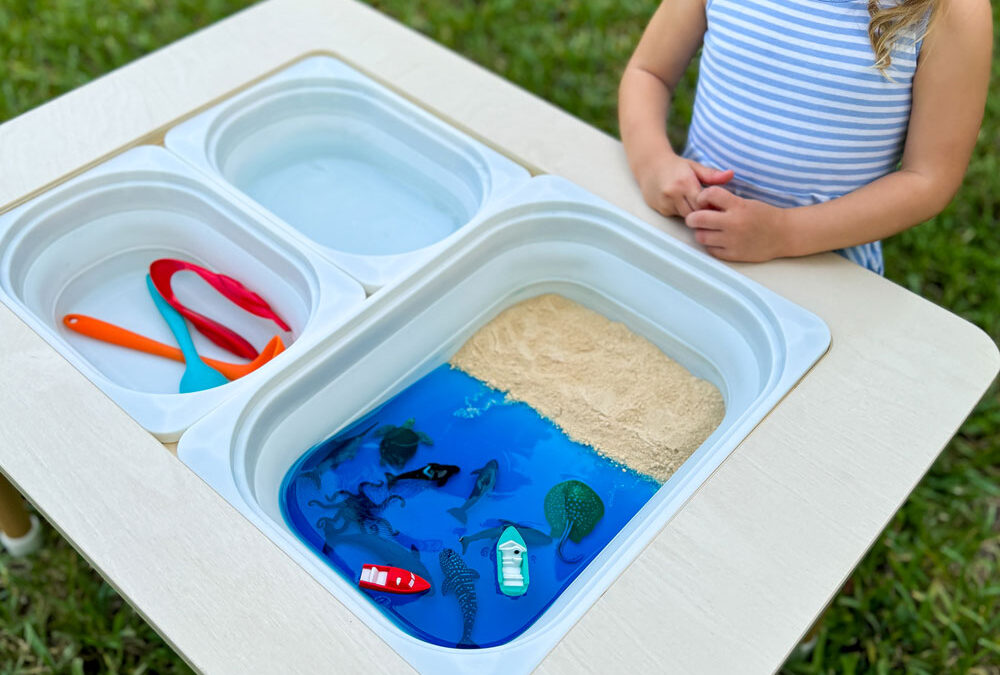
Ocean & Marine Life Sensory Bin
Bring the deep sea to your sensory table with this ocean and marine life sensory bin—a fun and refreshing way for kids to explore water, textures, and pretend play with sea creatures. There are a few creative ways to set this one up depending on your child’s age and your mess tolerance!
Setup options:
(1) Use real water in one bin and waterproof sensory sand in the other for a classic beach and ocean experience.
(2) Swap the water entirely for waterproof blue sensory sand for a mess-free setup that still feels immersive.
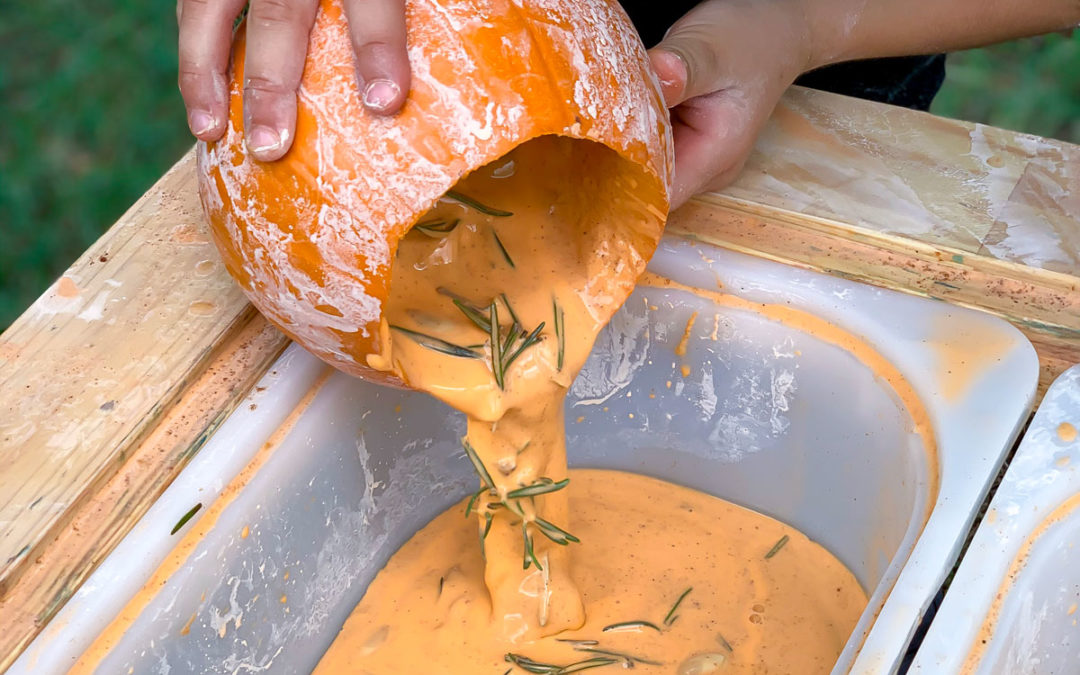
(3) For a toddler-friendly, taste-safe version, use blue Jello as the ocean and crushed Cheerios as the sand (this is the version shown in our photo!). Click HERE for the step by step instructions.
Supplies (mix and match based on setup):
-
Waterproof sensory sand (can be used with or without water)
-
Blue food coloring (if using water)
-
Water (optional)
-
Blue Jello (taste-safe version)
-
Crushed Cheerios (taste-safe sand)
-
Scoops, spoons, and cups for exploring
Color Matching Sensory Bin
Turn sensory play into a fun color-learning activity! In this bin, kids scoop and transfer pom-poms into a muffin tin with color-matching dot stickers, helping with fine motor skills and color recognition.
Supplies:
- Extra Large Pom-poms
- Muffin tin
- Color dot stickers (to place in muffin tin spaces)
- Tongs and mini tool silicone set


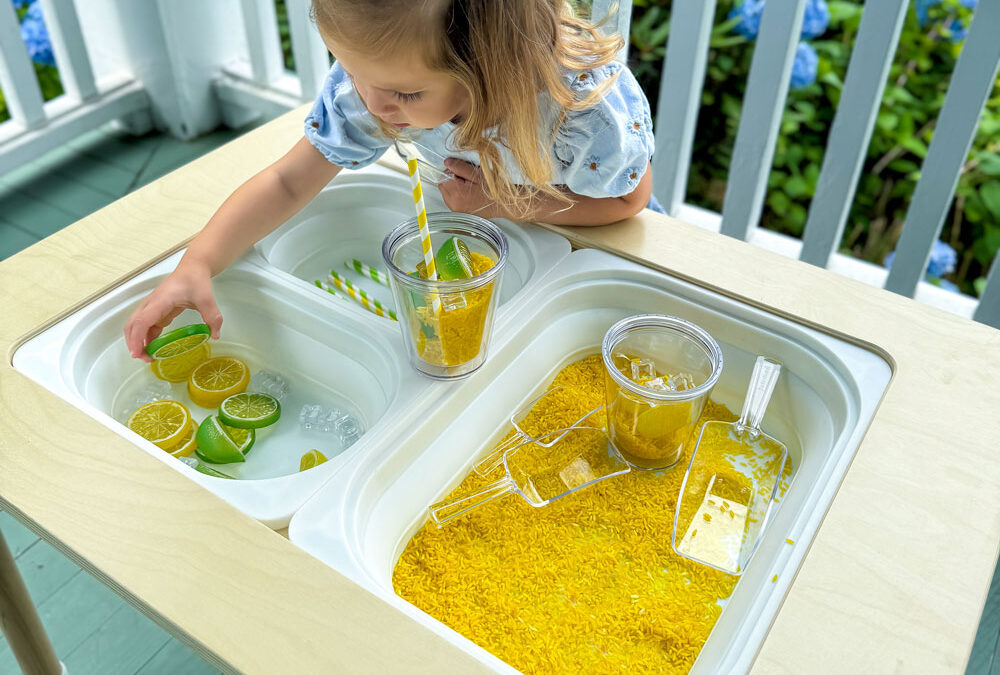
Lemonade Sensory Bin Idea
This lemonade sensory bin is a bright and cheerful activity that’s perfect for summer—or for when you just want to bring a little sunshine indoors! Kids can scoop, pour, and mix their own pretend lemonade using yellow-dyed rice, cups, scoops, and pretend fruit, all while building fine motor skills and engaging their senses.
Supplies:
-
DIY Yellow-dyed rice (click HERE for the recipe)
- Artificial ice, lemon, and lime set
- Cups
- Scoops
- Colorful straws
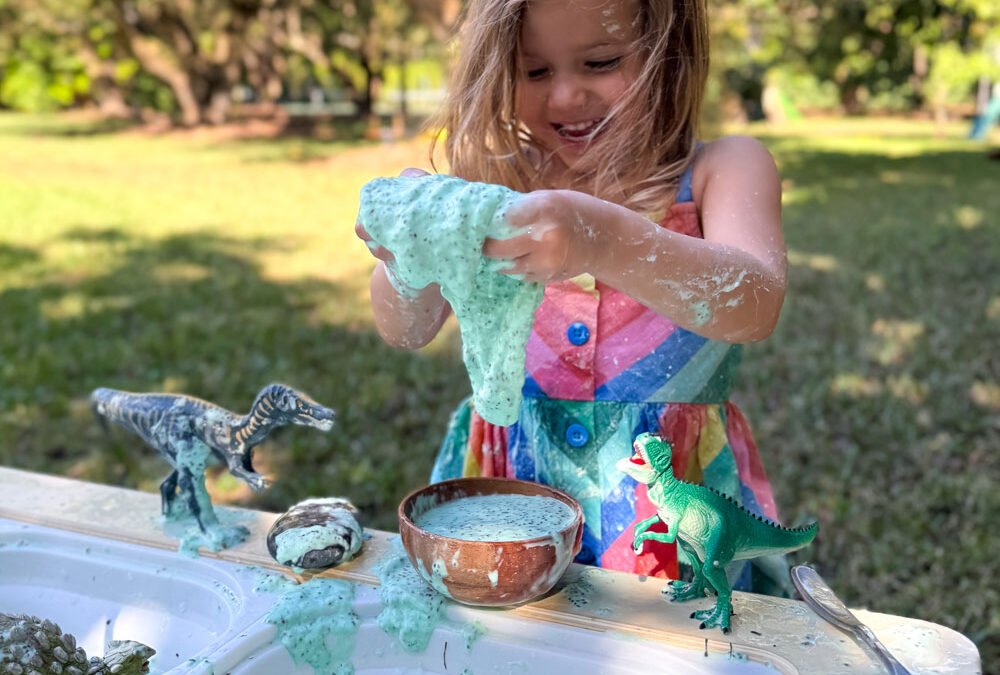
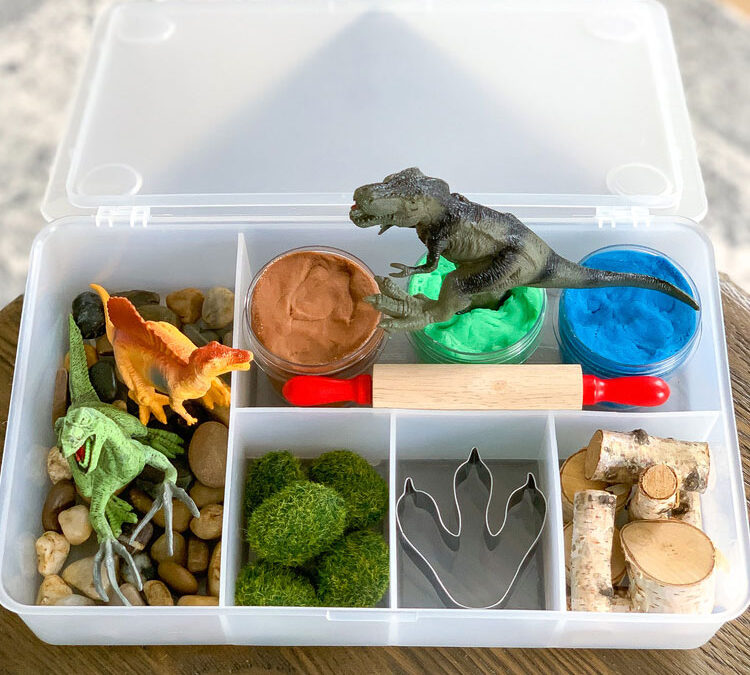
Dinosaur Swamp
Ready to take dino play to the next level? This DIY chia slime dinosaur swamp is a squishy, stretchy sensory bin that feels like a prehistoric swamp—and it’s super easy to make at home. Kids will love stomping their dinosaur figures through the slime and exploring all the ooey-gooey textures!
Supplies:
- DIY Chia Slime
- Dinosaur Figurines
- Small rocks
- Leaves
- Scissors


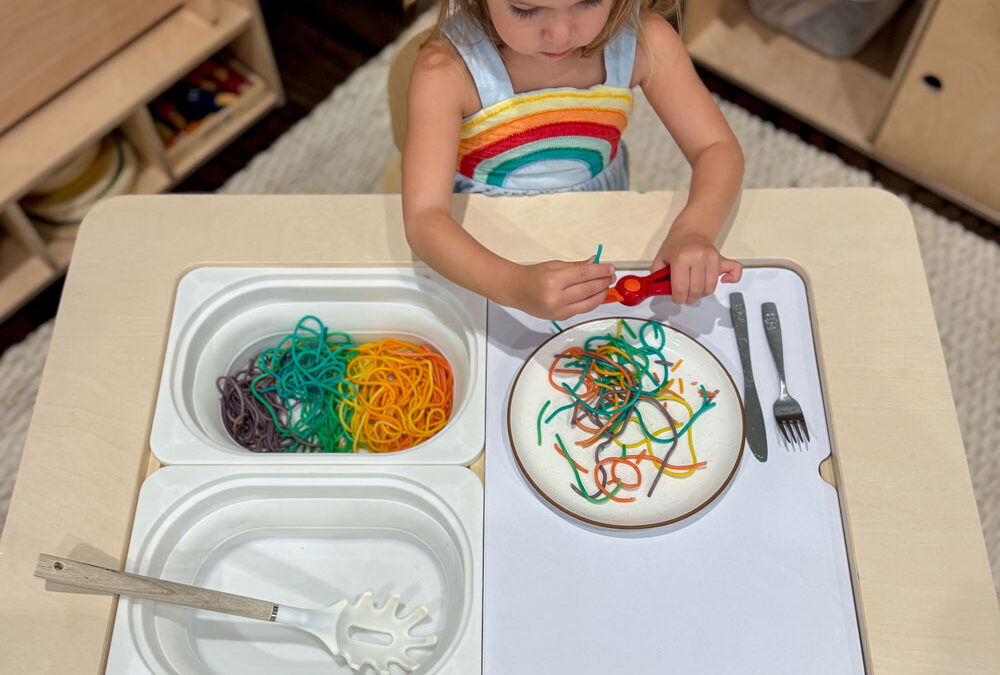
Spaghetti Sensory Bin Idea
This colorful spaghetti sensory bin is a squishy, slippery, and totally irresistible way for kids to explore texture! You can dye the noodles in different colors, toss them into the bin, and let your child squish, squeeze, and mix for a wildly fun sensory experience that’s also taste-safe.
Click HERE for the step by step recipe.
Taste-Safe Foam Sensory Bin Idea
This taste-safe foam sensory bin is bubbly, fluffy fun for kids of all ages—especially toddlers who still like to explore with their mouths! Made with just a few simple ingredients, this foam is safe, easy to whip up, and perfect for scooping, swirling, and imaginative sensory play.
Click HERE for the step by step recipe.


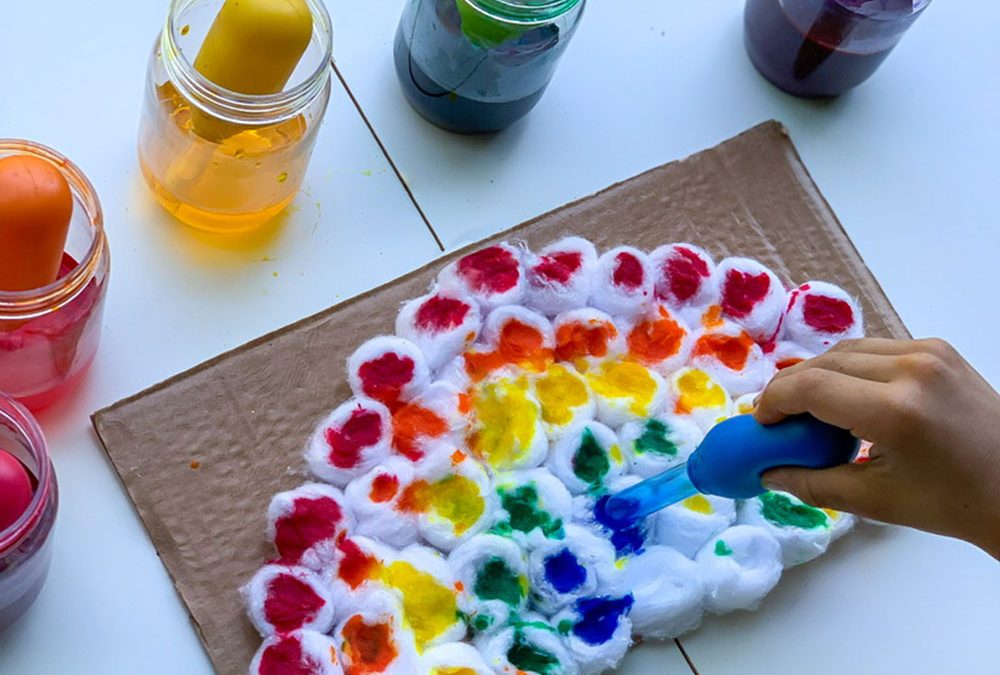
Color Mixing Sensory Bin Idea
This color mixing sensory bin is a vibrant way to introduce early science concepts through hands-on play! Using colored water, droppers, and clear containers, kids can explore how primary colors combine to make new ones—turning sensory fun into a mini science experiment.
Click HERE to read more about how I set this up.
Shaving Cream Cones Sensory Bin Idea
This shaving cream cones sensory bin is a whipped and wonderful way to spark imaginative play! Kids can pretend they’re running their own ice cream shop while building fine motor skills as they scoop, swirl, and sprinkle colorful “ice cream” into toy cones.
Supplies:


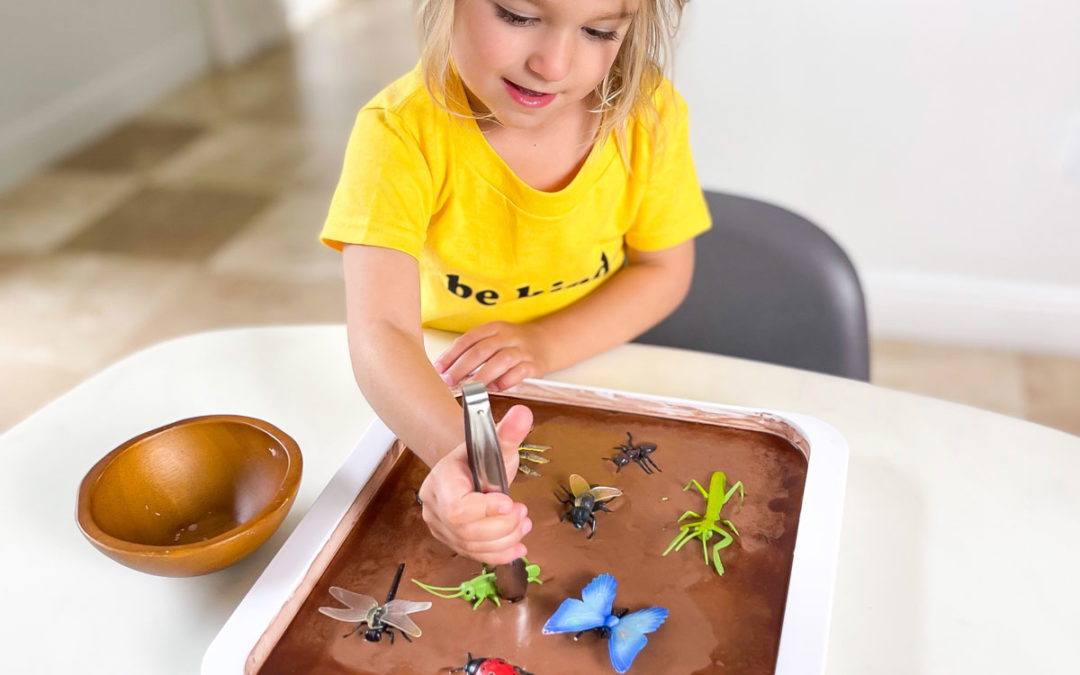
Taste-Safe Mud Oobleck Sensory Bin Idea
This taste-safe mud sensory bin uses oobleck to create a gooey, muddy mess that’s actually safe for little ones to explore! It’s the perfect setup for digging, scooping, and messy play—without any worry if your toddler decides to sneak a taste.
Supplies:
- Click HERE for step by step recipe
- Little Bugs or Big Bugs (as featured)
-
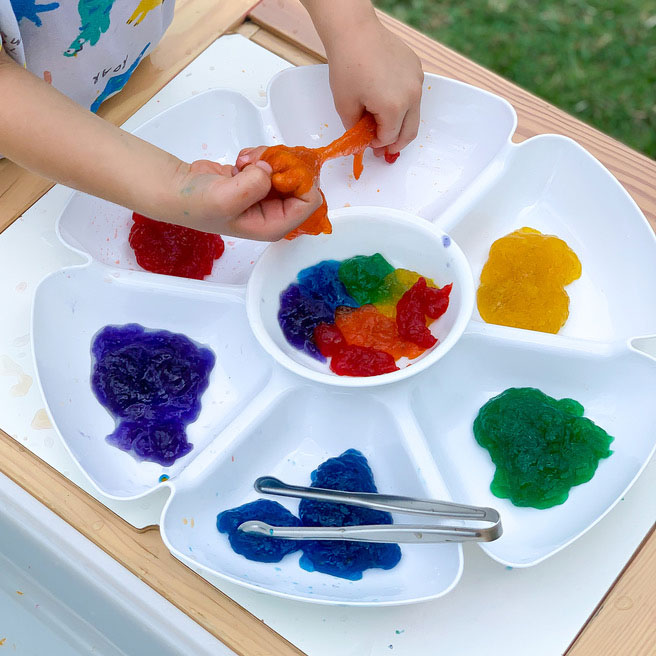
Toddler-Friendly Slime Sensory Bin Idea
This slime sensory bin for toddlers is stretchy, squishy fun made with safe, taste-friendly ingredients—perfect for little ones who love to explore textures! It’s easy to make, soothing to play with, and a great way to introduce slime without the worry of harsh chemicals.
Click HERE for the step by step recipe.


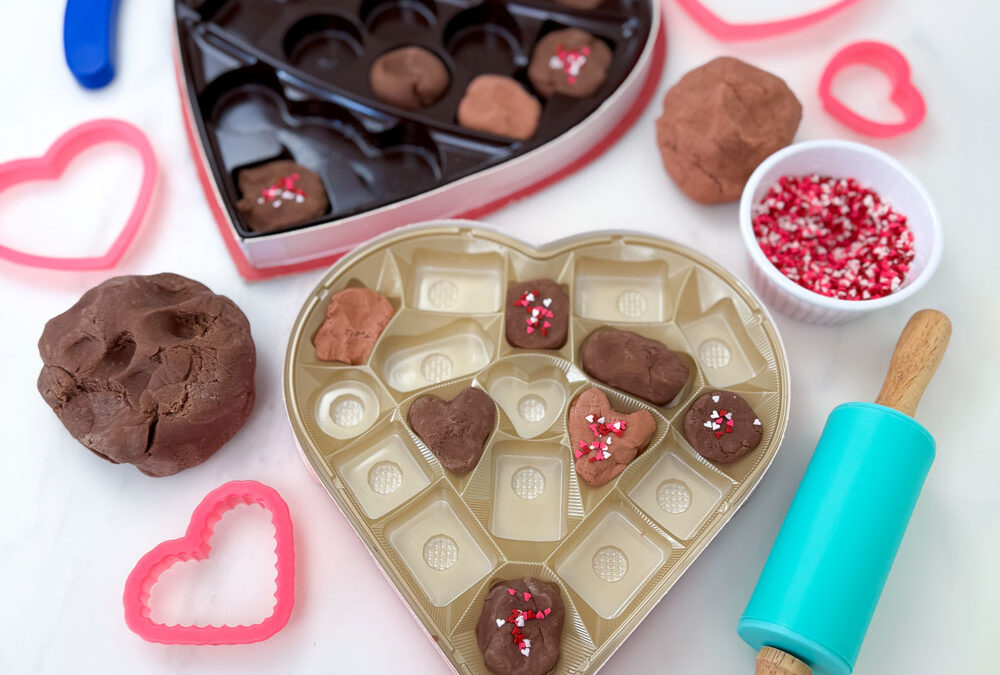
Cocoa Playdough Sensory Bin Idea
This cocoa playdough sensory bin smells just like chocolate and adds an extra layer of sensory fun to classic playdough time! It’s soft, easy to mold, and made with taste-safe ingredients—perfect for rolling, squishing, and pretend baking play.
Click HERE for the step by step recipe.
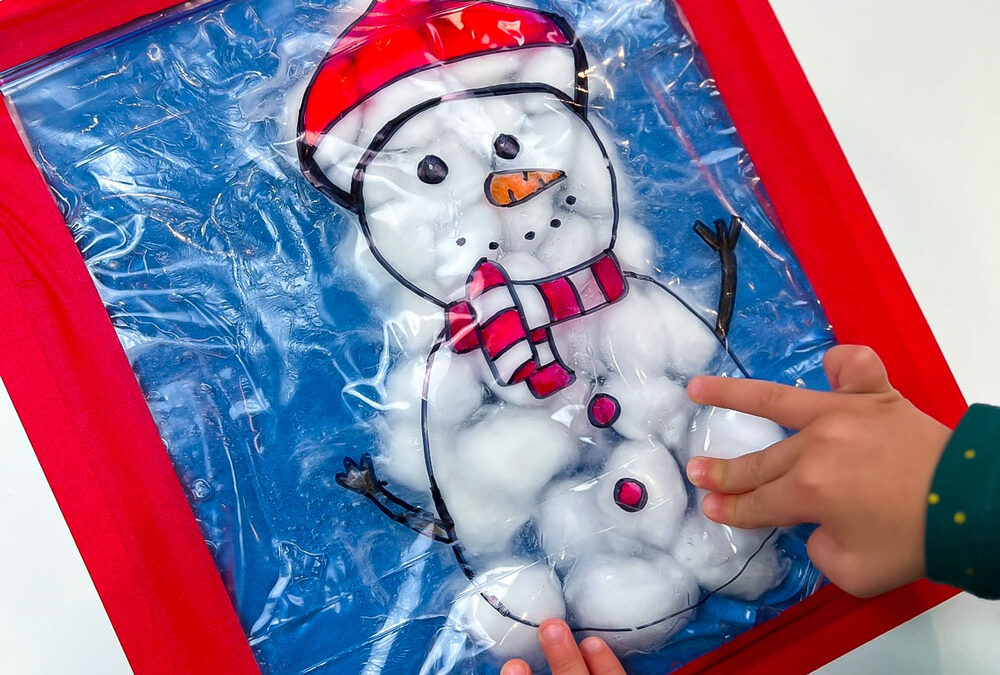
DIY Snow Sensory Bin Idea
This DIY snow sensory bin brings all the frosty fun indoors—no cold weather required! With just a couple of simple ingredients, you can create a cool, crumbly snow-like texture that’s perfect for scooping, molding, and pretend winter play.
Click HERE to explore 4 different DIY snow recipes.


More Taste-Safe Sensory Bin Ideas for Little Ones
If you’re looking for sensory bin ideas that are safe for toddlers and little ones who love to taste everything, I’ve got you covered! I rounded up 12 of our favorite taste-safe sensory play activities that are perfect for curious kiddos. From edible mud to safe “sand,” these activities are great for younger kids or anyone exploring sensory play with a side of peace of mind.
👉 Click HERE to check out all 12 taste-safe sensory play ideas!
The Benefits of Sensory Play
Sensory bins aren’t just fun—they’re packed with developmental benefits! They help:
-
Build fine motor skills through scooping, grasping, and transferring objects.
-
Encourage imaginative play and creative thinking.
-
Strengthen problem-solving skills as kids explore different textures and materials.
-
Support language development, especially when playing with themes like kitchens, construction sites, or ocean life.
By using a sensory bin, kids can learn through play while staying engaged for hours. Try these ideas, mix and match materials, and create your own unique sensory experiences!
What’s Next?
The Best Sensory Bin Ideas to Keep Kids Engaged for Hours
read more

The Best Easter Ideas for Kids
Discover the best Easter ideas for kids including basket ideas, egg fillers, crafts, activities, decorations, and printables to make Easter fun and easy.
Air Fryer Tequeños, Freeze Ahead and Cook Straight From Frozen
Make Air Fryer Tequeños you can freeze and cook from frozen, crispy dough, melty cheese, plus dips and no-leak tips.


_Green-17")