The Best Arts and Crafts Supplies for Kids 2024

The Best Arts and Crafts Supplies for Kids 2024

The Best Arts and Crafts Supplies for Kids 2025

the best arts and crafts supplies for kids

Discover the best arts and crafts supplies for kids! Keep reading to explore fun, mess-free options and awesome craft kits to spark creativity!

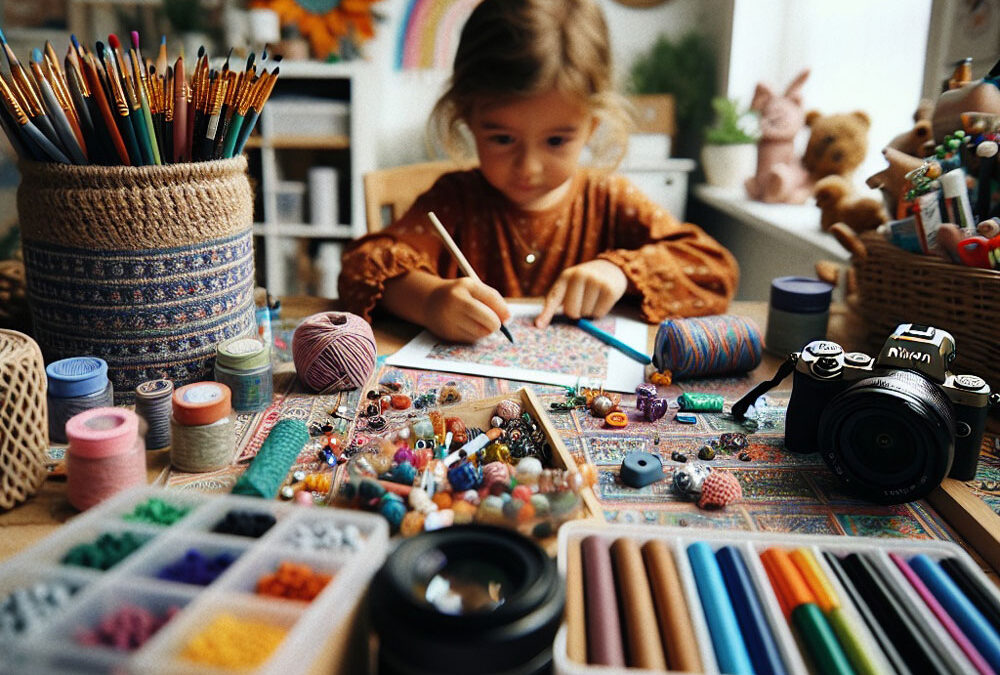
Kids’ Arts and Crafts Supplies: Your Guide to Creative Adventures

Welcome to our ultimate guide on the best arts and crafts supplies for kids! Engaging in arts and crafts isn’t just a fun way to pass the time; it’s essential for a child’s development. Creative activities help kids enhance their fine motor skills, boost their problem-solving abilities, and foster emotional expression. With the right arts and crafts supplies, children can explore their imaginations and develop critical thinking skills, all while having a blast. Keep reading to discover the top supplies that will inspire creativity and support your child’s growth in exciting ways!

All activities should be supervised by an adult. As an Amazon Associate, I earn from qualifying purchases. This post may contain affiliate links.

The Best Art Supplies for Kids

Get ready to explore a world of color and creativity with our top picks for the best art supplies that every kid will love.

Crayola art kit

Art Supply Set of Crayons, Colored Pencils and Markers with Carrying Case

paper brushes and paint set

Washable Paint, Brush, and Paper Set

water color set crayola with 16 colors

Watercolor Set with  16 Assorted Colors
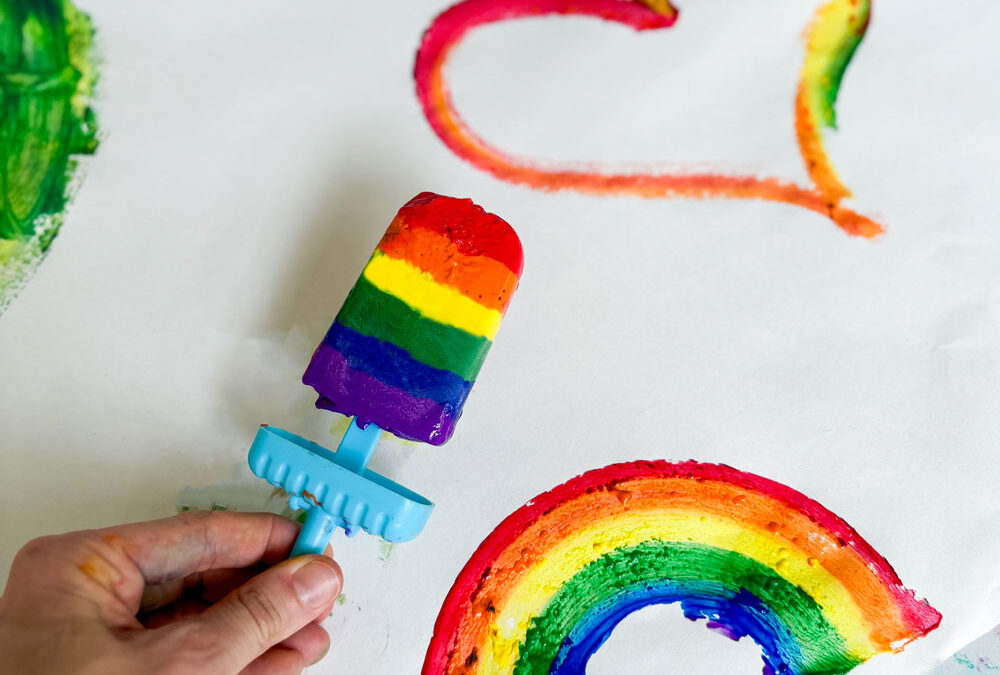
Crayola paint sticks

Paint Sticks

Crayola watercolor pens

No Drip Watercolor Brush Pens

paint set for kids 24 colors

42 Color Kid Paint Set

fabric marker set

Fabric Markers

paint smock apron for kids

Art Apron Smock

The Best Less-Mess and Mess-Free Art Supplies for Kids

Say goodbye to cleanup stress and hello to fun with our favorite less-mess and mess-free art supplies that keep creativity flowing without the mess.

cool art supplies mess free paint palette

Mess Free Paint Palette

spill proof tempera paint crayola

Spill Proof Washable Tempera Paint

cool art supplies refillable paint washable palette

Refillable Paint Palette

washable finger paint station less mess easy clean up

Washable Finger Paint Station

crayola 2-in-1 doodle board

2-in-1 Doodle Board

mess free finger paint set travel activity

Mess Free Fingerprint Palette and Coloring Book

mess free travel coloring set with stamps

Mess Free Coloring and Stamps with Travel Case 

paint in the bath easy clean up set

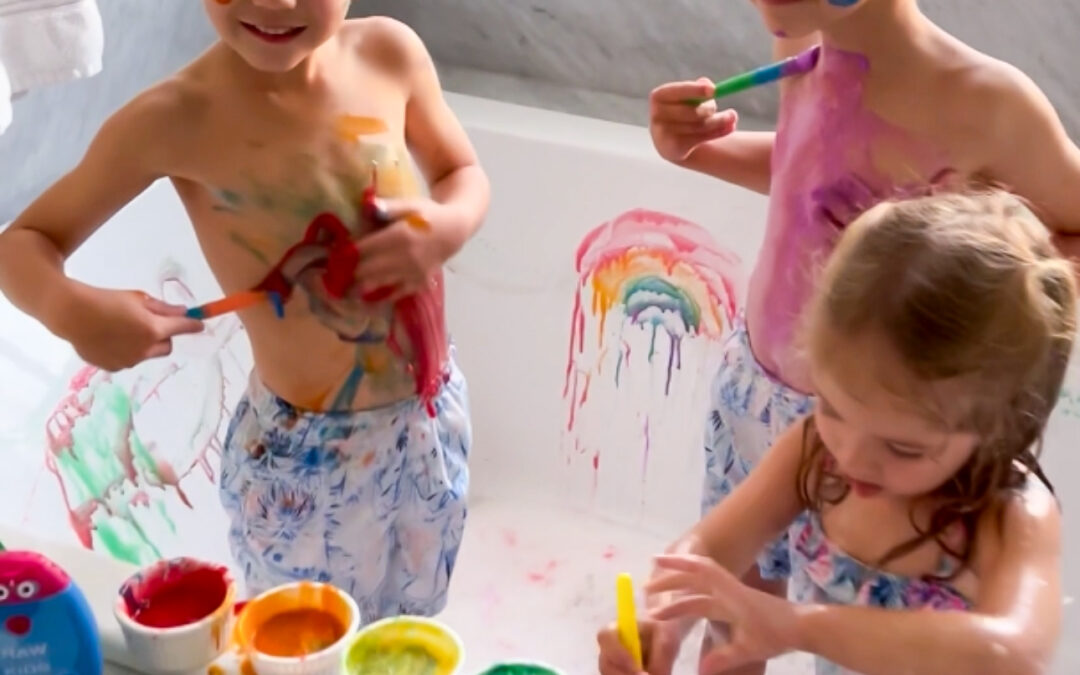
Paint with Bath Soap for Easy Clean Up Set!

The Best Arts and Crafts Kits for Kids

Dive into the exciting world of arts and crafts kits, where kids can enjoy hands-on projects that spark imagination and creativity!

clay art kit for kids

Sculpting Station with Turntable

paint pouring art kit for kids

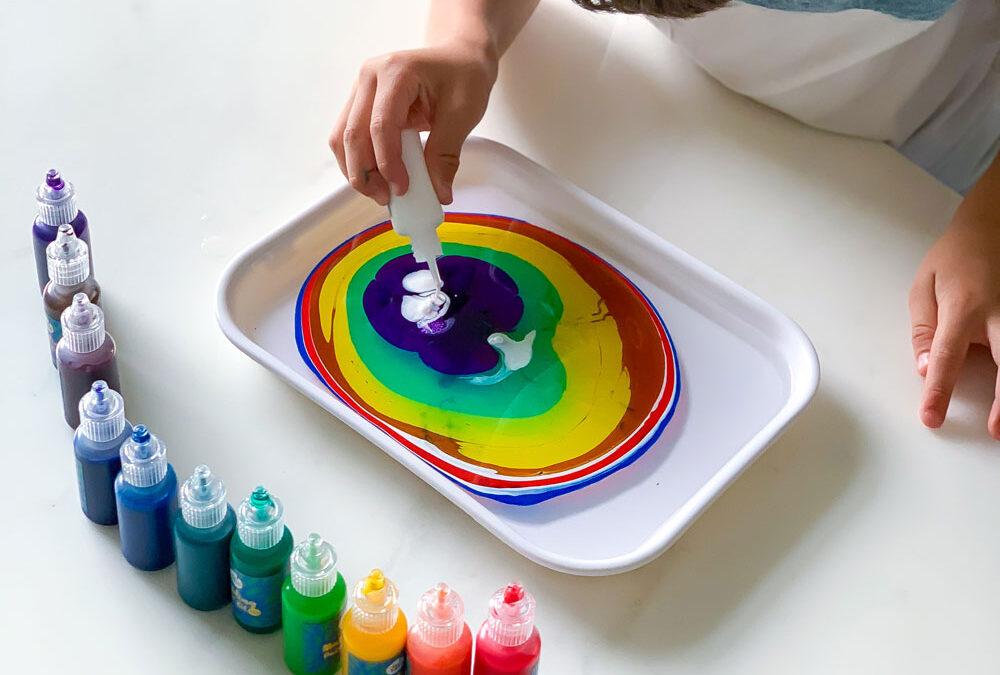
Kid Friendly Paint Pouring Kit

air marker sprayer for kids

Marker Airbrush Sprayer Kit

spin art for kids set

Spin and Spiral Set

scissor set skills for kids

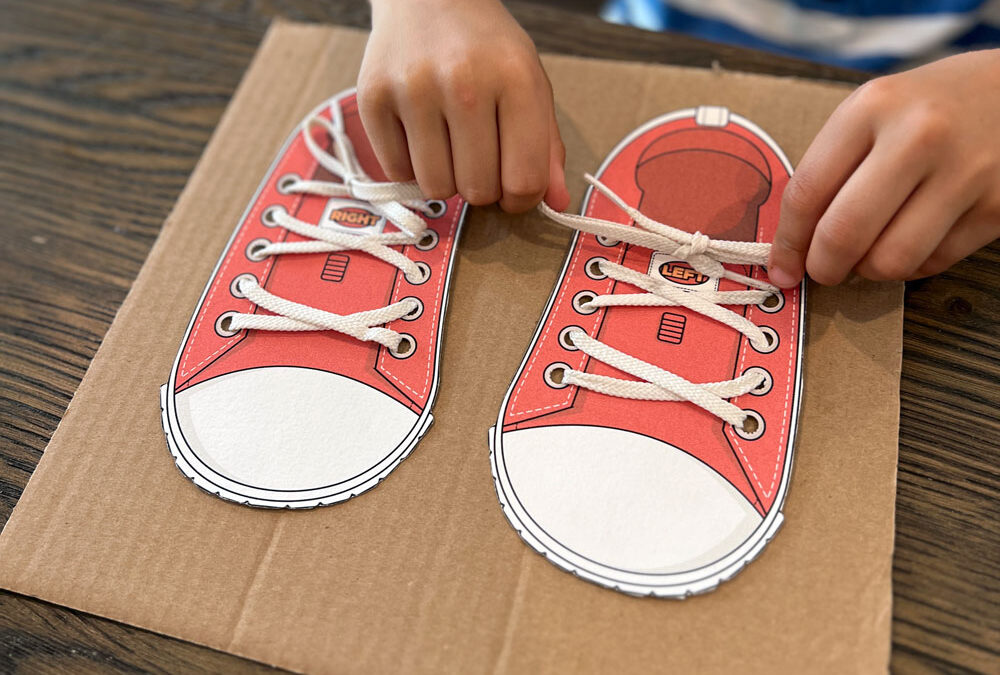
Scissor Skills Activity Kit

sprinkle set for kids no mess or waste

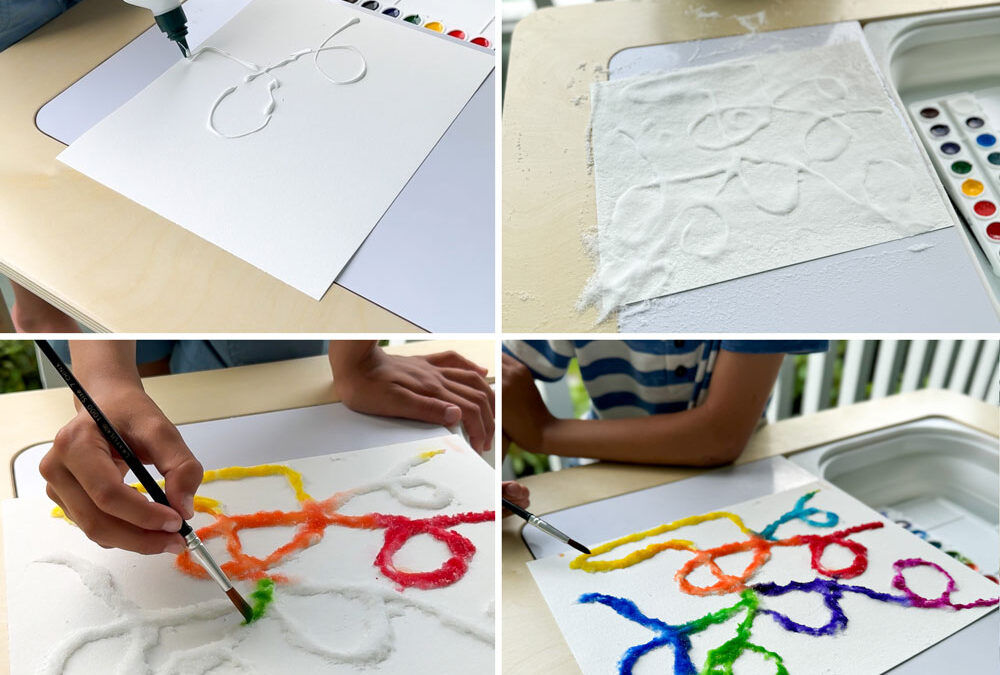
No Waste Sprinkle Art Decorator Set

dot marker set for kids

Dot Marker and Coloring Sheet Set

scrap book kit for kids

Scrapbook Activity Craft Kit

Summing Up: The Best Arts and Crafts Supplies for Your Little Artist

Wrapping up, the right arts and crafts supplies can turn any day into a creative adventure for kids.

From colorful crayons and mess-free markers to engaging craft kits, these tools not only entertain but also support essential developmental skills.

Encouraging creativity in your child has never been easier or more fun. So, gather your supplies, clear a space, and let your kids’ imaginations run wild.

Happy crafting!

    Summing Up: The Best Arts and Crafts Supplies for Your Little Artist

    Wrapping up, the right arts and crafts supplies can turn any day into a creative adventure for kids.

    From colorful crayons and mess-free markers to engaging craft kits, these tools not only entertain but also support essential developmental skills.

    Encouraging creativity in your child has never been easier or more fun. So, gather your supplies, clear a space, and let your kids’ imaginations run wild.

    Happy crafting!


    What’s Next?

    How to Make Salt Paintings for Kids

    How to Make Salt Paintings for Kids

    How to Make Salt Paintings for Kids

    salt painting for kids

    Salt paintings for kids are fun and easy! With a few supplies, create beautiful textured art using our templates or your own designs.

    Transform Glue and Salt into Art: Salt Paintings for Kids

    Salt paintings for kids are a fun and creative way to make art with just a few simple supplies. By combining glue, salt, and watercolors, children can create beautiful, textured art that’s both easy and engaging. It’s especially cool to see the watercolor spread through the salt, creating mesmerizing visual effects. Whether they prefer freehand designs or want to use our printable designs for more precise patterns, this activity offers endless possibilities. Plus, we’ll share tips on how to seal their masterpieces to prevent flaking and keep them looking great. Let’s explore the colorful world of salt paintings and inspire your kids’ artistic skills!

    All activities should be supervised by an adult. As an Amazon Associate, I earn from qualifying purchases. This post may contain affiliate links.

    Why Salt Paintings for Kids Are More Than Just Fun

    Salt paintings for kids offer a range of benefits beyond just creating beautiful art. This activity combines art, fine motor skills, sensory play, and even science too, making it both fun and educational.

    As children draw with glue and sprinkle salt, they develop fine motor skills and hand-eye coordination. The tactile sensation of the salt and the vibrant colors of the watercolors provide a rich sensory experience that can be both calming and stimulating.

    Plus, this project encourages creativity and self-expression, allowing kids to explore their artistic abilities in a fun, hands-on way.

    And there’s a fascinating science aspect to it as well, which we’ll delve into more deeply towards the end of the post.

    Use these sheets for coloring, or create textured art by applying glue and a sensory base of your choice (like sand or salt).

    Freehand vs. Template Designs for Salt Paintings

    When it comes to creating salt paintings, both freehand and template designs offer unique advantages. Freehand drawing with glue allows kids to explore their creativity and experiment with their own patterns, making each piece a one-of-a-kind masterpiece. This approach fosters imagination and gives children the freedom to express themselves in any way they choose. On the other hand, using our template designs can make the process easier and more precise. Our templates include a variety of seasonal and non-seasonal designs too, providing options for all occasions. Whether kids are creating spontaneous designs or following a template, both methods enhance their artistic skills and provide for a super engaging experience.

    Materials

    salt painting for kids

    Step-by-Step Instructions 

    Step 1

    Use white glue to draw your design directly onto the cardstock or watercolor paper. For precise designs, use the printable templates to trace a design.

    Step 2

    While the glue is still wet, sprinkle table salt evenly over the glue. Shake off any excess salt to avoid clumping.

    Step 3

    Using a brush, gently apply watercolors to the salt. Watch as the colors spread and interact with the salt, creating vibrant, textured effects.

    Step 4

    Allow the artwork to dry completely. This can take several hours depending on the amount of glue and paint used.

    Step 5

    Once dry, seal the artwork with a clear spray sealer or a thin layer of clear glue to prevent the salt from flaking off. Follow the instructions on the product for best results.

    Exploring the Science Behind Salt Paintings for Kids

    Salt paintings for kids aren’t just an artistic activity; they’re a fantastic way to introduce basic scientific concepts. When children watch the watercolor spread through the salt, they observe capillary action in action—this is the same process that helps plants draw water from the soil up through their stems. As the watercolors travel along the salt, kids can see how liquid moves through porous materials. Additionally, this project offers a hands-on lesson in absorption and crystallization. Kids learn that salt absorbs water, causing the vibrant colors to move and blend in fascinating ways. This blend of art and science encourages curiosity and a deeper understanding of how the world works, making learning both fun and visually captivating

    salt painting for kids


    salt painting for kids

    Exploring the Science Behind Salt Paintings for Kids

    Salt paintings for kids aren’t just an artistic activity; they’re a fantastic way to introduce basic scientific concepts. When children watch the watercolor spread through the salt, they observe capillary action in action—this is the same process that helps plants draw water from the soil up through their stems. As the watercolors travel along the salt, kids can see how liquid moves through porous materials. Additionally, this project offers a hands-on lesson in absorption and crystallization. Kids learn that salt absorbs water, causing the vibrant colors to move and blend in fascinating ways. This blend of art and science encourages curiosity and a deeper understanding of how the world works, making learning both fun and visually captivating

    Fun Arts and Crafts Kits and Supplies!

    For even more creative fun, here are some fantastic arts and crafts kits and supplies that will keep your kids engaged and inspired.

    cool art supplies magic water elf fairy kit

    Water Creatures Kit

    magic marbling art kit

    Marbling Art Kit

    cool art supplies refillable paint washable palette

    Refillable Paint Palette 

    cool art supplies color changing markers

    Color Changing Markers

    glow in the dark paint sticks

    Glow in the Dark Paint Sticks: a cool art supply used as face/body paint that you can also use on paper!

    cool art supplies mess free paint palette

    Mess Free Paint Palette

    cool art supplies spin art kit

    Spin Art Kit

    cool art supplies moon lamp kit

    Moon Lamp Kit

    What’s Next?

    DIY Lemonade Sensory Bin: A Fun ‘L is for Lemonade’ Activity

    DIY Lemonade Sensory Bin: A Fun ‘L is for Lemonade’ Activity

    DIY Lemonade Sensory Bin: A Fun ‘L is for Lemonade” Activity

    lemonade sensory bin in foldable sensory table by 7 days of play

    How to make a lemonade sensory bin for kids. This ‘L is for Lemonade’ activity promotes imaginative play and letter learning!

    Step-by-Step Guide to Making a Lemonade Sensory Bin

    When it comes to nurturing kids’ development through interactive play, few activities match the appeal and educational benefits of a well-crafted sensory experience like this lemonade sensory bin. This setup cleverly blends the refreshing concept of lemonade with sensory play essentials, such as vibrant yellow rice, artificial citrus pieces, and imaginative ice props. It’s not just about fun; this activity engages children’s senses deeply while subtly reinforcing letter recognition—making it an ideal “L is for Lemon or Lemonade” activity. Keep reading to find the step by step instructions and links to materials we used!

    All activities should be supervised by an adult. As an Amazon Associate, I earn from qualifying purchases. This post may contain affiliate links.

    The Impact of a Lemonade Sensory Bin on Child Development

    Sensory play is crucial for children’s development, and this lemonade sensory bin offers a perfect blend of fun and learning through sensory exploration.

    This type of play stimulates multiple senses—touching, seeing, and even smelling—as children interact with materials like the dyed yellow rice, artificial citrus pieces, and pretend ice.

    These interactions help enhance fine motor skills and hand-eye coordination as they scoop, pour, and manipulate the items in the bin. Moreover, sensory play fosters cognitive development by encouraging problem-solving and imaginative thinking. In the context of the lemonade sensory bin, kids not only engage in creative play but also learn about colors, textures, and shapes related to the theme of lemonade.

    This hands-on approach not only makes learning enjoyable but also reinforces letter recognition, tying into the “L is for Lemon or Lemonade” educational aspect. 

    Sensory table for sensory bins foldable

    Using Our Foldable Sensory Table for Convenient Play

    Incorporating our foldable sensory table into your kiddo’s playtime not only enhances the experience but also adds practicality to cleanup and storage. Our foldable sensory table, equipped with three collapsible bins, provides a versatile platform for activities like this lemonade sensory bin setup. Its easy-to-set-up design makes it ideal for both indoor and outdoor use, allowing you to create immersive play environments anywhere your child explores. When playtime is over, simply fold the table and stow it away, keeping your living space tidy and ready for the next adventure!

    Materials

    Step-by-Step Instructions 

    Prepare the Dyed Rice
    • Pour uncooked rice into a large sealed container.
    • Add a few squirts of hand sanitizer (to assist drying)
      • Add several drops of yellow food coloring.
      • Close the container and shake vigorously until the rice is evenly coated with color.
      • Spread the rice out in a thin layer and let dry for about 30 minutes to an hour, or until the coloring is fully set and dry to the touch.
      Set Up the Sensory Bin
      • Pour the dyed yellow rice into the big bin with the scoops.
      • Arrange the artificial ice, lemon and lime wedges in a small bin.
      • Place the cups and colorful straws in another small bin.
      Incorporating “L is for…” into the Activity

      To incorporate “L is for…” into this activity, encourage children to identify and interact with items in the sensory bin that start with the letter “L,” such as lemon, lime, and lemonade! You can also include the letter L itself as a manipulative inside the bin of rice to be discovered too.

      Prepare the Dyed Rice
      • Pour uncooked rice into a large sealed container.
      • Add a few squirts of hand sanitizer (to assist drying)
        • Add several drops of yellow food coloring.
        • Close the container and shake vigorously until the rice is evenly coated with color.
        • Spread the rice out in a thin layer and let dry for about 30 minutes to an hour, or until the coloring is fully set and dry to the touch.
        Set Up the Sensory Bin
        • Pour the dyed yellow rice into the big bin with the scoops.
        • Arrange the artificial ice, lemon and lime wedges in a small bin.
        • Place the cups and colorful straws in another small bin.
        Incorporating “L is for…” into the Activity

        To incorporate “L is for…” into this activity, encourage children to identify and interact with items in the sensory bin that start with the letter “L,” such as lemon, lime, and lemonade! You can also include the letter L itself as a manipulative inside the bin of rice to be discovered too.

        Storage Tips for Your Lemonade Sensory Bin

        After your sensory play session with the lemonade sensory bin, follow these steps to tidy up and prepare for future adventures:

        1. Gather Items: Collect all materials used, including dyed yellow rice, artificial lemon and lime wedges, artificial ice cubes, plastic cups, scoops, and straws.

        2. Store Dyed Rice: Transfer the dyed yellow rice into an airtight container to maintain its freshness and color for future use.

        3. Clean Artificial Props: Wash the artificial lemon and lime slices, ice cubes, cups, scoops, and straws with mild soap and water. Ensure they are thoroughly dried before storing to prevent mold.

        4. Proper Storage: Store all cleaned items in a cool, dry place to preserve their condition until the next playtime.

        lemonade sensory bin in foldable sensory table by 7 days of play
        lemonade sensory bin in foldable sensory table by 7 days of play

        Storage Tips for Your Lemonade Sensory Bin

        After your sensory play session with the lemonade sensory bin, follow these steps to tidy up and prepare for future adventures:

        1. Gather Items: Collect all materials used, including dyed yellow rice, artificial lemon and lime wedges, artificial ice cubes, plastic cups, scoops, and straws.

        2. Store Dyed Rice: Transfer the dyed yellow rice into an airtight container to maintain its freshness and color for future use.

        3. Clean Artificial Props: Wash the artificial lemon and lime slices, ice cubes, cups, scoops, and straws with mild soap and water. Ensure they are thoroughly dried before storing to prevent mold.

        4. Proper Storage: Store all cleaned items in a cool, dry place to preserve their condition until the next playtime.

        More Sensory Bin Ideas to Explore

        Don’t stop at this ocean sensory bin. Explore more ways your kiddo can play safely with sensory bases!

        ocean sensory bin on activity table by 7 days of play. Child playing with marine creatures animals and taste safe jello for the ocean and cherros for the sand. great activity for toddlers

        Ocean Animals and Beach Bin

        diy sensory sand play taste safe toddler baby

        Taste Safe Sand

        play dough wild dough sensory

        Taste Safe Foam

        how to make mud for play taste safe oobleck

        Taste Safe Mud

        slime for toddlers

        Taste Safe Slime

        activity for toddlers colorful taste safe cereal sensory bin

        Colorful Cherrios

        spaghetti sensory play scissor skills rainbow pasta sensory table

        Spaghetti Cutting

        fall sensory bin taste safe toddler baby foam

        Fall Sensory Bin

        Discover the magic of color mixing for kids using Oobleck. This is a great hands on way to discover primary and secondary colors!

        Color Mixing with Oobleck

        shaving cream activity sensory play for kids

        Rainbow Ice Cream Bin

        make oobleck with a fall twist pumpkin spice soup sensory play

        Pumpkin Soup Bin

        rainbow-science-experiment-frozen-baking-soda-vinegar-science-kids-toddlers

        Fizzy Cubes

        More Sensory Bases to Explore

        Here are my top picks for different types of sensory bases you can buy!

        sensory sand play for kids

        Sensory Sand

        mad mattr sensory dough modeling dough

        Modelling Dough

        rainbow rice for sensory play

        Rainbow Rice

        slime kit sensory play for kids

        Slime & Putty Kit

        What’s Next?

        The Ultimate Guide to Cool Art Supplies and Craft Kits

        The Ultimate Guide to Cool Art Supplies and Craft Kits

        The Ultimate Guide to Cool Art Supplies and Craft Kits

        cool art supplies marbling kit for kids

        Explore cool art supplies and craft kits your kids will love! Plus, a comprehensive list of must-have essentials for creative play.

        Cool Art Supplies and Craft Kits to Inspire Creative Kids!

        Welcome to the ultimate guide to cool art supplies! If you’re looking to spark some creativity and fun in your kids, you’ve come to the right place. We’ve rounded up some of the coolest art supplies and craft kits that make perfect gifts and are sure to keep your little artists engaged. From magical color-changing markers to a unique watercolor kit with single-use circles that prevent palette mishaps, and an exciting marbling art kit that brings mesmerizing designs to life, these picks are anything but ordinary. And don’t worry, we’ll also cover the basics so you’re always prepared for any crafty adventure. Let’s dive into the world of creativity with these must-have cool art supplies!

        All activities should be supervised by an adult. As an Amazon Associate, I earn from qualifying purchases. This post may contain affiliate links.

        Top Picks: Cool Art Supplies and Craft Kits

        Check out these cool art supplies and craft kits that will make every kid say ‘wow’ and transform creative time into pure fun!

        cool art supplies magic water elf fairy kit

        Water Creatures Kit

        magic marbling art kit

        Marbling Art Kit

        cool art supplies refillable paint washable palette

        Refillable Paint Palette 

        cool art supplies color changing markers

        Color Changing Markers

        glow in the dark paint sticks

        Glow in the Dark Paint Sticks: a cool art supply used as face/body paint that you can also use on paper!

        cool art supplies mess free paint palette

        Mess Free Paint Palette

        cool art supplies spin art kit

        Spin Art Kit

        cool art supplies moon lamp kit

        Moon Lamp Kit

        pottery kit

        Affordable Pottery Kit with Wheel

        traveling with kids guide activity for plane car road trip make up kit coloring

        Make Up and Dress Up Coloring Set

        Crayola art kit

        Complete Art Supply Set with Case

        craft supply set

        Complete Craft Supply Set with Case

        homemade dino nuggets cutters

        Building Your Arts and Crafts Supplies Collection

        Every household with creative kids should have a solid collection of basic arts and crafts supplies to support spontaneous creativity and planned projects alike.

        Whether you’re crafting with kids or enjoying solo creative time, these essentials ensure you’re always prepared. Here’s a printable list of must-have supplies to build your arsenal:

        Wrapping Up: Inspiring Creativity with Cool Art Supplies

        Incorporating cool art supplies into your kids’ creative routine not only sparks their imagination but also provides endless hours of fun and learning.

        Whether they’re amazed by color-changing markers, experimenting with unique watercolor kits, or creating mesmerizing designs with a marbling art kit, these products are sure to inspire.

        Don’t forget to stock up on the essential supplies to keep the creativity flowing.

        Try out these unique kits, ensure you have the basics, and watch as your children’s creativity soars!

          Wrapping Up: Inspiring Creativity with Cool Art Supplies

          Incorporating cool art supplies into your kids’ creative routine not only sparks their imagination but also provides endless hours of fun and learning.

          Whether they’re amazed by color-changing markers, experimenting with unique watercolor kits, or creating mesmerizing designs with a marbling art kit, these products are sure to inspire.

          Don’t forget to stock up on the essential supplies to keep the creativity flowing.

          Try out these unique kits, ensure you have the basics, and watch as your children’s creativity soars!

            What’s Next?

            How to Teach Kid to Ride Bike: A Step-by-Step Guide

            How to Teach Kid to Ride Bike: A Step-by-Step Guide

            How to Teach Kid to Ride Bike: A Step-by-Step Guide

            how to teach kid to ride bike guide for parents tips and tricks

            Discover effective tips and tricks to teach kid to ride bike with confidence and ease. Step-by-step guide and expert advice for parents.

            Teaching Kids to Ride Bike—A Milestone in Their Development

            Teaching kids to ride bike is a significant milestone in their development, offering numerous benefits such as improved physical fitness, enhanced coordination, and boosted self-confidence. As parents, your patience and support play a crucial role in making this learning experience positive and enjoyable. Remember, every child is unique and develops at their own pace, so it’s important to tailor your approach to fit your child’s needs and abilities. By understanding and respecting their individual journey, you can help them achieve success and build a lifelong love for cycling. Keep reading for a straightforward guide with tips and tricks to get your kiddo riding comfortably and independently!

            All activities should be supervised by an adult. As an Amazon Associate, I earn from qualifying purchases. This post may contain affiliate links.

            Step-by-Step Guide to Teach Kid to Ride Bike

            Step 1: Mental Preparation: Positive Affirmations

            • Encourage your child to look in the mirror and repeat positive affirmations: “I am brave, I am strong, I can do it!” I know that this may feel silly at first, but I promise you this WILL make a difference! Explain the importance of confidence and how it helps them learn.

            Step 2: Safety First

            • Equip Proper Gear (recommendations below!)
              • Ensure your child wears a well-fitting helmet.
              • Provide additional safety gear: knee pads, elbow pads, and gloves.
            • Choose a Safe Practice Area
              • Find a flat, open space with minimal obstacles.
              • Ideal locations: empty parking lots, parks, or quiet streets.

            Step 3: Learning How to Use the Brakes

            • Teach your child how to use the brakes before getting on the seat. Emphasize the importance of controlling speed and stopping safely. Practice braking exercises: walking alongside the bike and using brakes to stop.
            teach kid to ride bike guide

            Step 4: Balance and Coordination

            • Start with Balance
              • Begin by having your child balance on the bike without pedaling.
              • Use a balance bike or remove pedals from a regular bike.
              • Practice coasting down small slopes to build balance skills.
            • Assist with Balance
              • Hold your child at the armpits or the back of the seat for support.
              • Gradually reduce support as your child gains confidence.
              • Observe signs that your child is ready to ride independently.

            Step 5: Learning to Pedal

            • Have your child start with one foot on a pedal and the other on the ground.
            • Teach them to push off with the foot on the ground to start moving.
            • Gradually introduce pedaling with both feet once they are comfortable.

            Tips and Tricks for Success

            Towel Trick for Teaching Kids to Ride a Bike

            • Easy Support: Wrap a towel around your child’s torso to gently guide and stabilize them without holding the bike directly.
            • Encourages Balance: Allows kids to feel the bike’s movement while practicing balancing independently.
            • Parent-Friendly: Keeps parents upright, reducing strain on their backs compared to bending over to hold the bike.

            Short, Frequent Practice Sessions

            • Keep practice sessions short and consistent to avoid frustration.
            • Encourage regular practice to build skills and confidence.

            Positive Reinforcement

            • Celebrate small victories and progress to motivate your child.
            • Offer praise and rewards for effort and improvement.

            Patience and Understanding

            • Recognize that learning to ride a bike may take time.
            • Stay calm and supportive, even during setbacks.

            teach kid to ride bike guide
            teach kid to ride bike guide

            Tips and Tricks for Success

            Towel Trick for Teaching Kids to Ride a Bike

            • Easy Support: Wrap a towel around your child’s torso to gently guide and stabilize them without holding the bike directly.
            • Encourages Balance: Allows kids to feel the bike’s movement while practicing balancing independently.
            • Parent-Friendly: Keeps parents upright, reducing strain on their backs compared to bending over to hold the bike.

            Short, Frequent Practice Sessions

            • Keep practice sessions short and consistent to avoid frustration.
            • Encourage regular practice to build skills and confidence.

            Positive Reinforcement

            • Celebrate small victories and progress to motivate your child.
            • Offer praise and rewards for effort and improvement.

            Patience and Understanding

            • Recognize that learning to ride a bike may take time.
            • Stay calm and supportive, even during setbacks.

            Choosing the Perfect Bike for Your Child’s First Ride

            When it comes to teaching your kid to ride bike, selecting the right bike is crucial. The ideal bike should be safe, comfortable, and suited to your child’s size and skill level. 

            woom balance bike

            woom Balance Bike

            • Ultra-Lightweight: Easy for kids to maneuver and control.
            • Adjustable Design: Grows with your child for longer usability.

            Use CODE 7days_off50 to get $50 off discount coupon code


            woom original pedal bike

            woom Original Pedal Bike

            • Beginner-Friendly: Lightweight frame and low center of gravity for easy learning.
            • Safety Features: Reliable hand brakes and ergonomic design for stability.

            Use CODE 7days_off50 to get $50 off discount coupon code


            woom off mountain bike

            woom OFF Mountain Bike

            • Lightweight Build: Superlight aluminum frame for easy handling on trails.
            • Trail-Ready Geometry: Designed for control and performance on rugged terrain.

            Use CODE 7days_off50 to get $50 off discount coupon code


            woom now urban lifestyle bike

            woom NOW Bike

            • Front Cargo Rack: Ideal for carrying gear with balanced handling.
            • Urban-Ready: Built-in lights and wide tires for smooth city rides.

            Use CODE 7days_off50 to get $50 off discount coupon code


            Ensuring Safety with the Right Equipment

            Safety is paramount when you teach kid to ride bike. Equipping your child with the proper protective gear can prevent injuries and build their confidence. Here are some recommendations for helmets and other essential protective gear to ensure your child stays safe while learning to ride.

            woom helmet

            Woom Helmet

            • Specifically designed for children’s comfort and safety.
            • Lightweight with excellent ventilation and a secure fit.
            mad mattr sensory dough modeling dough

            Nutcase Little Nutty Kids Helmet

            • Stylish designs with durable ABS shell.
            • Magnetic buckle for easy, pinch-free fastening.
            protective bike gear with helmet

            Protective Bike Gear with Helmet

            • Includes helmet in addition to 6 piece set of elbow pads, knee pads, and wrist guards.
            bike protective gear elbow, knee, wrist protector

            Knee, Elbow and Wrist Protector Set

            • Consist of anti-scratch high-hardness PVC shell for hard protection, and soft sponge material for impact buffering, yet comfortable in wearing.

            What’s Next?

            How to Make a Popsicle Stick Catapult Game

            How to Make a Popsicle Stick Catapult Game

            How to Make a Popsicle Stick Catapult Game

            popsicle stick catapult game

            This popsicle stick catapult game is so much fun! Not only is it a great STEM learning activity but it’s one that the kids can help to create from start to finish as well. This is a great two-player game that will teach the kids about teamwork and creativity, too. 

            DIY Physics Fun with a Popsicle Stick Catapult

            This engaging two-player activity is perfect for kids, combining fun and educational elements. Using easily findable household materials like popsicle sticks, clothespins, and pom poms, children can construct their own catapults and compete to launch the pom poms into the target. Not only is this game super entertaining for kids, but it also offers a hands-on learning experience about basic physics principles such as force, trajectory, and motion. 

            All activities should be supervised by an adult. As an Amazon Associate, I earn from qualifying purchases. This post may contain affiliate links.

            Tips for Successful Popsicle Stick Catapult Building

            Choose the Right Glue: For a sturdy and long-lasting catapult, use a hot glue gun or a strong craft glue. Ensure all parts are securely bonded before moving on to the next step.

            Precision Matters: Align the popsicle sticks and clothespins carefully to ensure the catapult works effectively. Symmetry and balance are key to a successful launch.

            Test and Adjust: After building your catapult, test it several times to see how it performs. If the pom pom doesn’t launch well, adjust the angle of the sticks or the position of the clothespins for better results.

            Customize Your Catapult: Encourage kids to decorate their catapults with markers, stickers, or paint. Personalizing their catapults can make the game even more enjoyable and allow for some creative expression.

            popsicle stick catapult game

            DIY Physics Fun with a Popsicle Stick Catapult

             Building and playing with this popsicle stick catapult game offers children a hands-on introduction to key scientific principles. As they construct their catapults, kids learn about engineering and design, understanding how different components work together to create a functional device. During play, they explore basic physics concepts such as force, motion, and trajectory. By experimenting with the launch angle and the amount of force applied, children gain insights into how these variables affect the distance and accuracy of the pom pom’s flight. This engaging activity not only fosters creativity and problem-solving skills but also provides a fun and interactive way to grasp fundamental scientific ideas.

            Materials

            Step-by-Step Instructions 

            Step 1

            Create the Base: Lay two popsicle sticks lengthwise on the table. Glue a third popsicle stick across the middle of the two sticks to form a stable base.

            Step 2

            Attach the Clothespins: Glue one clothespin to each end of the middle popsicle stick, making sure they are securely attached. Reinforce each clothespin by gluing a second clothespin on top of the first ones.

            Step 3

            Add the Launch Arms: Glue a popsicle stick to the top of each clothespin, extending outward. On the end of each popsicle stick, glue half of a plastic egg to create a launch cup.

            Step 4

            Prepare the Pom Poms: Attach a string to each pom pom, measuring and cutting the string to an appropriate length for launching. Glue the other end of the string to the middle of the popsicle stick base, ensuring the pom pom can be easily placed in the launch cup.

            Step 5

            Set Up and Play: Place the pom pom in the plastic egg cup. Aim to land the pom pom into the opposing plastic egg half to score points. Snap the clothespin with your finger to launch the pom pom. Enjoy playing the popsicle stick catapult game!

            Game Variations and Learning Extensions

            Target Practice: Create different targets using cups or small containers at varying distances. Challenge kids to hit specific targets to score points. This variation helps improve their aim and understanding of force and distance.

            Scientific Exploration: Turn the game into a science experiment. Have kids hypothesize how different variables (such as the length of the string, the angle of the launch arm, or the size of the pom pom) will affect the launch. Let them test their hypotheses and record the results.

            Team Challenges: Divide players into teams and set up multiple catapults. Teams can compete in various challenges, such as launching the most pom poms into a target within a time limit or achieving the longest distance. This promotes teamwork and healthy competition.

            popsicle stick catapult game

            Math Integration: Incorporate math skills by having kids measure the distance of each launch and calculate averages. They can also graph their results to visualize the data and observe patterns.

            popsicle stick catapult game

            Game Variations and Learning Extensions

            Target Practice: Create different targets using cups or small containers at varying distances. Challenge kids to hit specific targets to score points. This variation helps improve their aim and understanding of force and distance.

            Scientific Exploration: Turn the game into a science experiment. Have kids hypothesize how different variables (such as the length of the string, the angle of the launch arm, or the size of the pom pom) will affect the launch. Let them test their hypotheses and record the results.

            Team Challenges: Divide players into teams and set up multiple catapults. Teams can compete in various challenges, such as launching the most pom poms into a target within a time limit or achieving the longest distance. This promotes teamwork and healthy competition.

            Math Integration: Incorporate math skills by having kids measure the distance of each launch and calculate averages. They can also graph their results to visualize the data and observe patterns.

            Beyond Popsicle Stick Catapult – Top Pick Catapult Toys and Kits

            If your kiddo loved making their own popsicle stick catapult game, here are my suggestions for catapult toys and kits that make great gifts!

            catapult game

            Craft a Catapult & Play

            Catapult and Aim!

            Robotic Catapult Kit

            catapult game

            Catapulting Sheep Game!

            What’s Next?

            How to Make Swim Through Rings, A Fun Underwater Activity!

            How to Make Swim Through Rings, A Fun Underwater Activity!

            How to Make Swim Through Rings, A Fun Underwater Activity!

            swim through rings. how to make them for underwater fun, games, obstacle courses DIY

            Are you searching for a budget-friendly way to elevate your pool time this summer? Look no further! DIY swim through rings are the perfect solution to bring more fun and excitement to your swimming sessions.

            Dive Into Fun: Creating DIY Swim Through Rings on a Budget

            Using just a dollar store hula hoop and a small piece of pool noodle, you can easily create these engaging underwater obstacle courses. Not only are they cost-effective, but they also enhance your child’s gross motor skills. In this comprehensive guide, we’ll provide step-by-step instructions on how to make swim through rings and delve into the numerous benefits they offer for children’s development and poolside entertainment.

            All activities should be supervised by an adult. As an Amazon Associate I earn from qualifying purchases. This post may contain affiliate links.

            Skills:
            Ages: 
            Prep Time:

            The Educational Benefits of Swim Through Rings for Kids

            Creating and using DIY swim through rings offers a wealth of educational benefits for children. Here’s how these simple, budget-friendly pool toys can contribute to your child’s development:

            1. Enhancing Gross Motor Skills

            Swimming through the rings requires children to use their large muscle groups, improving strength, coordination, and balance. This physical activity supports overall motor development, helping kids become more agile and confident in their movements.

            2. Improving Spatial Awareness

            Navigating through the rings helps children develop a better understanding of space and how their bodies move within it. This spatial awareness is crucial for everyday tasks and can enhance their performance in other sports and physical activities.

            3. Boosting Confidence and Independence

            Successfully swimming through the rings gives children a sense of achievement, boosting their confidence. It encourages them to challenge themselves, fostering a sense of independence and self-reliance.

            4. Encouraging Problem-Solving Skills

            Setting up and swimming through an obstacle course of rings encourages kids to think critically and solve problems. They learn to plan their movements and adapt their strategies to navigate through the rings effectively.

            swim through rings. how to make them for underwater fun, games, obstacle courses DIY

            What age group is best suited for using swim through rings?

            Swim through rings are a versatile pool toy that can be enjoyed by a wide range of age groups, but they are particularly beneficial for children aged 5 to 12. At this developmental stage, kids are typically strong enough swimmers to navigate through the rings safely and effectively. Younger children, particularly those under 5, may struggle with the coordination and strength required to swim through the rings, so close supervision is essential. For older kids, the rings provide a fun and challenging activity that helps improve their swimming skills and keeps them engaged during pool time. Always ensure that children are comfortable and confident in the water before introducing swim through rings, and adjust the difficulty level of the activities based on their swimming abilities. 

            Materials

            • Dollar store hula hoop
            • 4-inch piece of pool noodle

            Step-by-Step Instructions 

            Step 1

            Cut the Hula Hoop: Carefully cut the hula hoop at one point. This will allow you to fill it with water later.

            Step 2

            Fill with Water: Slowly fill the hula hoop with water. This step is crucial as the water will weigh down the hula hoop, keeping it upright underwater.

            Step 3
            Seal the Hula Hoop: Use waterproof tape to seal the cut. Ensure the tape is applied tightly to prevent any water from leaking out. Use multiple layers if necessary!
            Step 4

            Add the Pool Noodle: Slide the 4-inch piece of pool noodle onto the hula hoop. This will act as a floatation device, keeping the hula hoop upright in the water.

            Step 5

            Test the Ring: Place the swim through ring in the pool to ensure it floats and stays upright. Adjust the pool noodle or tape if necessary.

            Fun Games and Activities with Swim Through Rings

            Once you’ve created your DIY swim through rings, the fun is just beginning! Here are some engaging games and activities that you can enjoy with your kids, making the most out of these versatile pool toys:

            1. Underwater Obstacle Course

            Create a challenging underwater obstacle course by placing multiple swim through rings at different depths and distances. Children can race against the clock or each other to complete the course, enhancing their swimming skills and endurance.

            2. Ring Relay Race

            Organize a relay race where kids have to swim through a series of rings, either individually or in teams. This game not only promotes physical fitness but also encourages teamwork and friendly competition.

            3. Treasure Hunt

            Hide small pool toys or treasures around the pool, with some placed inside or near the swim through rings. Kids can dive and swim through the rings to collect the treasures, combining fun with problem-solving and spatial awareness.

            4. Ring Toss

            Transform the swim through rings into a fun and interactive ring toss game. Kids can take turns throwing pool noodles or other floating objects through the rings, improving their aim and coordination.

            swim through rings. how to make them for underwater fun, games, obstacle courses DIY

            5. Dolphin Dives

            Encourage kids to pretend they are dolphins or other sea creatures, swimming through the rings in imaginative ways. This game boosts creativity and allows children to explore different swimming techniques and styles.

            6. Follow the Leader

            One child can lead the group through a series of swim through rings, with the others following in their path. This activity fosters leadership skills and encourages kids to pay attention and mimic movements accurately.

            Incorporating these games and activities into your pool time ensures that your DIY swim through rings provide endless entertainment and developmental benefits for children. Each game can be easily adapted to suit different age groups and swimming abilities, making them perfect for family fun and summer pool parties.

            swim through rings. how to make them for underwater fun, games, obstacle courses DIY

            Fun Games and Activities with Swim Through Rings

            Once you’ve created your DIY swim through rings, the fun is just beginning! Here are some engaging games and activities that you can enjoy with your kids, making the most out of these versatile pool toys:

            1. Underwater Obstacle Course

            Create a challenging underwater obstacle course by placing multiple swim through rings at different depths and distances. Children can race against the clock or each other to complete the course, enhancing their swimming skills and endurance.

            2. Ring Relay Race

            Organize a relay race where kids have to swim through a series of rings, either individually or in teams. This game not only promotes physical fitness but also encourages teamwork and friendly competition.

            3. Treasure Hunt

            Hide small pool toys or treasures around the pool, with some placed inside or near the swim through rings. Kids can dive and swim through the rings to collect the treasures, combining fun with problem-solving and spatial awareness.

            4. Ring Toss

            Transform the swim through rings into a fun and interactive ring toss game. Kids can take turns throwing pool noodles or other floating objects through the rings, improving their aim and coordination.

            5. Dolphin Dives

            Encourage kids to pretend they are dolphins or other sea creatures, swimming through the rings in imaginative ways. This game boosts creativity and allows children to explore different swimming techniques and styles.

            6. Follow the Leader

            One child can lead the group through a series of swim through rings, with the others following in their path. This activity fosters leadership skills and encourages kids to pay attention and mimic movements accurately.

            Incorporating these games and activities into your pool time ensures that your DIY swim through rings provide endless entertainment and developmental benefits for children. Each game can be easily adapted to suit different age groups and swimming abilities, making them perfect for family fun and summer pool parties.

            More Fun Ways to Play in Water!

            Expand your poolside adventures beyond these DIY swim through rings with a variety of exciting products designed to maximize the fun in the water, or visit our guide for The Best Outdoor Toys and Games!

            best outdoor toys inflatable slide

            Inflatable Water Slide, Bounce House, Climbing Wall, and Pretend Market Stand Combo 

            best outdoor toys inflatable water slide for toddlers

            Inflatable Water Slide for Toddlers – Dinosaur Themed

            best outdoor toys inflatable water slide for toddlers

            Inflatable Water Slide for Toddlers – Rainbow Themed

            outdoor inflatable water slide

            Inflatable Water Slide with Climbing Wall

            best outdoor toys slip and slide surf

            Surf and Slide

            best outdoor toys slip and slide

            Slip and Slide

            best outdoor toys splash pad

            Budget Friendly Splash Pad Sprinkler

            inflatable pool slide

            Sensory Sand Construction Kit

            fun outdoor toys for kids - water toy

            The Ultimate Water Play and Pump Toy!

            reusable water balloons

            Reusable Water Balloons

            remote controlled underwater shark

            Remote Controlled Underwater Shark

            sensory sand kit outdoor play

            Waterfall Wall

            What’s Next?

            Crafts Using Toilet Paper Rolls That Kids Will Love

            Crafts Using Toilet Paper Rolls That Kids Will Love

            Crafts Using Toilet Paper Rolls That Kids Will Love

            crafts using toilet paper rolls

            Discover fun crafts using paper toilet rolls! From DIY race tracks to educational games, explore creative activities for kids!

            Creative and Fun Crafts Using Toilet Paper Rolls

            Welcome to a world of creativity and fun with crafts using paper rolls! These simple, everyday items can be transformed into a variety of engaging and educational activities for kids. Whether you’re looking to spark their imagination with a DIY car race track, enhance their learning with a math activity, or simply keep them entertained with colorful crafts, paper rolls are incredibly versatile. Dive into these exciting ideas that are perfect for hands-on play and learning. Get ready to explore the endless possibilities of paper roll crafts!

            As an Amazon Associate, I earn from qualifying purchases. This post may contain affiliate links.

            Activities And Crafts Using Toilet Paper Rolls!

            Explore a world of creativity with these crafts and activities that turn simple paper tubes into fun crafts for kids!

            diy racing track for toys

            DIY Race Track

            toddler fun activity paper tube recycled hand eye coordination stacker

            Paper Tube Stacker Toy

            paper tube animal matching game

            Match the Animals

            teach addition diy math addition games for preschoolers

            Learn Addition with this DIY Game!

            diy car toy paper tube car garage

            Paper Tube Car Garage

            valentines handprint craft

            Paper Tube Bee

            easy-activity-for-toddlers-pom-pom-paper-tube

            Paper Tube Pom Pom Drop

            color matching activity with paper tubes and pom poms great for fine motor skills

            Paper Tube Color Match

            xylophone craft paper tube cardboard for kids crafts using toilet paper rolls

            DIY Xylophone

            paper tube animal matching game

            Match the Animals

            crafts using toilet paper rolls paper tube car

            Paper Tube Cars

            crafts using toilet paper rolls paper tube rocket

            Paper Tube Rockets

            crafts using toilet paper rolls

            The Joy of Reusing Everyday Items for Creative Crafts

            Making crafts using toilet paper rolls is a wonderful way to encourage creativity while promoting sustainability. Everyday household products can be given a new life through crafts and activities, turning potential waste into treasures.

            For instance, old cereal boxes can be transformed into sturdy organizers or imaginative playhouses. Glass jars can become beautiful candle holders or storage containers for art supplies. Even plastic bottles can be upcycled into bird feeders or planters.

            By reusing these common items, not only do we reduce waste, but we also inspire children to think creatively and resourcefully about the materials around them.

            crafts using toilet paper rolls

            What’s Next?

            Activity for Respiratory System: Free Printable Lung Lesson

            Activity for Respiratory System: Free Printable Lung Lesson

            Activity for Respiratory System:

            Free Printable Lung Lesson

            This free printable activity is a fun way to learn all about how the lungs work!

            Discover a fun, interactive activity for the respiratory system. Free printable included. Perfect for home or classroom learning!
            Get the free printable HERE!

            Engage Kids with a Fun and Educational Activity for Respiratory System

            Learning about the human body is a captivating journey, especially for young minds. Introducing kids to the respiratory system can be both fun and educational with the right resources. Our free printable activity for respiratory system offers a hands-on, visual experience that simplifies complex concepts. Using just a few common household items, children can explore how their lungs work, sparking their curiosity and fostering a love for science

            All activities should be supervised by an adult. As an Amazon Associate I earn from qualifying purchases. This post may contain affiliate links.

            Skills:
            Ages: 
            Prep Time:

            Understanding the Science Behind This Activity

            This activity is a fantastic way to dive into the science of how our lungs work. By creating a model with straws and plastic bags, kids can see firsthand how air travels through the trachea (the big straw) and splits into the bronchi (the smaller straws), eventually filling up the lungs (the plastic bags). When they blow into the straws, they’ll see the “lungs” inflate, just like when we breathe in. This helps kids understand the role of the respiratory system in getting oxygen into our bodies and removing carbon dioxide. It’s a fun and simple way to show how essential breathing is and how our body works to keep us alive and healthy. Plus, they’ll get a kick out of making the model and seeing it in action!

            Here are 3 facts you can explain to your child:

            Air Pathway: When you breathe in, air travels through your trachea (windpipe) and then splits into your bronchi, which are like smaller tubes leading to each lung. This pathway helps air reach every part of your lungs.

            Lung Inflation: The plastic bags in the activity represent your lungs. Just like how the bags inflate when you blow into the straws, your lungs fill with air when you breathe in, helping you get the oxygen your body needs.

            Gas Exchange: Inside your lungs, there are tiny air sacs called alveoli where oxygen from the air you breathe in passes into your blood, and carbon dioxide from your blood is breathed out. This process is crucial for keeping your body energized and healthy.

            This free printable activity is a fun way to learn all about how the lungs work!

            Download and Print this Activity for Respiratory System Learning

            One of the best parts about this activity is that it’s a free printable you can easily download and print. This saves you the hassle of drawing your own lung diagrams, making it super convenient for busy parents and educators.

            With just a few clicks, you’ll have a ready-to-use, accurate diagram that perfectly complements the hands-on project. It’s designed to be simple and clear, ensuring that kids can easily follow along and understand the activity. So, you can focus more on the fun and educational aspects without worrying about creating your own materials from scratch!

            Materials

            • Tape
            • Plastic bags (leftover produce bags work perfectly!)
            • This free printable
            • Piece of Cardboard
            • Two straws
            • Tape
            • Plastic bags (leftover produce bags work perfectly!)

            Step-by-Step Instructions 

            Step 1

            Download and print the template. Cut out the lungs, lips, and nose and glue it to a piece of cardboard.

            Step 2

            Take two plastic bags and inflate them slightly. These will represent the lungs in the activity. Ensure that the bags are clean and free from any holes or tears.

            Step 3

            Using tape, secure one end of each straw to the top of each plastic bag. These straws will act as the trachea and bronchi, allowing air to flow in and out of the “lungs”. 

            Step 4

            Place the printed lung diagram in front of you. Position the plastic bags with attached straws on top of the diagram, aligning them with the lung illustrations. Secure them with tape. Tape the nose and mouth on the top part of the straws.

            Step 5

            Explain to the child how the lungs work using the diagram as a guide. Encourage them to blow into the straws to see how air moves in and out of the plastic bags, mimicking the process of breathing.

            Why is it important to learn about the respiratory system?

            Learning about the respiratory system helps us understand how our bodies function and how essential breathing is for our survival. It also promotes awareness of how to keep our lungs healthy.

            How do the lungs actually work?

            The lungs are organs responsible for taking in oxygen from the air we breathe and removing carbon dioxide, a waste product of metabolism. When we inhale, air travels through the trachea and bronchi into the lungs, where oxygen is transferred to the bloodstream and carbon dioxide is expelled when we exhale.

            What happens if our lungs don’t work properly?

            If our lungs don’t work properly, it can lead to various respiratory problems such as asthma, chronic obstructive pulmonary disease (COPD), or pneumonia. These conditions can affect our ability to breathe efficiently and may require medical treatment.

            How can we keep our lungs healthy?

            To keep our lungs healthy, it’s important to avoid smoking and exposure to secondhand smoke, as well as pollutants and toxins in the air. Regular exercise, maintaining a healthy weight, and practicing good hygiene, such as washing hands frequently, can also help prevent respiratory infections.

            This free printable activity is a fun way to learn all about how the lungs work!

            How can we keep our lungs healthy?

            To keep our lungs healthy, it’s important to avoid smoking and exposure to secondhand smoke, as well as pollutants and toxins in the air. Regular exercise, maintaining a healthy weight, and practicing good hygiene, such as washing hands frequently, can also help prevent respiratory infections.

            Fun facts about the respiratory system:

            An adult at rest breathes in and out about 12-20 times per minute? Also, the surface area of the lungs is roughly the size of a tennis court when fully spread out!

            This free printable activity is a fun way to learn all about how the lungs work!

            Why is it important to learn about the respiratory system?

            Learning about the respiratory system helps us understand how our bodies function and how essential breathing is for our survival. It also promotes awareness of how to keep our lungs healthy.

            How do the lungs actually work?

            The lungs are organs responsible for taking in oxygen from the air we breathe and removing carbon dioxide, a waste product of metabolism. When we inhale, air travels through the trachea and bronchi into the lungs, where oxygen is transferred to the bloodstream and carbon dioxide is expelled when we exhale.

            What happens if our lungs don’t work properly?

            If our lungs don’t work properly, it can lead to various respiratory problems such as asthma, chronic obstructive pulmonary disease (COPD), or pneumonia. These conditions can affect our ability to breathe efficiently and may require medical treatment.

            How can we keep our lungs healthy?

            To keep our lungs healthy, it’s important to avoid smoking and exposure to secondhand smoke, as well as pollutants and toxins in the air. Regular exercise, maintaining a healthy weight, and practicing good hygiene, such as washing hands frequently, can also help prevent respiratory infections.

            Fun facts about the respiratory system:

            An adult at rest breathes in and out about 12-20 times per minute? Also, the surface area of the lungs is roughly the size of a tennis court when fully spread out!

            More Ways to Explore Anatomy!

            If you kiddo loved this activity for learning the respiratory system, check out some more fun ways to learn about the human body and anatomy!

            systems of the body for kids printable

            Reveal the Systems of Human Body wit This Interactive Printable

            best learning toys for the human body

            Human Body Model

            anatomy printable for kids learn the human body

            “Inside My Body” Custom Printable Coloring Book

            anatomy science organs skeleton

            Magnetic Anatomy Puzzle

            What’s Next?

            How to Encourage Kids to Read, 16 Ways to Connect with Books!

            How to Encourage Kids to Read, 16 Ways to Connect with Books!

            How to Encourage Kids to Read, 16 Ways to Get Kids Hooked on Books!

            how to encourage kids children to read reading fort

            Want to know how to encourage kids to read? Explore these 16 inspiring techniques guaranteed to ignite their love for books!

            Raising Readers: How to Encourage Kids to Read

            In a world brimming with distractions, nurturing a love for reading in children can be a challenge. However, with the right approach, turning the pages of a book can transform into a captivating adventure. From building cozy forts to hosting book-themed parties, there are countless innovative ways to inspire young minds to embrace the magic of reading. In this guide, we’ll explore 16 creative techniques designed to captivate and motivate children, sparking a lifelong passion for reading.

            As an Amazon Associate, I earn from qualifying purchases. This post may contain affiliate links.

            16 Ways to Encourage Kids to Dive into Books

            Excited to inspire a love for reading in your child? Explore these 16 creative and effective strategies to ignite their passion for books!

            how to encourage kids children to read

            Go on a Special Outing Based on a Book: Visit places related to the book’s story, like a museum, park, or ice cream shop.

            how to encourage kids children to read reading fort

            Make a Reading Fort: Create a cozy space with pillows, blankets, and books where kids can enjoy reading.

            how to encourage kids children to read reward jar

            Reward Jar: For each book read, add a candy. Once the jar is filled, your kiddo can enjoy the whole thing!

            30 Day Reading Challenge - Printable

            Free Printable Reading Challenge: Download and print this 30 day reading challenge. Kids can win a reward if it gets completed!

            how to encourage kids children to read reward chart

            Reward Chart: Create a chart to track books read and reward milestones with special treats or activities.

            how to encourage kids children to read

            Make Food Inspired by the Book: Cook dishes or snacks mentioned in the book or inspired by the story’s theme.

            how to encourage kids children to read

            Watch a Show or Movie Based on the Book: Compare the book and its adaptation, discussing similarities and differences.

            how to encourage kids children to read

            Do a Craft or Activity Based on the Book: Create art projects or activities related to the book’s story or characters.

            how to encourage kids children to read

            Set a Good Example: Let kids see you reading regularly so they know it’s fun and important.

            create a book club

            Start a Book Club: Organize a book club with friends or family where kids can discuss the book and share their thoughts.

            visit the library

            Visit the Library Regularly: Make library trips a fun and routine activity to explore new books and participate in library programs.

            read aloud to each other

            Read Aloud Together: Spend time reading books aloud to each other, using different voices for characters to make it engaging.

            audio books in car

            Use Audiobooks: Listen to audiobooks during car rides or at home to expose kids to new stories and improve their listening skills.

            book party

            Host a Book-Themed Party: Throw a party based on a favorite book, with themed games, decorations, and costumes.

            character dress up

            Character Dress-Up Day: Let kids dress up as their favorite book characters and host a character-themed day at home or school.

            child reading on a tablet

            Incorporate Technology: Use e-readers, reading apps, or educational websites that make reading interactive and fun.

            The Best Book Sets for Kids

            Now that we know how to encourage kids to read, let’s get the best books in their hands! Here are my top picks of books sets for kids, ordered from beginning reader to advanced reader!

            bob book set

            Bob Books

            I can Read book set

            I Can Read!

            elephant and piggie book set

            Elephant and Piggie

            fly guy book set

            Fly Guy

            magic treehouse book set for readers

            Magic Tree House

            Desmond Cole Ghost Patrol Book set

            Desmond Cole Ghost Patrol

            junie b jones book set

            Junie B. Jones

            Geronimo stilton book set

            Geronimo Stilton

            boxcar children book set

            The Boxcar Children

            harry potter book set

            Harry Potter

            percy jackson book set for readers

            Percy Jackson & The Olympians

            the last kids on earth book set

            The Last Kids on Earth

            dog man book set

            Dog Man

            the chronicles of narnia book set

            The Chronicles of Narnia

            the hunger games book set

            The Hunger Games

            the lord of the rings book set

            The Lord of the Rings

            The Crucial Role of Reading in Early Childhood Development

            Reading plays a pivotal role in a child’s development, especially during the early stages of learning to read. It serves as the foundation for academic success, language acquisition, and cognitive growth. For children who are just beginning to grasp the complexities of language, reading opens up a world of possibilities.

            It enhances vocabulary, improves comprehension skills, and fosters critical thinking abilities. Moreover, reading introduces children to diverse perspectives, cultures, and experiences, nurturing empathy and social awareness. Beyond its educational benefits, reading also sparks imagination and creativity, transporting young minds to far-off lands and fantastical adventures.

            By instilling a love for reading from an early age, we empower children to become lifelong learners with the tools they need to navigate the complexities of the world around them.

            What’s Next?

            How to Make Masa Tortillas – Even a Toddler Can Do It!

            How to Make Masa Tortillas – Even a Toddler Can Do It!

            How to Make Masa Tortillas Even a Toddler Can Do It!

            how to make masa tortillas

            Learn the art of making masa tortillas with this easy recipe. Discover how to make masa tortillas from scratch in just a few simple steps!

            How to Make Masa Tortillas – A Food with Deep Roots

            In the realm of homemade foods, few things rival the simplicity  of making masa tortillas. With just two humble ingredients – masa harina (corn flour) and water – one can embark on a culinary journey deeply rooted in ancient Mesoamerican civilizations. Dating back thousands of years, masa tortillas hold a profound cultural significance, serving as a cornerstone of Mexican cuisine and a testament to the ingenuity of early cooks. This timeless recipe not only offers a taste of history but also provides a hands-on opportunity for families to connect with the traditions of the past while creating something delicious together in the present.

            As an Amazon Associate, I earn from qualifying purchases. This post may contain affiliate links. 

            What is Masa Flour?

            Masa flour, also known as masa harina, is a fundamental ingredient in Mexican and Central American cuisines, prized for its versatility and distinctive flavor.

            Derived from dried maize (corn) that has been treated with lime (calcium hydroxide), masa flour undergoes a process called nixtamalization, which not only softens the corn but also enhances its nutritional value by making certain nutrients more bioavailable.

            This ancient technique dates back thousands of years and is credited with revolutionizing Mesoamerican cuisine. Masa flour has a fine texture and a slightly sweet, earthy taste, making it ideal for various culinary applications, from crafting traditional masa tortillas to preparing tamales, pupusas, and other beloved dishes.

            How to Eat Your Masa Tortillas

            We love to use masa tortillas as the base for tacos, filling them with a variety of meats, beans, vegetables, and toppings for a customizable and satisfying meal. Another popular choice is to make quesadillas by layering tortillas with cheese, vegetables, and protein, then grilling until golden and melty. Tamales, a traditional Mesoamerican dish, also feature masa dough wrapped around savory or sweet fillings, steamed to perfection for a hearty and flavorful treat. Additionally, masa tortillas can be used to make enchiladas, tostadas, and even dessert dishes like sopapillas or sweet empanadas. 

            how to make masa tortillas

            What Masa Flour Should I Use?

            In our pantry we have Masienda masa flour. Masienda is known for its commitment to preserving traditional techniques and high-quality ingredients in the production of masa flour, ensuring authenticity and flavor in their products.

            Which Kitchen Equipment Is Needed?

            To embark on the adventure of making masa tortillas at home, you’ll need just a few basic kitchen tools. Aside from a mixing bowl and spoon, you’ll want a tortilla press or a heavy skillet comes in handy for flattening the dough into thin, round tortillas. Additionally, you’ll need a flat skillet or griddle for cooking the tortillas to golden perfection. Other helpful tools include measuring cups for accurately portioning ingredients and plastic wrap or parchment paper for shaping the tortillas. 

            Ingredients

            Instructions 

            Step 1

            Mix the Masa Dough: In a mixing bowl, combine 2 cups of masa harina with 1 1/4 cups of warm water. Stir the mixture with a spoon until the dough comes together, adding more water if needed to achieve a smooth, pliable consistency.

            Step 2

            Knead the Dough: Once the dough is formed, transfer it to a clean work surface. Knead the dough for about 2-3 minutes, until it becomes smooth and elastic. If the dough feels too dry, add a tablespoon of water at a time until it reaches the desired consistency.

            Step 3

            Divide the Dough: Divide the dough into small, golf ball-sized portions, about 1 to 1.5 inches in diameter.

            Step 4

            Shape the Tortillas: Take one portion of dough and roll it between your hands to form a smooth ball. Place the ball of dough between two sheets of plastic wrap or parchment paper. Flatten the ball with a tortilla press or a heavy skillet until it forms a thin, round tortilla, about 1/8 inch thick.


            Step 5

            Cook the Tortillas: Heat a skillet or griddle over medium-high heat. Carefully transfer the tortilla to the hot skillet and cook for about 30 seconds to 1 minute on each side, until lightly golden brown and slightly puffed. Repeat the process with the remaining portions of dough, stacking the cooked tortillas on a plate and covering them with a clean kitchen towel to keep them warm and moist.

            Step 6

            Serve and Enjoy: Once all the tortillas are cooked, serve them immediately with your favorite taco fillings or Mexican dishes. I filled the masa tortillas up with cheese and beans and used a taco holder. While traditional taco holders are typically designed to hold pre-made or store-bought taco shells, some people may choose to use them for homemade masa tortillas as well. Using a taco holder can help keep the tortillas upright and stable while filling them with ingredients, making it easier to assemble and serve tacos to kids. 

            Step 1

            Mix the Masa Dough: In a mixing bowl, combine 2 cups of masa harina with 1 1/4 cups of warm water. Stir the mixture with a spoon until the dough comes together, adding more water if needed to achieve a smooth, pliable consistency.

            Step 2

            Knead the Dough: Once the dough is formed, transfer it to a clean work surface. Knead the dough for about 2-3 minutes, until it becomes smooth and elastic. If the dough feels too dry, add a tablespoon of water at a time until it reaches the desired consistency.

            Step 3

            Divide the Dough: Divide the dough into small, golf ball-sized portions, about 1 to 1.5 inches in diameter.

            Step 4

            Shape the Tortillas: Take one portion of dough and roll it between your hands to form a smooth ball. Place the ball of dough between two sheets of plastic wrap or parchment paper. Flatten the ball with a tortilla press or a heavy skillet until it forms a thin, round tortilla, about 1/8 inch thick.

            Step 5

            Cook the Tortillas: Heat a skillet or griddle over medium-high heat. Carefully transfer the tortilla to the hot skillet and cook for about 30 seconds to 1 minute on each side, until lightly golden brown and slightly puffed. Repeat the process with the remaining portions of dough, stacking the cooked tortillas on a plate and covering them with a clean kitchen towel to keep them warm and moist.

            Step 6

            Serve and Enjoy: Once all the tortillas are cooked, serve them immediately with your favorite taco fillings or Mexican dishes. I filled the masa tortillas up with cheese and beans and used a taco holder. While traditional taco holders are typically designed to hold pre-made or store-bought taco shells, some people may choose to use them for homemade masa tortillas as well. Using a taco holder can help keep the tortillas upright and stable while filling them with ingredients, making it easier to assemble and serve tacos to kids. 

            How to Make Masa Tortillas with Kids and Even Toddlers

            Engaging children in the process of making masa tortillas can transform a simple cooking task into a memorable and educational experience. From measuring ingredients to shaping dough, kids can participate in various steps of the tortilla-making process, fostering valuable life skills and instilling a love for cooking from a young age. As they roll out dough balls and watch them transform into perfectly round tortillas, children not only develop fine motor skills but also gain a sense of accomplishment and pride in creating something delicious from scratch. Moreover, involving kids in the kitchen provides opportunities for bonding and quality time as families work together to create tasty homemade tortillas that everyone can enjoy.

            how to make masa tortillas
            how to make masa tortillas

            How to Make Masa Tortillas with Kids and Even Toddlers

            Engaging children in the process of making masa tortillas can transform a simple cooking task into a memorable and educational experience. From measuring ingredients to shaping dough, kids can participate in various steps of the tortilla-making process, fostering valuable life skills and instilling a love for cooking from a young age. As they roll out dough balls and watch them transform into perfectly round tortillas, children not only develop fine motor skills but also gain a sense of accomplishment and pride in creating something delicious from scratch. Moreover, involving kids in the kitchen provides opportunities for bonding and quality time as families work together to create tasty homemade tortillas that everyone can enjoy.

            More Homemade Recipes!

            Check out these totally do-able recipes. Making your own food from scratch doesn’t need to be complicated. Like this bread machine brioche recipe, you’ll be shocked at how easy each of these are to make!

            how to make greek yogurt at home

            Greek Yogurt!

            colorful popsicles rainbow layers frozen yogurt snack for kids

            Rainbow Popsicles!

            rainbow pasta recipe

            Homemade Pasta

            ice cream maker toy ball how to use it

            Ice Cream in a Ball

            What’s Next?

            How to Make Sun Catchers You Can Wear!

            How to Make Sun Catchers You Can Wear!

            How to Make Sun Catchers You Can Wear!

            how to make a sun catcher craft with cardboard that you can wear with cellophane

            Learn how to make sun catchers with stunning designs using cardboard and colorful cellophane in our step-by-step guide. 

            Sunlight Creations: How to Make Sun Catchers!

            Welcome to the world of DIY sun catchers! In this guide, we’ll explore how to turn everyday cardboard and vibrant cellophane into eye-catching pieces of art that capture and reflect sunlight. Crafting your own sun catchers is a rewarding endeavor that adds a touch of warmth and color to any space. From intricate butterfly wings to geometric designs, the possibilities are endless as we delve into the art of using recycled materials to create stunning decorations. So gather your supplies and let’s dive into the world of sun catcher crafting together!

            All activities should be supervised by an adult. As an Amazon Associate, I earn from qualifying purchases. This post may contain affiliate links.

            Skills: Arts and Crafts

            Ages: 2+

            Prep Time: 20 minutes 

            how to make a sun catcher craft with cardboard that you can wear with cellophane

            Exploring Light and Color: Sun Catchers as a Science Activity

            Crafting sun catchers from cardboard and cellophane not only provides an opportunity for artistic expression but also serves as a fascinating science activity for kids to explore light and shadow. As sunlight filters through the colorful cellophane, it creates a mesmerizing display of hues and patterns on surrounding surfaces. Children can observe how the intensity and direction of light affect the brightness and distribution of colors, as well as the formation of shadows. Through hands-on experimentation with positioning the sun catchers in different locations and angles relative to the light source, they can discover firsthand concepts such as transparency, reflection, and refraction. This engaging activity not only fosters a deeper understanding of light but also encourages critical thinking and curiosity about the natural world.

            how to make a sun catcher craft with cardboard that you can wear with cellophane
            how to make a sun catcher craft with cardboard that you can wear with cellophane

            Tips for Creating Sun Catchers

            Choose Sturdy Cardboard: Opt for sturdy cardboard for your sun catcher base to ensure durability and stability. Thicker cardboard works best, as it provides a solid foundation for your design and holds up well against the elements.

            Layer with Cellophane: Add depth and vibrancy to your sun catcher by layering colorful cellophane over your cardboard shapes. Mix and match hues to create dynamic effects and play with light and shadow.

            Protect from Moisture: To prolong the lifespan of your cardboard sun catcher, avoid exposing it to excessive moisture or humidity. If displayed outdoors, consider adding a protective layer of clear sealant to shield it from the elements.

            Below I’ll explain the step by step process of how to make sun catchers, specifically the butterfly wings that you can wear. Beyond butterfly wings, there’s a plethora of designs you can explore. For wearable options akin to butterfly wings, consider crafting: Fairy wings, dragon wings, angel wings, or bat wings!


            Materials

            • Tape
            • Ribbon for straps

            Step-by-Step Instructions 

            Step 1

            Trace and Cut Out One Side of the Butterfly Wing: Begin by tracing the shape of the butterfly wing onto the cardboard. Use a sharp craft knife to carefully cut along the traced lines, creating the outline of the wing.

            Step 2

            Cut Out Different Shapes for the Wing: Once the outline is cut, use the craft knife to cut out various shapes within the wing. These shapes will serve as the openings where the colored cellophane will be placed.

            Step 3

            Mirror the Wing: Take the side of the wing that is completely cut out and flip it over to create a mirrored image. Use this as a template to trace and cut out the second wing, ensuring that they are identical in shape.

            Step 4

            Tape Different Colored Cellophane: With both wings cut out, tape different colored cellophane behind the openings created in step 2. Experiment with various colors to create a vibrant and eye-catching effect.

            Step 5

            Create Straps: For straps, you have two options:

            Option 1: Use hot glue to attach ribbon to the back of the cardboard wings, creating straps that can be worn over the shoulders.

            Option 2: Thread the ribbon through holes punched in the cardboard to create sturdier straps. This method provides more stability, especially for active play.

            Step 6

            Sun and Light Exploration: Once the butterfly wings are complete, encourage kids to explore the effects of sunlight and light. Observe how the sunlight filters through the colored cellophane, creating beautiful patterns of light and shadow. This hands-on exploration not only enhances their understanding of light but also sparks their curiosity and creativity.

            Expanding Your Creativity

            Now that you’ve learned how to make sun catchers, here’s another way to embrace the beauty of butterflies. Consider trying out our printable butterfly template that allows you to design your own butterfly masterpiece!

            Simply cut out the portions of the wings, add tape or sticky paper, and embellish with colorful flowers or other decorative elements to fill in where the wings should be.

            This hands-on activity is not only enjoyable but also allows for endless possibilities in terms of design and personalization. Whether you’re crafting sun catcher wings or decorating a butterfly template, both activities are sure to spark joy and inspire your artistic spirit. So gather your supplies and let your imagination take flight!

            butterfly wings printable spring craft
            butterfly wings printable spring craft

            Expanding Your Creativity

            Now that you’ve learned how to make sun catchers, here’s another way to embrace the beauty of butterflies. Consider trying out our printable butterfly template that allows you to design your own butterfly masterpiece!

            Simply cut out the portions of the wings, add tape or sticky paper, and embellish with colorful flowers or other decorative elements to fill in where the wings should be.

            This hands-on activity is not only enjoyable but also allows for endless possibilities in terms of design and personalization. Whether you’re crafting sun catcher wings or decorating a butterfly template, both activities are sure to spark joy and inspire your artistic spirit. So gather your supplies and let your imagination take flight!

            More Fun Arts and Crafts!

            Looking for more fun ways to get crafty? Try some of these!

            easy heart craft valentine's day

            Geometric Heart Craft

            shaving cream art for kids marbled craft

            Shaving Cream Art

            DIY Maracas easter egg musical instrument

            DIY Maracas

            fall leaf craft autumn themed kids art

            Fall Leaf Craft

            What’s Next?

            Popsicle Paint – How to Make This Fun, Frozen Art Tool!

            Popsicle Paint – How to Make This Fun, Frozen Art Tool!

            Popsicle Paint – How to Make This Fun, Frozen Art Tool!

            popsicle paint recipe frozen paint arts and crafts activity

            Experience the fun of popsicle paint! Chill out and create icy masterpieces. Keep reading to learn how to make your own frozen art!

            Making Art with a Frozen Twist Using Popsicle Paint

            Welcome to a super creative activity where art meets ice! Discover the innovative world of frozen paint popsicles—a captivating activity that’s not only perfect for beating the summer heat but can also be enjoyed year-round. These paint popsicles offer a unique way for kids to explore colors, experiment with a new art medium, and unleash their creativity in a fun and engaging manner. So, whether it’s a scorching summer day or a cozy winter afternoon, dive into the realm of frozen paint popsicles and let your imagination soar!

            All activities should be supervised by an adult. As an Amazon Associate, I earn from qualifying purchases. This post may contain affiliate links.

            Skills: Sensory Play

            Ages: 2+

            Prep Time: 10 minutes 

            Why Frozen Popsicle Paint is a Must-Try Activity!

            Painting with popsicles is not just a creative endeavor; it’s a multifaceted learning experience that engages children on multiple levels. As they paint with their popsicles, they’re not just creating art—they’re refining their fine motor skills and hand-eye coordination.

            The sensory exploration aspect adds another dimension to their artistic journey, as they feel the cool touch of the frozen paint and observe how colors blend and mix together. This tactile experience stimulates their senses and fosters a deeper understanding of texture and temperature.

            Moreover, painting with popsicles encourages creative expression, empowering children to unleash their imaginations and express themselves through colorful creations. Whether they’re painting whimsical patterns, abstract designs, or realistic landscapes, each brushstroke represents a unique expression of their inner world. 

            Overall, painting with popsicles is not just about making art; it’s about nurturing a wide range of developmental skills in a fun and engaging way.

            popsicle paint recipe frozen paint arts and crafts activity

            Medicine Dispenser Hack

            Let’s talk about a nifty trick to jazz up your frozen paint popsicles: the trusty medicine syringe!

            This little tool is a game-changer, letting you layer paint colors in your popsicle molds like a pro. Say goodbye to messy sides and hello to perfectly layered rainbow goodness—the syringe ensures each color goes exactly where it’s supposed to.

            Keep in mind that if you go the rainbow route, it will take a little longer to create your popsicle paint. To save time, use one or a two-color pattern.


            Materials

            Step-by-Step Instructions 

            Step 1

            Pour each color of washable tempera paint into separate containers for easy access.

            Step 2

            Using the medicine syringe, draw up one color of paint at a time.

            Step 3

            Carefully inject the paint into the popsicle mold, layering each color to create your desired design.

            Step 4

            Once the mold is filled, insert a popsicle stick into each compartment.

            Step 5

            Place the molds in the freezer and allow them to freeze overnight.

            Step 6

            When ready to enjoy, remove the popsicles from the molds and let them thaw slightly before painting. Get creative and paint away on paper or any other suitable surface, using the colorful popsicles as your medium!


            Tips for Making the Most of Frozen Popsicle Paint

            Patience Pays Off: When removing the popsicles from the molds, allow them to thaw slightly before attempting to pull them out. This prevents any mishaps and ensures your frozen creations stay intact.

            Mix It Up: Don’t be afraid to experiment with different color combinations and patterns. Try swirling the colors together for a marbled effect or layering them in unique ways to create mesmerizing designs.

            Cleanup Made Easy: To avoid a messy cleanup, place a silicone mat or newspaper underneath your workspace to catch any drips or spills. This makes for a quick and hassle-free cleanup once you’re done creating.

            popsicle paint recipe frozen paint arts and crafts activity
            popsicle paint recipe frozen paint arts and crafts activity

            Tips for Making the Most of Frozen Popsicle Paint

            Patience Pays Off: When removing the popsicles from the molds, allow them to thaw slightly before attempting to pull them out. This prevents any mishaps and ensures your frozen creations stay intact.

            Mix It Up: Don’t be afraid to experiment with different color combinations and patterns. Try swirling the colors together for a marbled effect or layering them in unique ways to create mesmerizing designs.

            Cleanup Made Easy: To avoid a messy cleanup, place a silicone mat or newspaper underneath your workspace to catch any drips or spills. This makes for a quick and hassle-free cleanup once you’re done creating.

            More DIY Recipes for Play!

            Expand your DIY repertoire with these exciting recipes for playtime fun! From homemade playdough to sensory sand, get ready to unleash creativity and imagination with these simple yet engaging projects.

            easy to make play dough recipe homemade no cook

            Homemade Play Dough

            diy sensory sand play taste safe toddler baby

            DIY Sensory Sand

            homemade bubble solution

            DIY Bubble Solution

            kids bath paint recipe

            DIY Kids Bath Paint

            What’s Next?

            Homemade Bubble Solution – Extra Strong Bubble Recipe

            Homemade Bubble Solution – Extra Strong Bubble Recipe

            Homemade Bubble Solution – Extra Strong Bubble Recipe

            homemade bubble solution

            Want to make your own super strong homemade bubble solution? We’ve got you! Check out this easy bubble recipe that you can whip up in minutes!

            Homemade Bubble Solution Made Simple!

            Are you tired of running out of bubbles too soon or finding store-bought solutions just don’t cut it? Say hello to a solution that’s as easy to make as it is effective! In this post, we’re sharing a simple recipe for homemade bubble solution that packs a punch without breaking the bank. With common household items, you can whip up a batch of bubbles that are not only super strong but also provide hours of entertainment for kids and adults alike. So, why settle for mediocre bubbles when you can create a bubbling wonderland right in your own backyard? Let’s get started on this bubble-filled adventure!

            All activities should be supervised by an adult. As an Amazon Associate, I earn from qualifying purchases. This post may contain affiliate links.

            Skills: Sensory Play

            Ages: 2+

            Prep Time: 10 minutes 

            Watch How to Make This Homemade Bubble Solution

            Watch to see how easy it is to make a homemade bubble solution! The step by step recipe, is below, but when it comes to making your own homemade bubbles, a few tips can make all the difference in creating a memorable bubble experience.

            First and foremost, use distilled water to ensure clarity and longevity in your bubbles.

            Additionally, glycerin is the secret ingredient for enhancing bubble strength and resilience, so don’t skimp on this component. Glycerin also makes homemade play dough super silky and smooth, so there will be multiple uses for it!

            Experiment with different dish soaps to find one that produces the best bubbles, opting for formulas that are gentle and free of additives like moisturizers or scents.

            Lastly, adding a touch of sugar to your mixture can help extend bubble life, providing hours of fun for little ones. With these simple tips in mind, you’ll be well on your way to crafting bubbles that are as impressive as they are enjoyable!

            homemade bubble solution

            Homemade Bubble Solution Refill Station

            Transforming an old detergent container into a DIY bubble refill station is a game-changer for endless bubble fun!

            Simply wash out the container thoroughly, removing any residue, and pour in your homemade bubble solution. The wide spout of the container makes refilling bubble wands a breeze, and its sturdy design ensures no spills or messes during playtime.

            For younger kids who might find it challenging to use the detergent dispenser, instead try using a beverage-type container with a handy dispenser that easily goes up and down.  

            Materials

            • Distilled Water
            • Dish Soap (Opt for a dish soap that is gentle and doesn’t produce too many suds. Brands like Dawn or Joy are often recommended)
            • Glycerin (Optional: helps strengthen bubbles)
            • Sugar (Optional: also helps strengthen bubbles)
            • Storage Container (like reusing an old detergent container!)

            Step-by-Step Instructions 

            Step 1

            Mix together 6 cups of distilled water, 1 cup of dish soap, 1/3 cup of glycerin, and 2 tablespoons of sugar. 

            Step 2

            Allow the mixture to sit for at least an hour or even overnight. This allows the ingredients to meld together and for any excess foam to dissipate. 

            Step 3

            Adjusting: If the bubbles aren’t strong enough, try adding more dish soap or glycerin to the mixture. If they’re too weak, you can dilute the solution with a bit more water. The way you blow the bubbles can also affect their strength. Blow slowly and steadily, avoiding quick, forceful bursts of air.

            Beyond the Bubbles: Enriching Benefits of Bubble Play for Kids

            Aside from the sheer joy of watching bubbles dance through the air, blowing bubbles offers a multitude of additional benefits for kid activities. Not only does it encourage outdoor play and physical activity, but it also stimulates hand-eye coordination as children chase and pop the bubbles. Blowing bubbles can also be a calming and therapeutic activity, helping kids relax and unwind during stressful or anxious moments.  Additionally, it provides a sensory experience, with the shimmering colors and delicate textures of the bubbles captivating their attention. Overall, blowing bubbles is more than just a simple pastime—it’s a gateway to learning, exploration, and fun!

            homemade bubble solution
            homemade bubble solution

            Beyond the Bubbles: Enriching Benefits of Bubble Play for Kids

            Aside from the sheer joy of watching bubbles dance through the air, blowing bubbles offers a multitude of additional benefits for kid activities. Not only does it encourage outdoor play and physical activity, but it also stimulates hand-eye coordination as children chase and pop the bubbles. Blowing bubbles can also be a calming and therapeutic activity, helping kids relax and unwind during stressful or anxious moments.  Additionally, it provides a sensory experience, with the shimmering colors and delicate textures of the bubbles captivating their attention. Overall, blowing bubbles is more than just a simple pastime—it’s a gateway to learning, exploration, and fun!

            More DIY Recipes for Play!

            Expand your DIY repertoire with these exciting recipes for playtime fun! From homemade playdough to sensory sand, get ready to unleash creativity and imagination with these simple yet engaging projects.

            easy to make play dough recipe homemade no cook

            Homemade Play Dough

            diy sensory sand play taste safe toddler baby

            DIY Sensory Sand

            how to make shaving cream puffy fluffy slime

            Fluffy Slime Recipe

            kids bath paint recipe

            DIY Kids Bath Paint

            What’s Next?

            How to Make Kids Bath Paint – Colorful Clean Fun

            How to Make Kids Bath Paint – Colorful Clean Fun

            How to Make Kids Bath Paint – Colorful Clean Fun

            kids bath paint recipe

            Are you looking for a way to make bath time fun? Making your own kids bath paint is the perfect way to get them clean while letting them channel their inner Picasso during bath time! 

            Getting Creative with Homemade Kids Bath Paint

            Who says bath time is just for getting clean? It’s also the perfect canvas for creativity! Imagine little hands painting rainbows and underwater scenes right on the bathtub walls.

            With washable soap paint, not only can kids tap into their inner artists, but cleanup is a breeze—it’s literally soap, after all! So, let’s dive into the colorful world of bath time art and discover how to make bath paint that’s as safe as it is fun with our easy recipe!

            All activities should be supervised by an adult. As an Amazon Associate, I earn from qualifying purchases. This post may contain affiliate links.

            Skills: Art, Sensory Play

            Ages: 2+

            Prep Time: 10 minutes

            The Benefits of Playing with Kids Bath Paint

            Painting during bath time offers a range of benefits for children:

            Creativity and Expression: Bath time painting provides a unique opportunity for children to express their creativity in a relaxed and enjoyable environment. They can explore their imagination and create colorful masterpieces using kids bath paint made out of soap.

            Sensory Stimulation: Painting in the bath engages multiple senses, including sight, touch, and even smell. The sensation of the paint on their fingers, the vibrant colors, and the scent of the soap can all enhance sensory stimulation, contributing to a richer sensory experience for the child.

            Fine Motor Skills Development: Holding a paintbrush or using fingers to apply paint helps to develop fine motor skills in children. These activities strengthen hand muscles and improve hand-eye coordination, which are crucial for tasks like writing, drawing, and other activities requiring precision.

            Overall, bath time painting offers a holistic learning experience that promotes creativity, sensory development, and emotional well-being in children, all while making bath time a fun and enjoyable part of their routine.

            The Benefits of Playing with Kids Bath Paint

            Painting during bath time offers a range of benefits for children:

            Creativity and Expression: Bath time painting provides a unique opportunity for children to express their creativity in a relaxed and enjoyable environment. They can explore their imagination and create colorful masterpieces using kids bath paint made out of soap.

            Sensory Stimulation: Painting in the bath engages multiple senses, including sight, touch, and even smell. The sensation of the paint on their fingers, the vibrant colors, and the scent of the soap can all enhance sensory stimulation, contributing to a richer sensory experience for the child.

            Fine Motor Skills Development: Holding a paintbrush or using fingers to apply paint helps to develop fine motor skills in children. These activities strengthen hand muscles and improve hand-eye coordination, which are crucial for tasks like writing, drawing, and other activities requiring precision.

            Overall, bath time painting offers a holistic learning experience that promotes creativity, sensory development, and emotional well-being in children, all while making bath time a fun and enjoyable part of their routine.

            kids bath paint recipe

            Tips for Making Kids Bath Paint 

             Tear-Free, Kid-Safe Paint: Opt for tear-free bath soap to ensure the paint is gentle and safe for children’s delicate skin. Look for soap specifically formulated for kids, preferably hypoallergenic and free from harsh chemicals.

            Use Washable Liquid Watercolor: Choose washable liquid watercolor instead of food coloring to avoid potential staining, especially on grout and other bathroom surfaces. Liquid watercolor provides vibrant colors that are easy to clean up, ensuring a mess-free bath time experience.Choose a

            Pleasantly Scented Soap: Select a bath soap with a pleasant fragrance to enhance the sensory experience during bath time painting. A soap with a subtle, kid-friendly scent can add an extra element of enjoyment to the activity, making bath time more enjoyable for children.

            Materials

            Step-by-Step Instructions 

            Step 1

            In a mixing bowl, combine 1/4 cup of tear-free bath soap with 1 tablespoon of corn starch. Stir well until the corn starch is fully dissolved and the mixture is smooth.

            Step 2

            Slowly add diluted washable liquid watercolor to the soap mixture, a few drops at a time, until you achieve the desired color intensity. Stir thoroughly after each addition to ensure even color distribution. Repeat this steps 1 and 2 for each color you’d like to create.


            Step 3

            With the paint ready to go, invite your little ones to unleash their creativity during bath time! Encourage them to paint on the bathtub walls, create colorful designs, and explore their imagination in a safe and enjoyable environment. (Try to avoid the grout if possible!)

            Step 4

            After bath time fun is over, simply rinse away the paint with water. The tear-free bath soap base ensures easy cleanup, leaving the bathtub clean and ready for the next adventure.

            Step 1

            In a mixing bowl, combine 1/4 cup of tear-free bath soap with 1 tablespoon of corn starch. Stir well until the corn starch is fully dissolved and the mixture is smooth.

            Step 2

            Slowly add diluted washable liquid watercolor to the soap mixture, a few drops at a time, until you achieve the desired color intensity. Stir thoroughly after each addition to ensure even color distribution. Repeat this steps 1 and 2 for each color you’d like to create.

            Step 3

            With the paint ready to go, invite your little ones to unleash their creativity during bath time! Encourage them to paint on the bathtub walls, create colorful designs, and explore their imagination in a safe and enjoyable environment. (Try to avoid the grout if possible!)

            Step 4

            After bath time fun is over, simply rinse away the paint with water. The tear-free bath soap base ensures easy cleanup, leaving the bathtub clean and ready for the next adventure.

            Even More Fun: Explore The Best Bath Toys for Kids!

            If you’re looking for more ways to make bath time a blast for your little ones, be sure to check out our comprehensive guide to bath toys for kids HERE!

            From bath slime and crayons to interactive games and toys, our guide is packed with fun and creative ideas to keep kids entertained while they splash and play.

            Whether you’re seeking sensory experiences or exciting games, our guide has something for every child to enjoy during bath time.

            best bath toys for kids guide by 7 days of play
            best bath toys for kids guide by 7 days of play

            Even More Fun: Explore The Best Bath Toys for Kids!

            If you’re looking for more ways to make bath time a blast for your little ones, be sure to check out our comprehensive guide to bath toys for kids HERE!

            From bath slime and crayons to interactive games and toys, our guide is packed with fun and creative ideas to keep kids entertained while they splash and play.

            Whether you’re seeking sensory experiences or exciting games, our guide has something for every child to enjoy during bath time.

            More Bath Art and Sensory Play Supplies!

            Here are some more fun bath art and sensory play supplies for little ones to explore while they wash up!

            bath crayons

            Bath Crayons

            bath slime

            Slime Soap

            bath toy paint sticks

            Bath Paint Sticks

            best bath toys for kids foam

            Foam Soap

            What’s Next?

            Ice Cream Maker Toy Ball – How to Use and Recipes

            Ice Cream Maker Toy Ball – How to Use and Recipes

            Ice Cream Maker Toy Ball – How to Use and Recipes

            ice cream maker toy ball how to use it

            This ice cream maker toy ball isn’t just a delicious treat; it’s a gateway to getting kids off screens so that they are more active, moving, having fun, and learning about the science behind making ice cream!

            Where Can You Get This Ice Cream Maker Toy Ball?

            You can get the exact ball we used HERE

            No electricity is needed to make ice cream in this toy ball! All the energy your kiddos have can be put towards playing with this ball and they’ll soon find out how easy it is to make ice cream!

            All activities should be supervised by an adult. As an Amazon Associate I earn from qualifying purchases. This post may contain affiliate links.

            Gross Motor, Science

            Ages: 
            Prep Time:

            Watch to See How To Make Ice Cream in a Ball!

            Using this ice cream mixer toy ball is as simple as add in your ingredients, playing, and enjoying homemade ice cream!

            Start by adding your favorite ice cream ingredients into one compartment of the ball, ensuring to seal it tightly. In the other compartment, fill it with rock salt and ice, again making sure it’s securely closed.

            Now, the fun begins! Roll, shake, and toss the ball around for about 20 minutes – whether it’s in the backyard, at the park, or even indoors.

            As the ball moves, the ingredients inside churn and freeze, transforming into delicious homemade ice cream.

            Once the time’s up, open up the compartments, scoop out your creamy creation, and enjoy in the fruits of your labor. It’s such an interactive and hands-on experience resulting in something delicious!

            ice cream maker toy ball how to use it

            Tips for Using This Ice Cream Ball

            Firstly, ensure all compartments are tightly sealed before you start rolling to prevent any leaks or spills. For optimal freezing, use a combination of ice cubes and rock salt in the designated compartment. Our ice stayed frozen during the 20 minutes of play, but if it melts before your ice cream freezes replenish as needed throughout the process.

            Make sure you explain the science behind creating the ice cream! Inside the ball, there’s ice and salt, which make it super cold. Normally, ice melts and turns into water when it gets warm. But when we mix salt with ice, something cool happens – the salt lowers the temperature of the ice. When we roll the ball around, the cold makes the ice cream mix freeze. That’s because the cold stops the ice cream from melting, and it gets all thick and yummy! Rolling it around helps mix everything up just right, so we get delicious ice cream every time we play!


            Materials

            • 1 Pint Cream
            • 1/2 Cup Sugar
            • 1 1/2 Teaspoon Vanilla Extract

            Step-by-Step Instructions 

            .Step 1

            Open the side of the ball with the white handle and pour in the cream, sugar, and vanilla extract. Then seal it tightly.

            Step 2

            Open the other side (neon yellow handle) and fill it up with ice with about a cup of rock salt.


            Step 3

            Play with the ball for 20 minutes (keep reading for suggestions on games you can play!)

            Step 4

            After 20 minutes of vigorous play, your ice cream should be well formed! I suggest eating it right away!

            .Step 1

            Open the side of the ball with the white handle and pour in the cream, sugar, and vanilla extract. Then seal it tightly.

            Step 2

            Open the other side (neon yellow handle) and fill it up with ice with about a cup of rock salt.

            Step 3

            Play with the ball for 20 minutes (keep reading for suggestions on games you can play!)

            Step 4

            After 20 minutes of vigorous play, your ice cream should be well formed! I suggest eating it right away!

            Gross Motor Games to Play While Using Your Ice Cream Maker Toy Ball

            There are lots of fun ways you can play with the ball, but keep in mind that the ball will be heavy, similar to a medicine ball. Here are a few games you can try:

            Rolling Relay Races: Divide kids into teams and set up relay races where they must roll the ice cream ball to a designated spot and back. This not only gets them moving but also adds an element of friendly competition.

            Ice Cream Ball Bowling: Set up empty plastic bottles or pins and take turns rolling the ice cream ball to knock them down, similar to bowling. Adjust the distance based on the age and skill level of the participants for added challenge.

            ice cream maker toy ball how to use it

            Hot Potato Ice Cream: Have kids stand in a circle and pass the ice cream ball around while music plays. When the music stops, whoever is holding the ball performs a fun action or answers a question before passing it on.

            ice cream maker toy ball how to use it

            Gross Motor Games to Play While Using Your Ice Cream Maker Toy Ball

            There are lots of fun ways you can play with the ball, but keep in mind that the ball will be heavy, similar to a medicine ball. Here are a few games you can try:

            Rolling Relay Races: Divide kids into teams and set up relay races where they must roll the ice cream ball to a designated spot and back. This not only gets them moving but also adds an element of friendly competition.

            Ice Cream Ball Bowling: Set up empty plastic bottles or pins and take turns rolling the ice cream ball to knock them down, similar to bowling. Adjust the distance based on the age and skill level of the participants for added challenge.

            Hot Potato Ice Cream: Have kids stand in a circle and pass the ice cream ball around while music plays. When the music stops, whoever is holding the ball performs a fun action or answers a question before passing it on.


            More Frozen Treats You Can Make a Home!

            Here are my top picks for frozen treat gadgets to make more yummy things at home!

            individual portion homemade ice cream cups dash

            Homemade Ice Cream in a Mug!

            slushy maker slushie

            DIY Slushy Maker – Just Squeeze!

            yonanas frozen treat with fruit ice cream

            Turn Frozen Fruit into Ice Cream!

            homemade popsicle molds

            Make Your Own Popsicles!

            What’s Next?

            How to Teach Shoelace Tying – Free Printable Activity Included!

            How to Teach Shoelace Tying – Free Printable Activity Included!

            How to Teach Shoelace Tying – Free Printable Activity Included!

            how to teach shoelace tying to kids

            This is all about how to teach shoelace tying to your kiddo! Our guide is here to equip you with effective methods, practical tips, and an engaging printable for helping your child master this essential practical life skill.

            Is your child ready to start tying shoes? 

            Typically, children begin showing interest and the necessary motor skills around the ages of 4 to 6 years old. However, with so many lace-less shoe options dominating the shoe market, even an older child might have not found the need to learn and, in effect, has not learned yet or even showed interest.

            Look for signs of readiness, such as the ability to follow simple instructions, manipulate small objects with their hands, and show an interest in learning new skills. Additionally, observe if they can tie simple knots with other materials like ribbons or strings. Once you notice these signs, it’s a good indication that your child may be ready to start learning how to tie their shoes. Remember, every child develops at their own pace, so be patient and supportive as they embark on this new skill.

            Skills:
            Ages: 
            Prep Time:

            Free Printable Resource for Learning How to Tie Shoes!

            Here are the step-by-step instructions for using your printable resource to help kids practice tying shoes:

            (1) Download and print the “How to Tie Shoes” printable;

            (2) Carefully cut out the shoe images along the outer edges.

            (3) Take a hole punch and punch holes in each of the lace holes indicated on the paper shoe cutouts.

            (4) Take a pair of old shoelaces and thread them through the lace holes in the paper shoe cutouts. Pro Tip: if your kiddo is having trouble handling the laces, try swapping in different colored pipe cleaners to use instead. The metal of the pipe cleaner keeps the shape of the loops well for early learners!

            (5) Securely tape each paper shoe to a sturdy board, such as a piece of cardboard or a foam board. 

            Now, your kiddo is ready to practice tying shoes! They can use the paper shoe cutouts with laces to practice the steps of tying shoelaces independently.  

            Free Printable Resource for Learning How to Tie Shoes!

            Here are the step-by-step instructions on how to set up this printable resource to help kids practice tying shoes:

            (1) Download and print the “How to Tie Shoes” printable;

            (2) Carefully cut out the shoe images along the outer edges.

            (3) Take a hole punch and punch holes in each of the lace holes indicated on the paper shoe cutouts.

            (4) Take a pair of old shoelaces and thread them through the lace holes in the paper shoe cutouts. Pro Tip: if your kiddo is having trouble handling the laces, try swapping in different colored pipe cleaners to use instead. The metal of the pipe cleaner keeps the shape of the loops well for early learners!

            (5) Securely tape each paper shoe to a sturdy board, such as a piece of cardboard or a foam board. 

            Now, your kiddo is ready to practice tying shoes! They can use the paper shoe cutouts with laces to practice the steps of tying shoelaces independently.  

            how to tie shoes

            How to Teach Shoelace Tying

            Sit facing your child with the printable shoes or a real shoe in hand and show them the following steps slowly and clearly, emphasizing each movement:

            1. Cross the laces.
            2. The back lace goes around the front lace and then pull them tight.
            3. Form two loops with each lace. You can also refer to the loops as bunny ears. Make sure to grab low, close to the knot to make the loops. Also make sure there is some tie left below the loops.
            4. Cross one loop over the other. Pinch the cross with one hand to keep it steady.
            5. Use the other hand to take one loop and pull it under the other loop.
            6. Pull both loops to tighten the knot.

            Encourage your child to mimic each step as you guide them through the process. Positive reinforcement and repetition is key to mastery. If your kiddo is struggling with holding the laces and/or getting the laces mixed together, try the pipe cleaner hack I mentioned in the previous section!

            What is an Alternative Method to Tying Shoes?

            Above I described the double loop aka Bunny Ear method which includes teaching kids to make two bunny ears with the laces and tie them together. However, you can alternatively show them the one loop or bowknot method:

            Make a loop with one end of the shoelace, wrap the other end around the loop, and pull a loop through the “hole” in the middle.

            The Importance of Learning How to Tie Shoes

            Learning how to tie shoes is a crucial skill for children that goes beyond mere practicality. It fosters independence and self-reliance, empowering children to take charge of their own daily tasks.

            Tying shoes also promotes fine motor skills development, hand-eye coordination, and spatial awareness. Moreover, mastering this skill builds confidence and a sense of accomplishment in children as they conquer a task that once seemed challenging.

            Additionally, knowing how to tie shoes properly ensures comfort and safety by preventing tripping hazards and keeping shoes securely fastened during active play and daily activities. 

            how to teach shoelace tying to kids

            All activities should be supervised by an adult. As an Amazon Associate, I earn from qualifying purchases. This post may contain affiliate links.

            how to teach shoelace tying to kids

            The Importance of Learning How to Tie Shoes

            Learning how to tie shoes is a crucial skill for children that goes beyond mere practicality. It fosters independence and self-reliance, empowering children to take charge of their own daily tasks.

            Tying shoes also promotes fine motor skills development, hand-eye coordination, and spatial awareness. Moreover, mastering this skill builds confidence and a sense of accomplishment in children as they conquer a task that once seemed challenging.

            Additionally, knowing how to tie shoes properly ensures comfort and safety by preventing tripping hazards and keeping shoes securely fastened during active play and daily activities. 

            All activities should be supervised by an adult. As an Amazon Associate, I earn from qualifying purchases. This post may contain affiliate links.

            Top Picks for Strengthening Practical Life Skills

            Here are some great gifts for continuing to strengthen practical life skills!

            fabric busy book fine motor skills practical life skills

            Fabric Busy Book

            This high quality fabric busy book is jam packed with practical life and fine motor skill activities! From dressing, to tying, buckling, and beyond!

            wooden sensory bin tools that are great for fine motor skills through play

            Sensory Bowls and Tools

            Scooping, pouring, and transferring are all important practice life skills! This set of wooden bowls, scoops, and a tong are great for sensory play!

            practical life skill construction toy screw driver board

            Screw Driver Board

            This car shaped screw driver board is a fun way for kids to learn how to screw and thread real life objects while using real life tools!

            practical life skills busy board book fine motor skills

            Activity Board

            This alligator shaped busy board will help young kids learn even more practical life skills. It is lightweight and folds into a book for easy carrying on the go!

            What’s Next?

            error: Content is protected !!

            Pin It on Pinterest

            Articles

            Products

              Articles

              Products

                Skip to content