Explore printable Mother’s Day cards & gifts! Don’t miss our free flower template for a heartfelt gift. Make this Mother’s Day unforgettable!
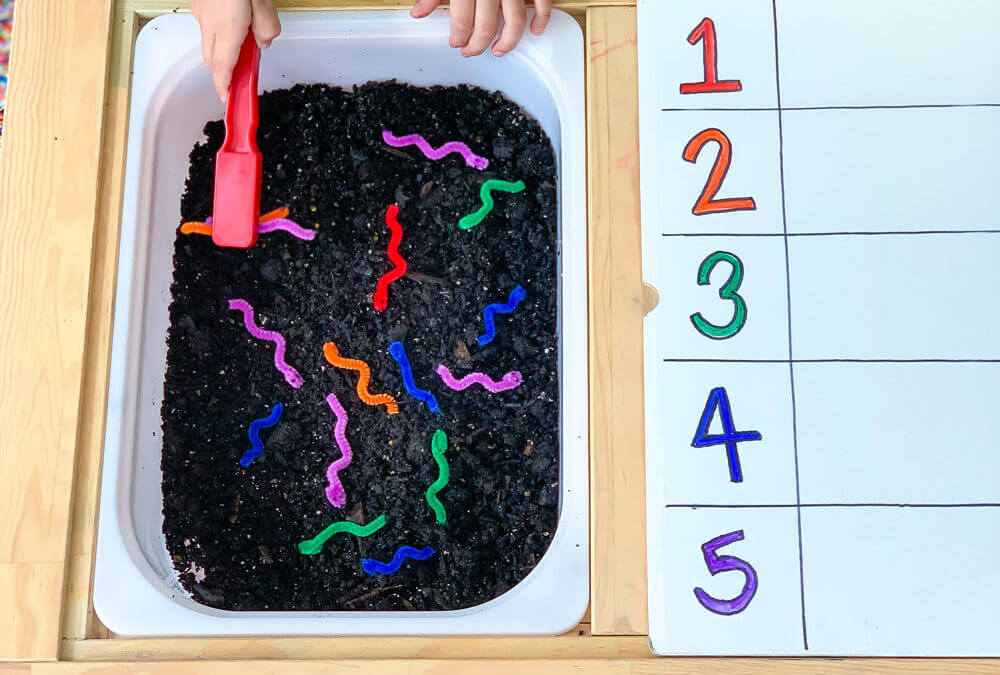
Counting Activity for Preschoolers: Fun Magnetic Worm Game
Counting Activity for Preschoolers: Fun Magnetic Worm Game

This is such a fun way counting activity for toddlers because it has so many exciting elements to it! Using soil in the tub is not only a fun conversation starter, but a great way to integrate sensory play with number learning!
Using the magnetic tool also made this activity extra exciting. The metal inside the pipe cleaners attracted to the magnet and literally pulled them right off the dirt! This made the kids giggle and laugh and want to do even more.
Hands on Number Learning for Toddlers
Hands-on play is a cornerstone of effective early childhood education, and the magnetic worm fishing activity exemplifies this perfectly.
Through the tactile experience of using a magnetic wand to catch pipe cleaner worms, preschoolers are not just learning numbers, but also actively engaging their senses and developing fine motor skills. This type of kinesthetic learning creates a stronger connection between the child and the concept being taught. As they place the worms beside numeric symbols, they’re not just memorizing abstract figures, but associating a tangible object with the concept of quantity.
All activities should be supervised by an adult. As an Amazon Associate, I earn from qualifying purchases. This post may contain affiliate links.
Skills:
Ages:
Prep Time:
Watch This Activity in Action!
Watch This Activity in Action!
Hands-on play brings an inherent sense of curiosity and exploration, turning the learning process into a joyful adventure. It taps into a child’s natural inclination to investigate, manipulate, and create, fostering a deeper understanding of the world around them.
In the context of the magnetic worm fishing activity, the children become the protagonists of their learning journey, encouraging them to be active participants rather than passive recipients of information. This approach nurtures a sense of ownership and boosts their self-confidence, making them more eager to explore other educational activities.
In essence, hands-on play brings the curriculum to life, transforming abstract concepts into concrete experiences. The magnetic worm fishing activity is a shining example of how something as simple as catching worms with magnets can spark a love for learning, nurture crucial skills, and create lasting memories of fun and discovery.

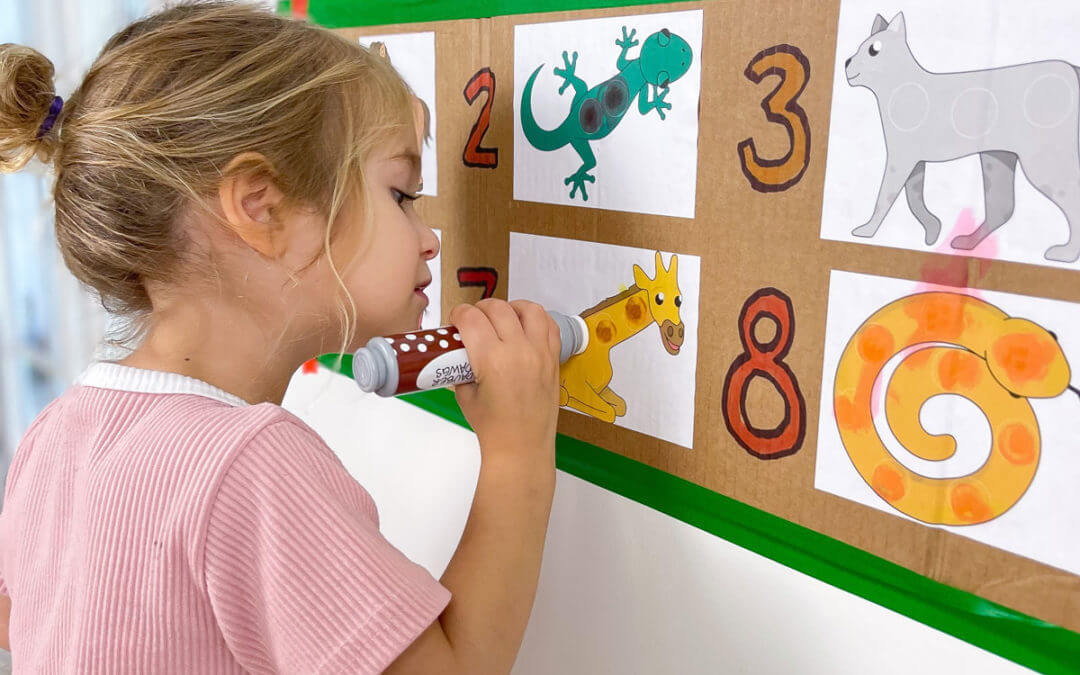
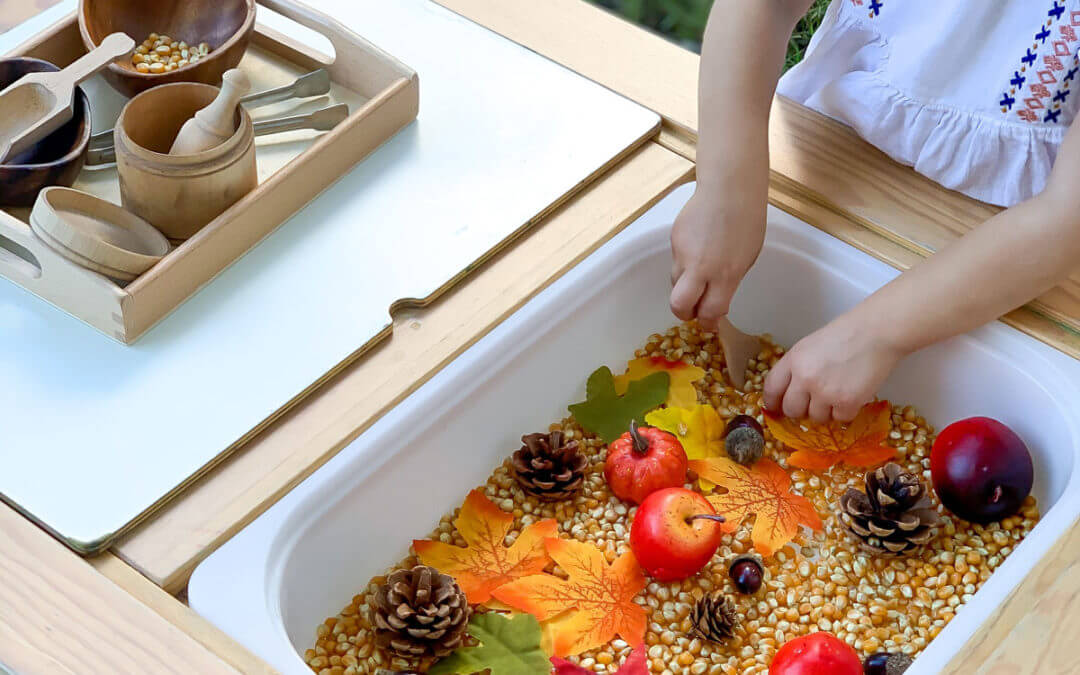
How to Set Up This Counting Activity for Preschoolers
You’ll need just a handful of supplies that are easy to gather. First and foremost, you’ll require a collection of pipe cleaner worms in vibrant colors – these are the stars of the show! Next, you’ll need a magnetic wand or a simple DIY magnet-on-a-string setup to make the fishing experience come alive.
We used our sensory table, using a bucket filled up with soil on one side. If you don’t have a sensory table, no problem! You can use a dish or a tray.
To create a visual connection between the worms and numbers, prepare numeric symbols or cards featuring numbers 1 through 5, and beyond for those learning more advanced numbers!
Materials
Step-by-Step Instructions
Step 1
Fill a tub or tray up with soil.
Step 2
Cut pipe cleaners in the shape of worms, adding eyes if you want!
Step 3
Put the felt pipe cleaners on top of the dirt or underneath a thin layer of the dirt.
Step 4
On the other side of the table, provide numerical symbol references for matching. You can use flash cards or write them by hand!
Step 5
To play the game, use the magnetic wand and have the kids pull out the worms and put them on the correct number or count them out loud.
Benefits of This Counting Activity for Preschoolers.
Beyond its fun and interactive nature, the magnetic worm fishing number game offers a wealth of educational benefits for young minds. As children use the magnetic wand to catch and count worms, they’re developing essential math skills such as one-to-one correspondence, numeral recognition, and simple addition.
This hands-on approach fosters a deeper understanding of numerical concepts by bridging the gap between abstract numbers and concrete objects. Moreover, the activity promotes cognitive development by encouraging problem-solving as kids decide how many worms to catch for each number.

Overall, this game nurtures not only mathematical proficiency but also critical thinking, fine motor skills, and cooperative learning in an enjoyable package.
Benefits of This Counting Activity for Preschoolers.
Beyond its fun and interactive nature, the magnetic worm fishing number game offers a wealth of educational benefits for young minds. As children use the magnetic wand to catch and count worms, they’re developing essential math skills such as one-to-one correspondence, numeral recognition, and simple addition.
This hands-on approach fosters a deeper understanding of numerical concepts by bridging the gap between abstract numbers and concrete objects. Moreover, the activity promotes cognitive development by encouraging problem-solving as kids decide how many worms to catch for each number.
Overall, this game nurtures not only mathematical proficiency but also critical thinking, fine motor skills, and cooperative learning in an enjoyable package.
More Ways to Play with Early Math!
Here are more fun ways to learn numbers and counting that also make great gifts!

If you want something really simple, this is perfect! It’s a puzzle made of wooden numbers.

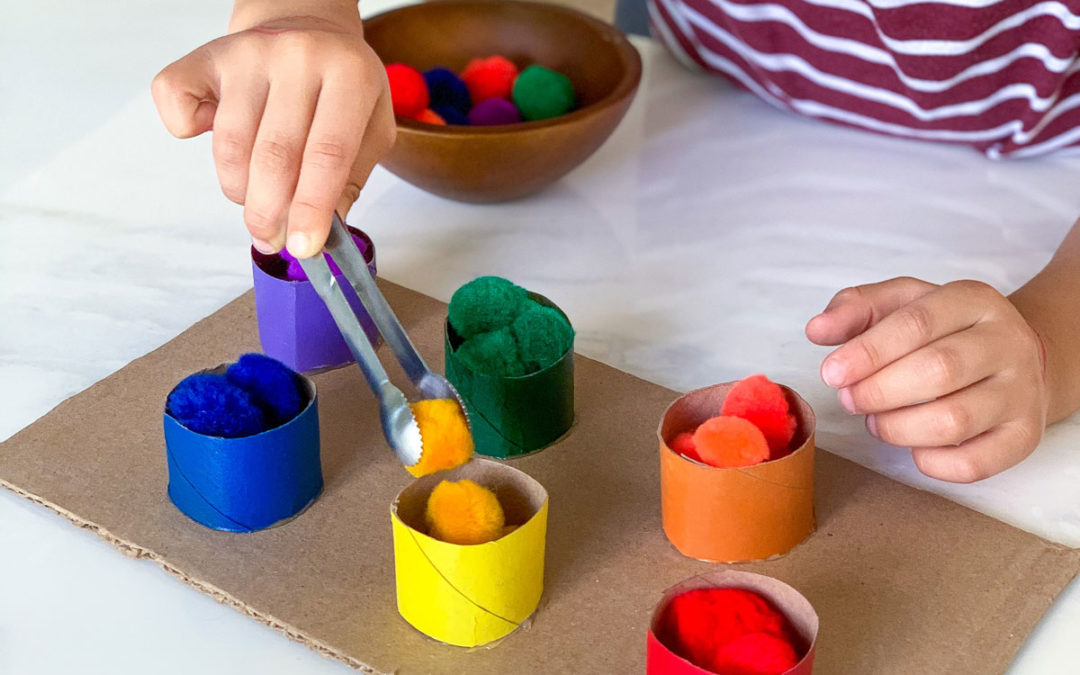
This activity uses soft pom poms and wooden cupcakes for early counting. It strengthens fine motor skills too.

This handcrafted learning resource is great for learning counting and addition and subtraction of numbers up to 20.

These wooden blocks resemble numbers and grow with your child’s advancing math skills. It also includes a math guide and activity cards.
What’s Next?
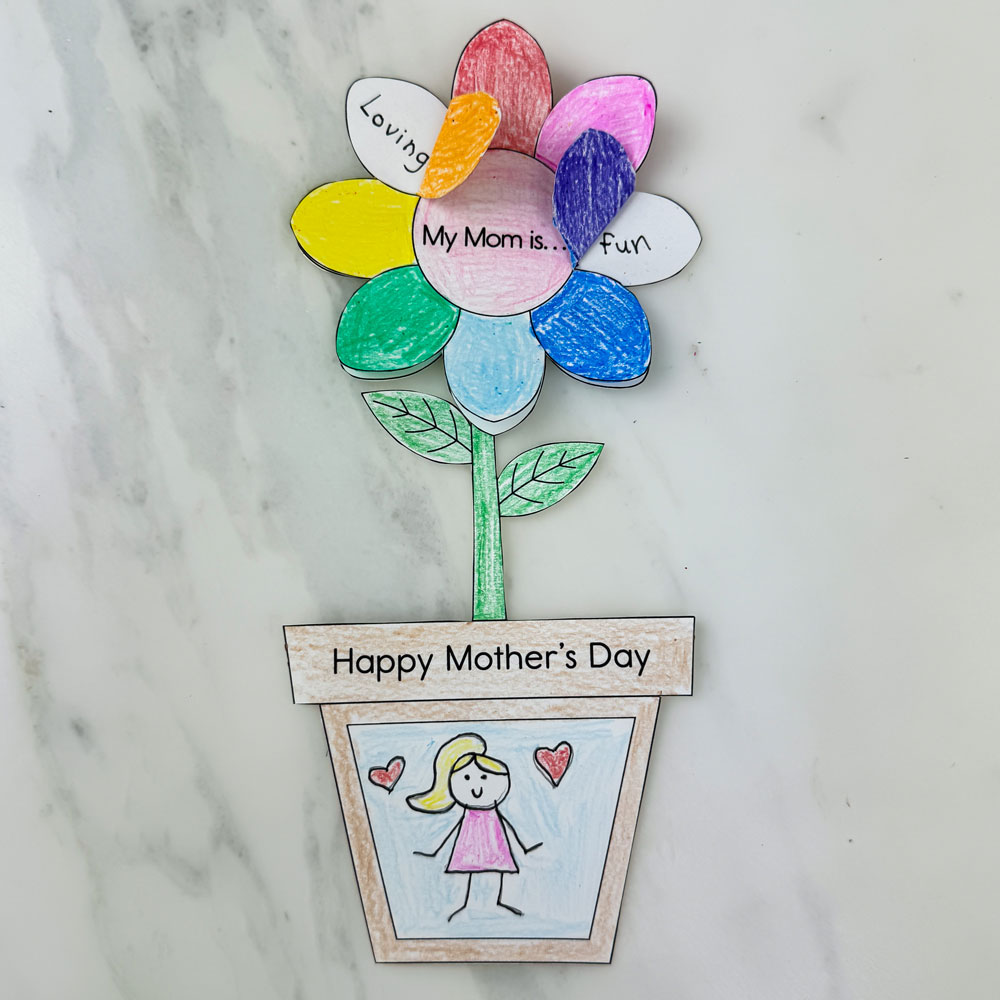
Printable Mother’s Day Cards – A Beautiful and Free Template!
read more
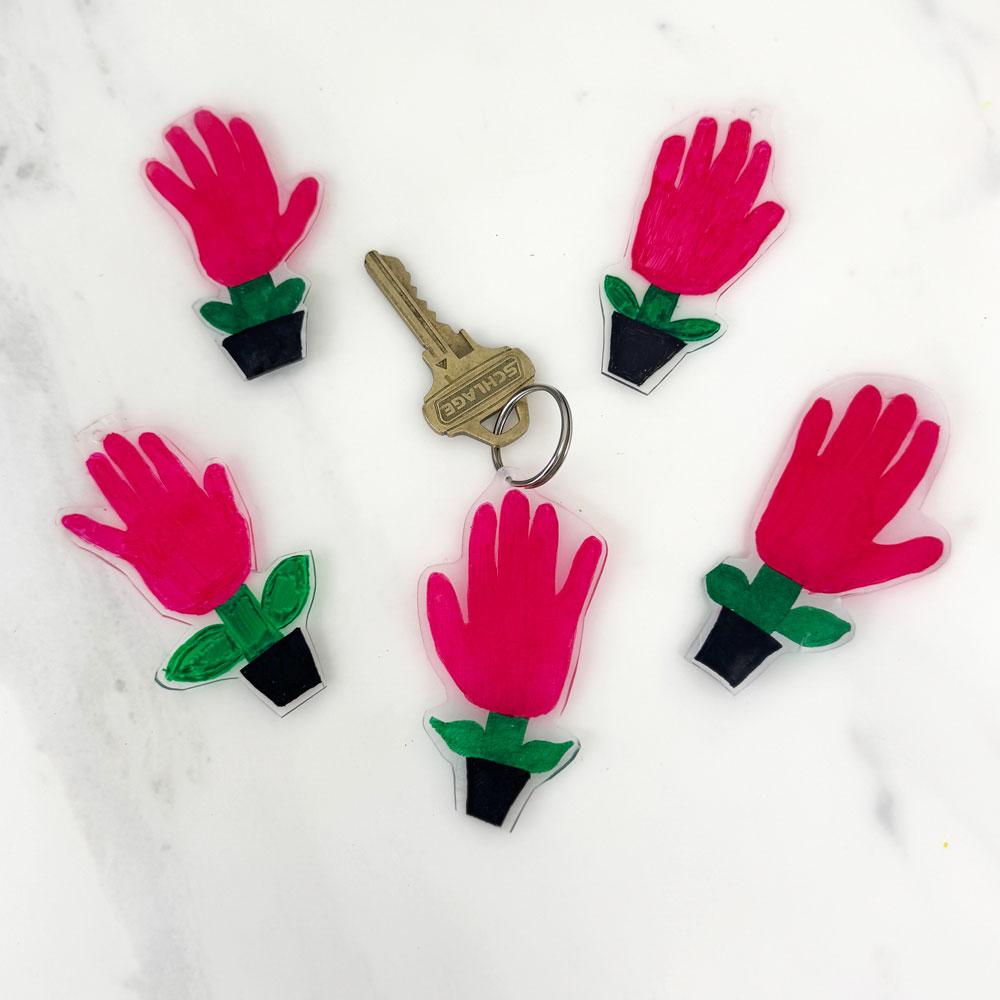
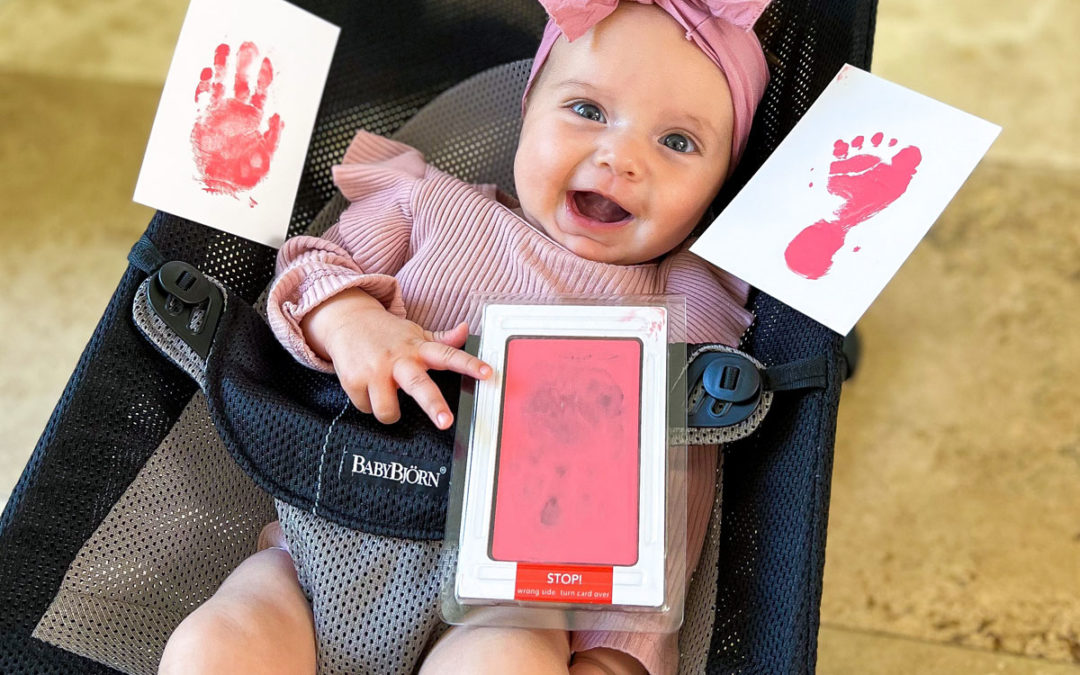
How to Make a Shrinky Dink Handprint Flower Keychain
Make a heartfelt Shrinky Dink handprint flower keychain—a thoughtful keepsake gift for Mother’s Day or any special occasion.
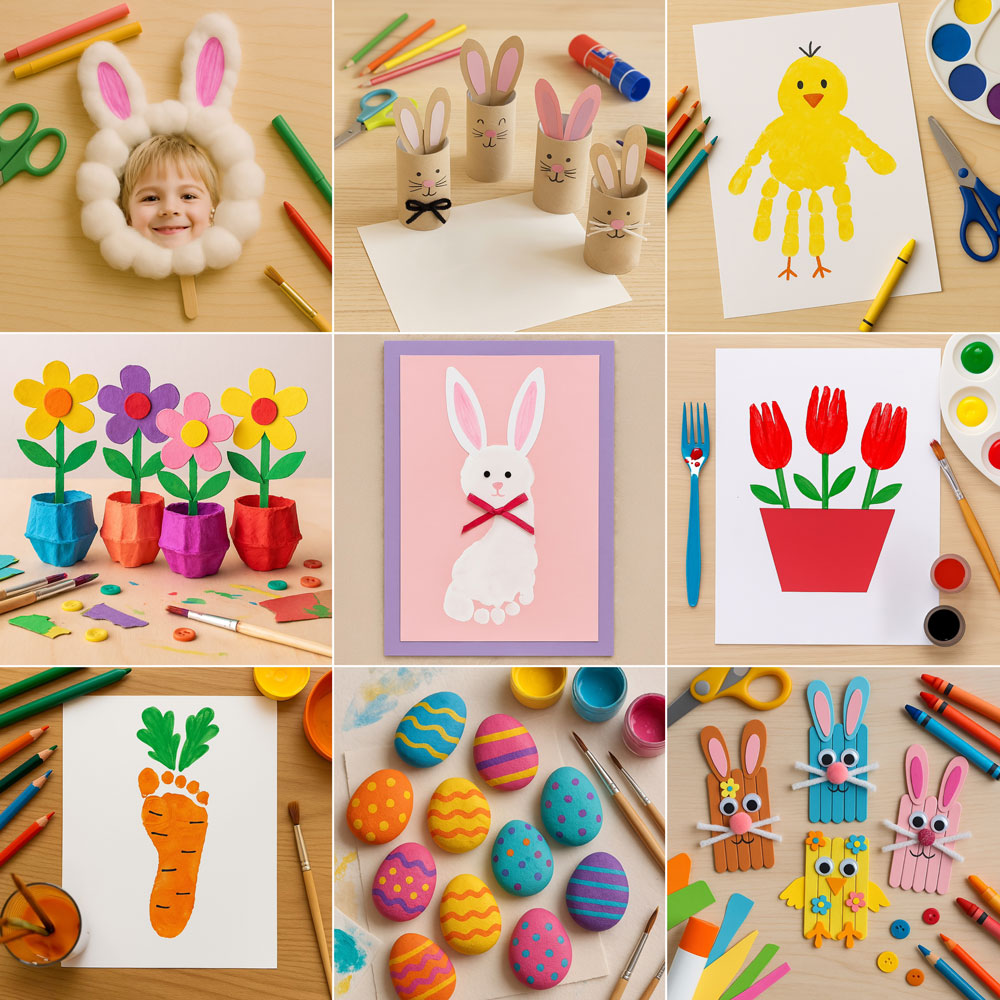
50+ Easy Easter Crafts for Kids That Are Fun and Festive
Discover 50+ Easter crafts for kids! Fun, easy, and festive projects perfect for celebrating spring and Easter together.